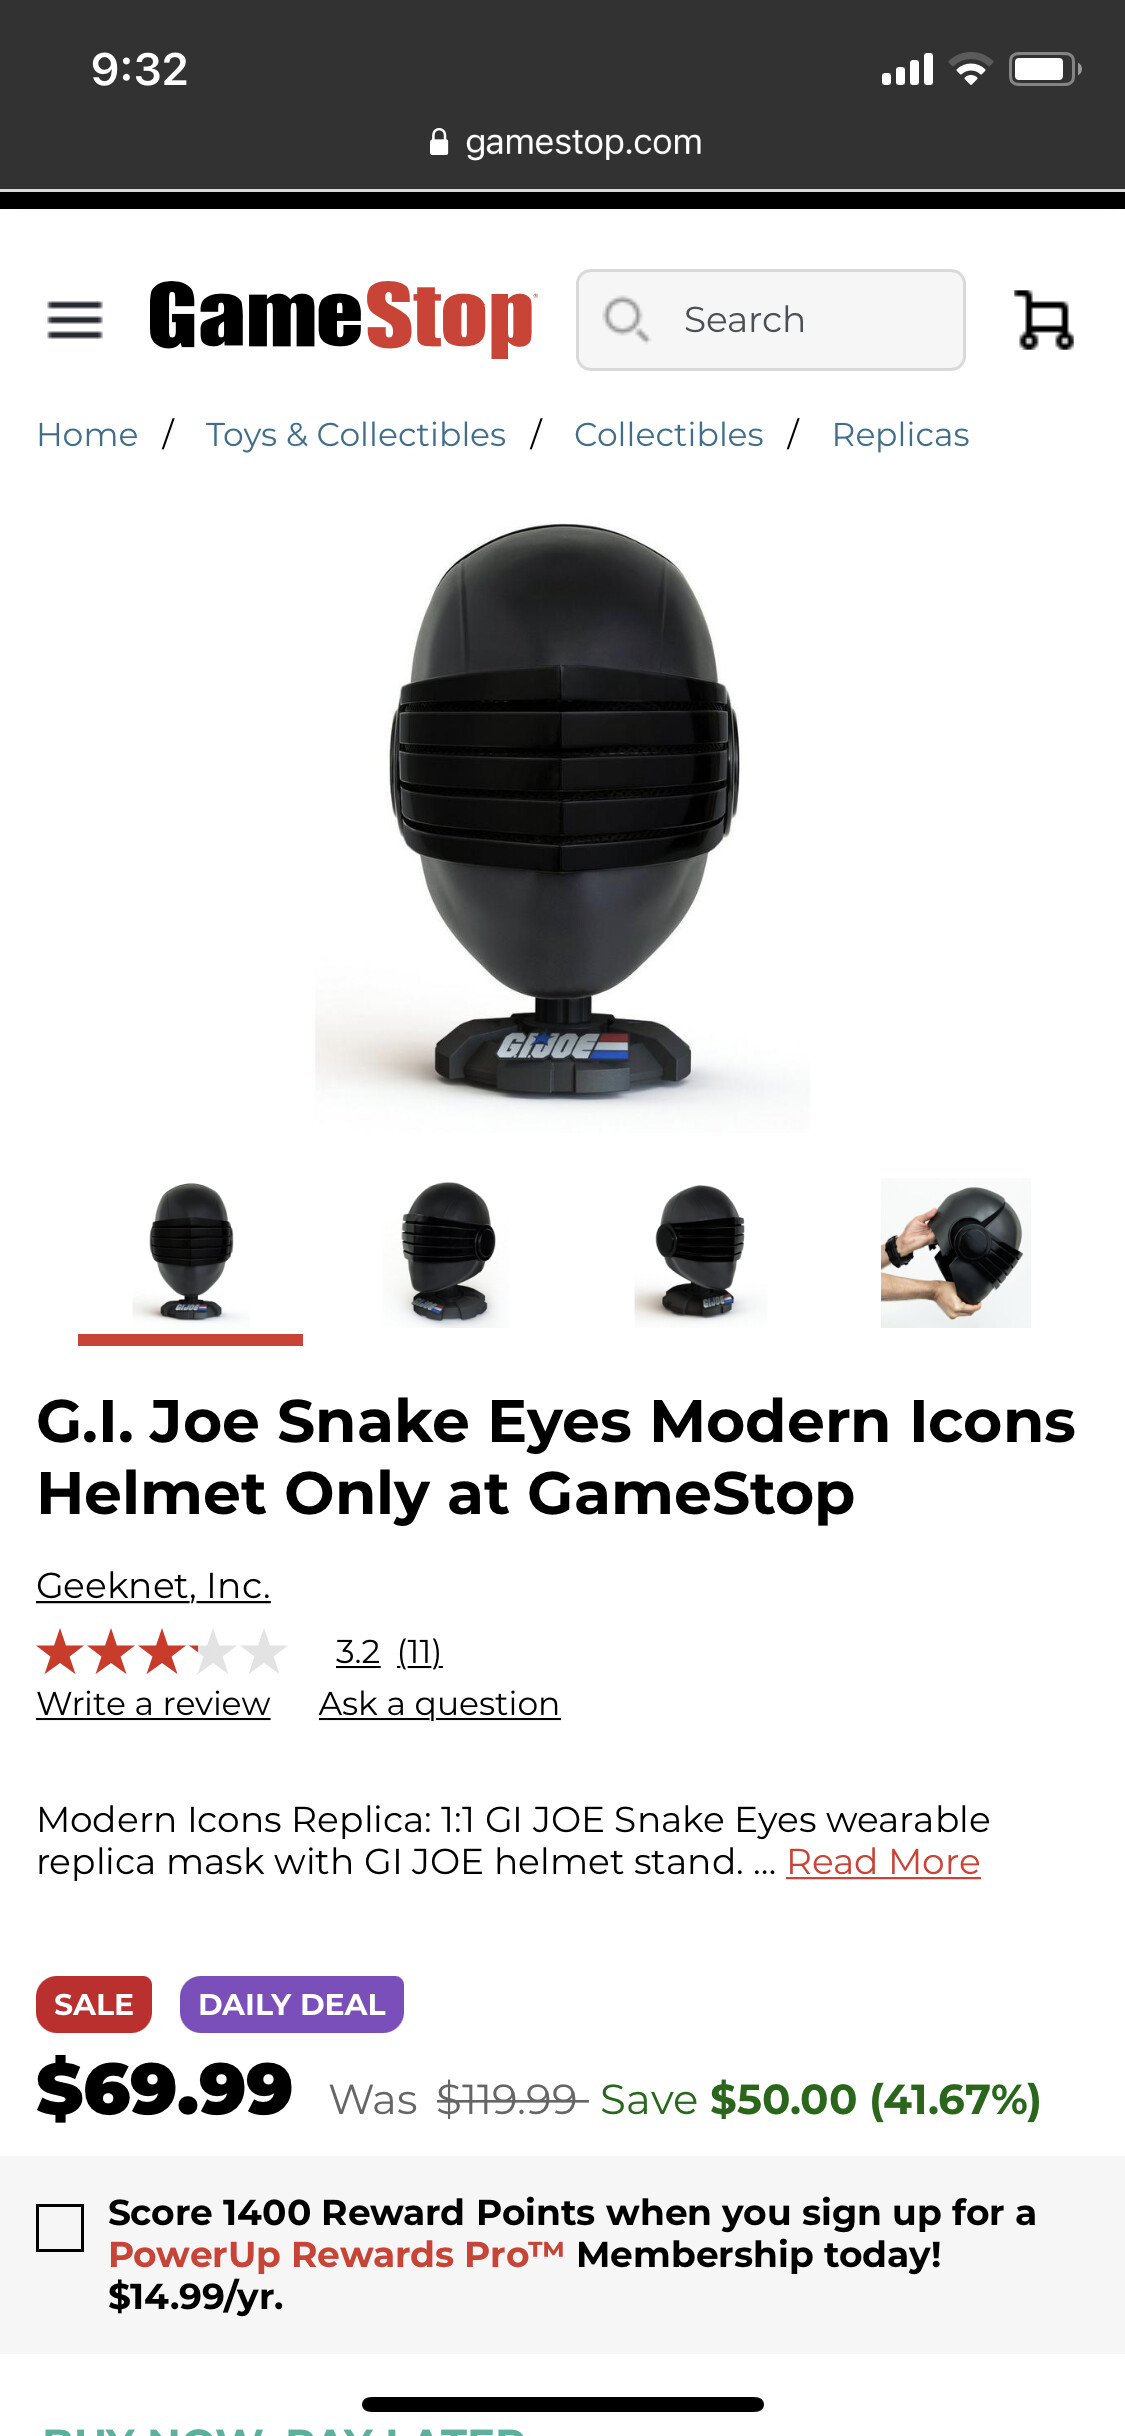
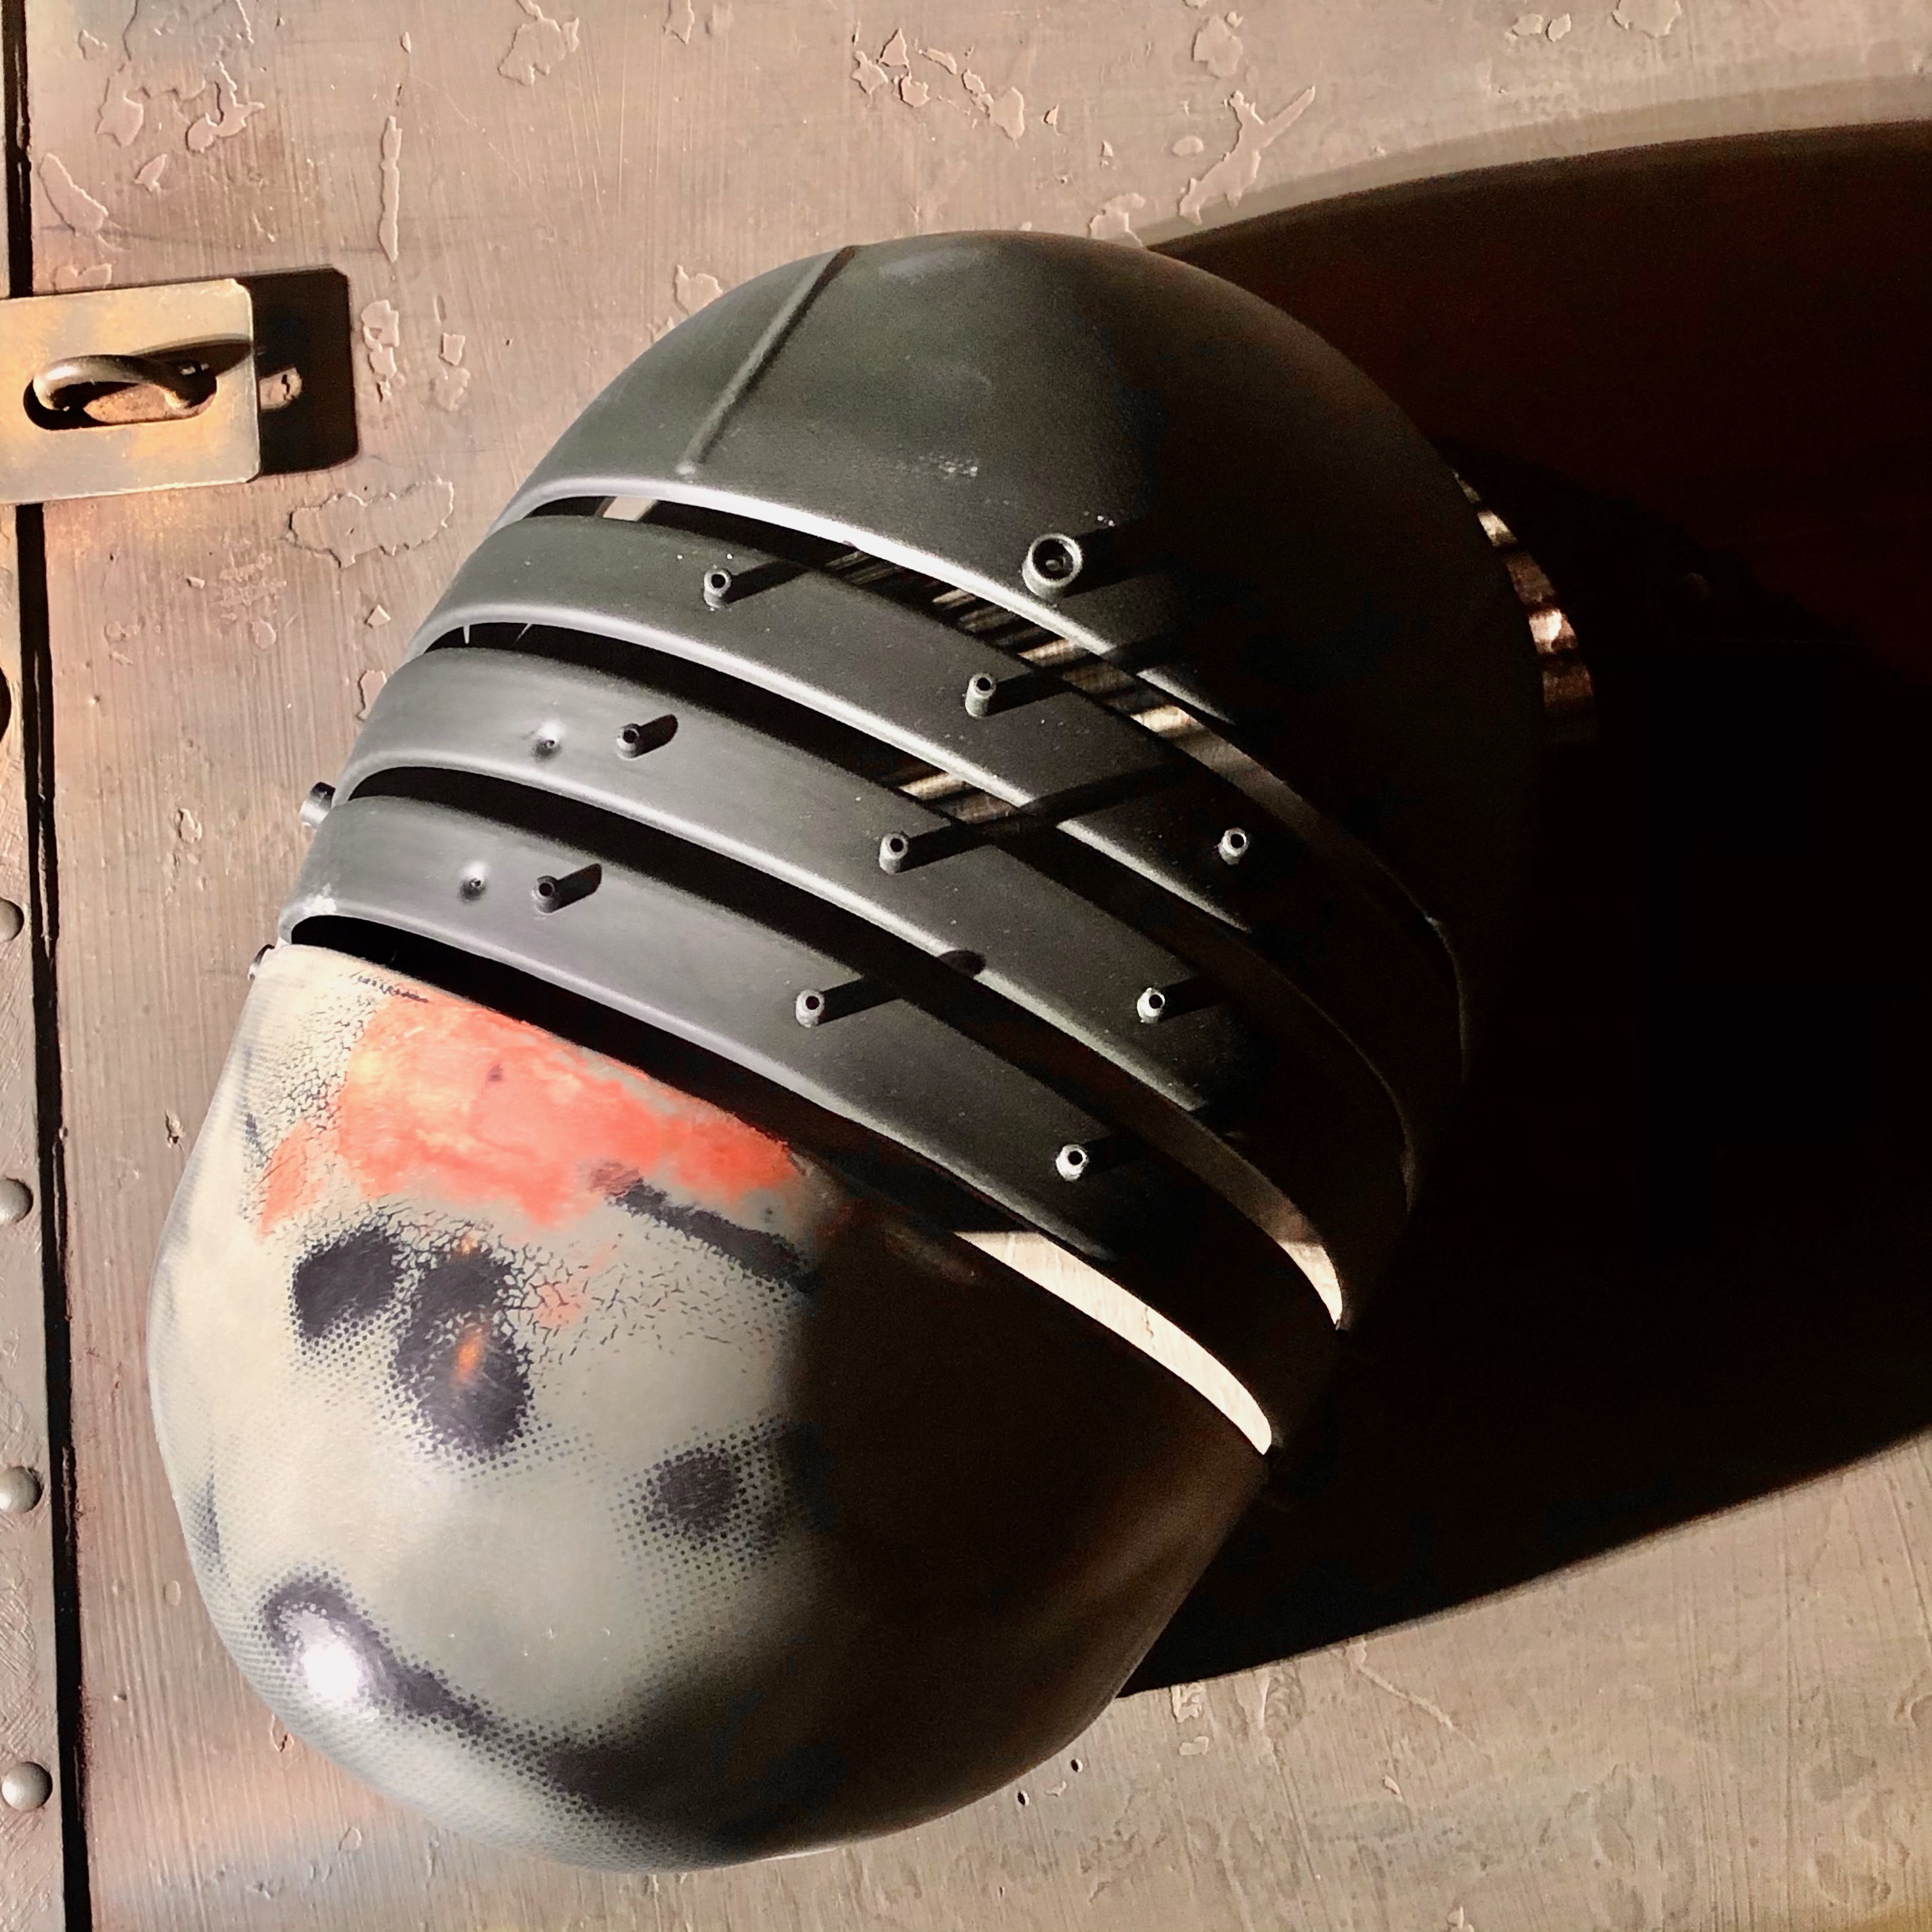
I bought a Snake Eyes Gamestop helmet a week ago. One of the first things I started to look at was the visor area. I think it’s only natural to focus on the eye of a mask first and foremost.
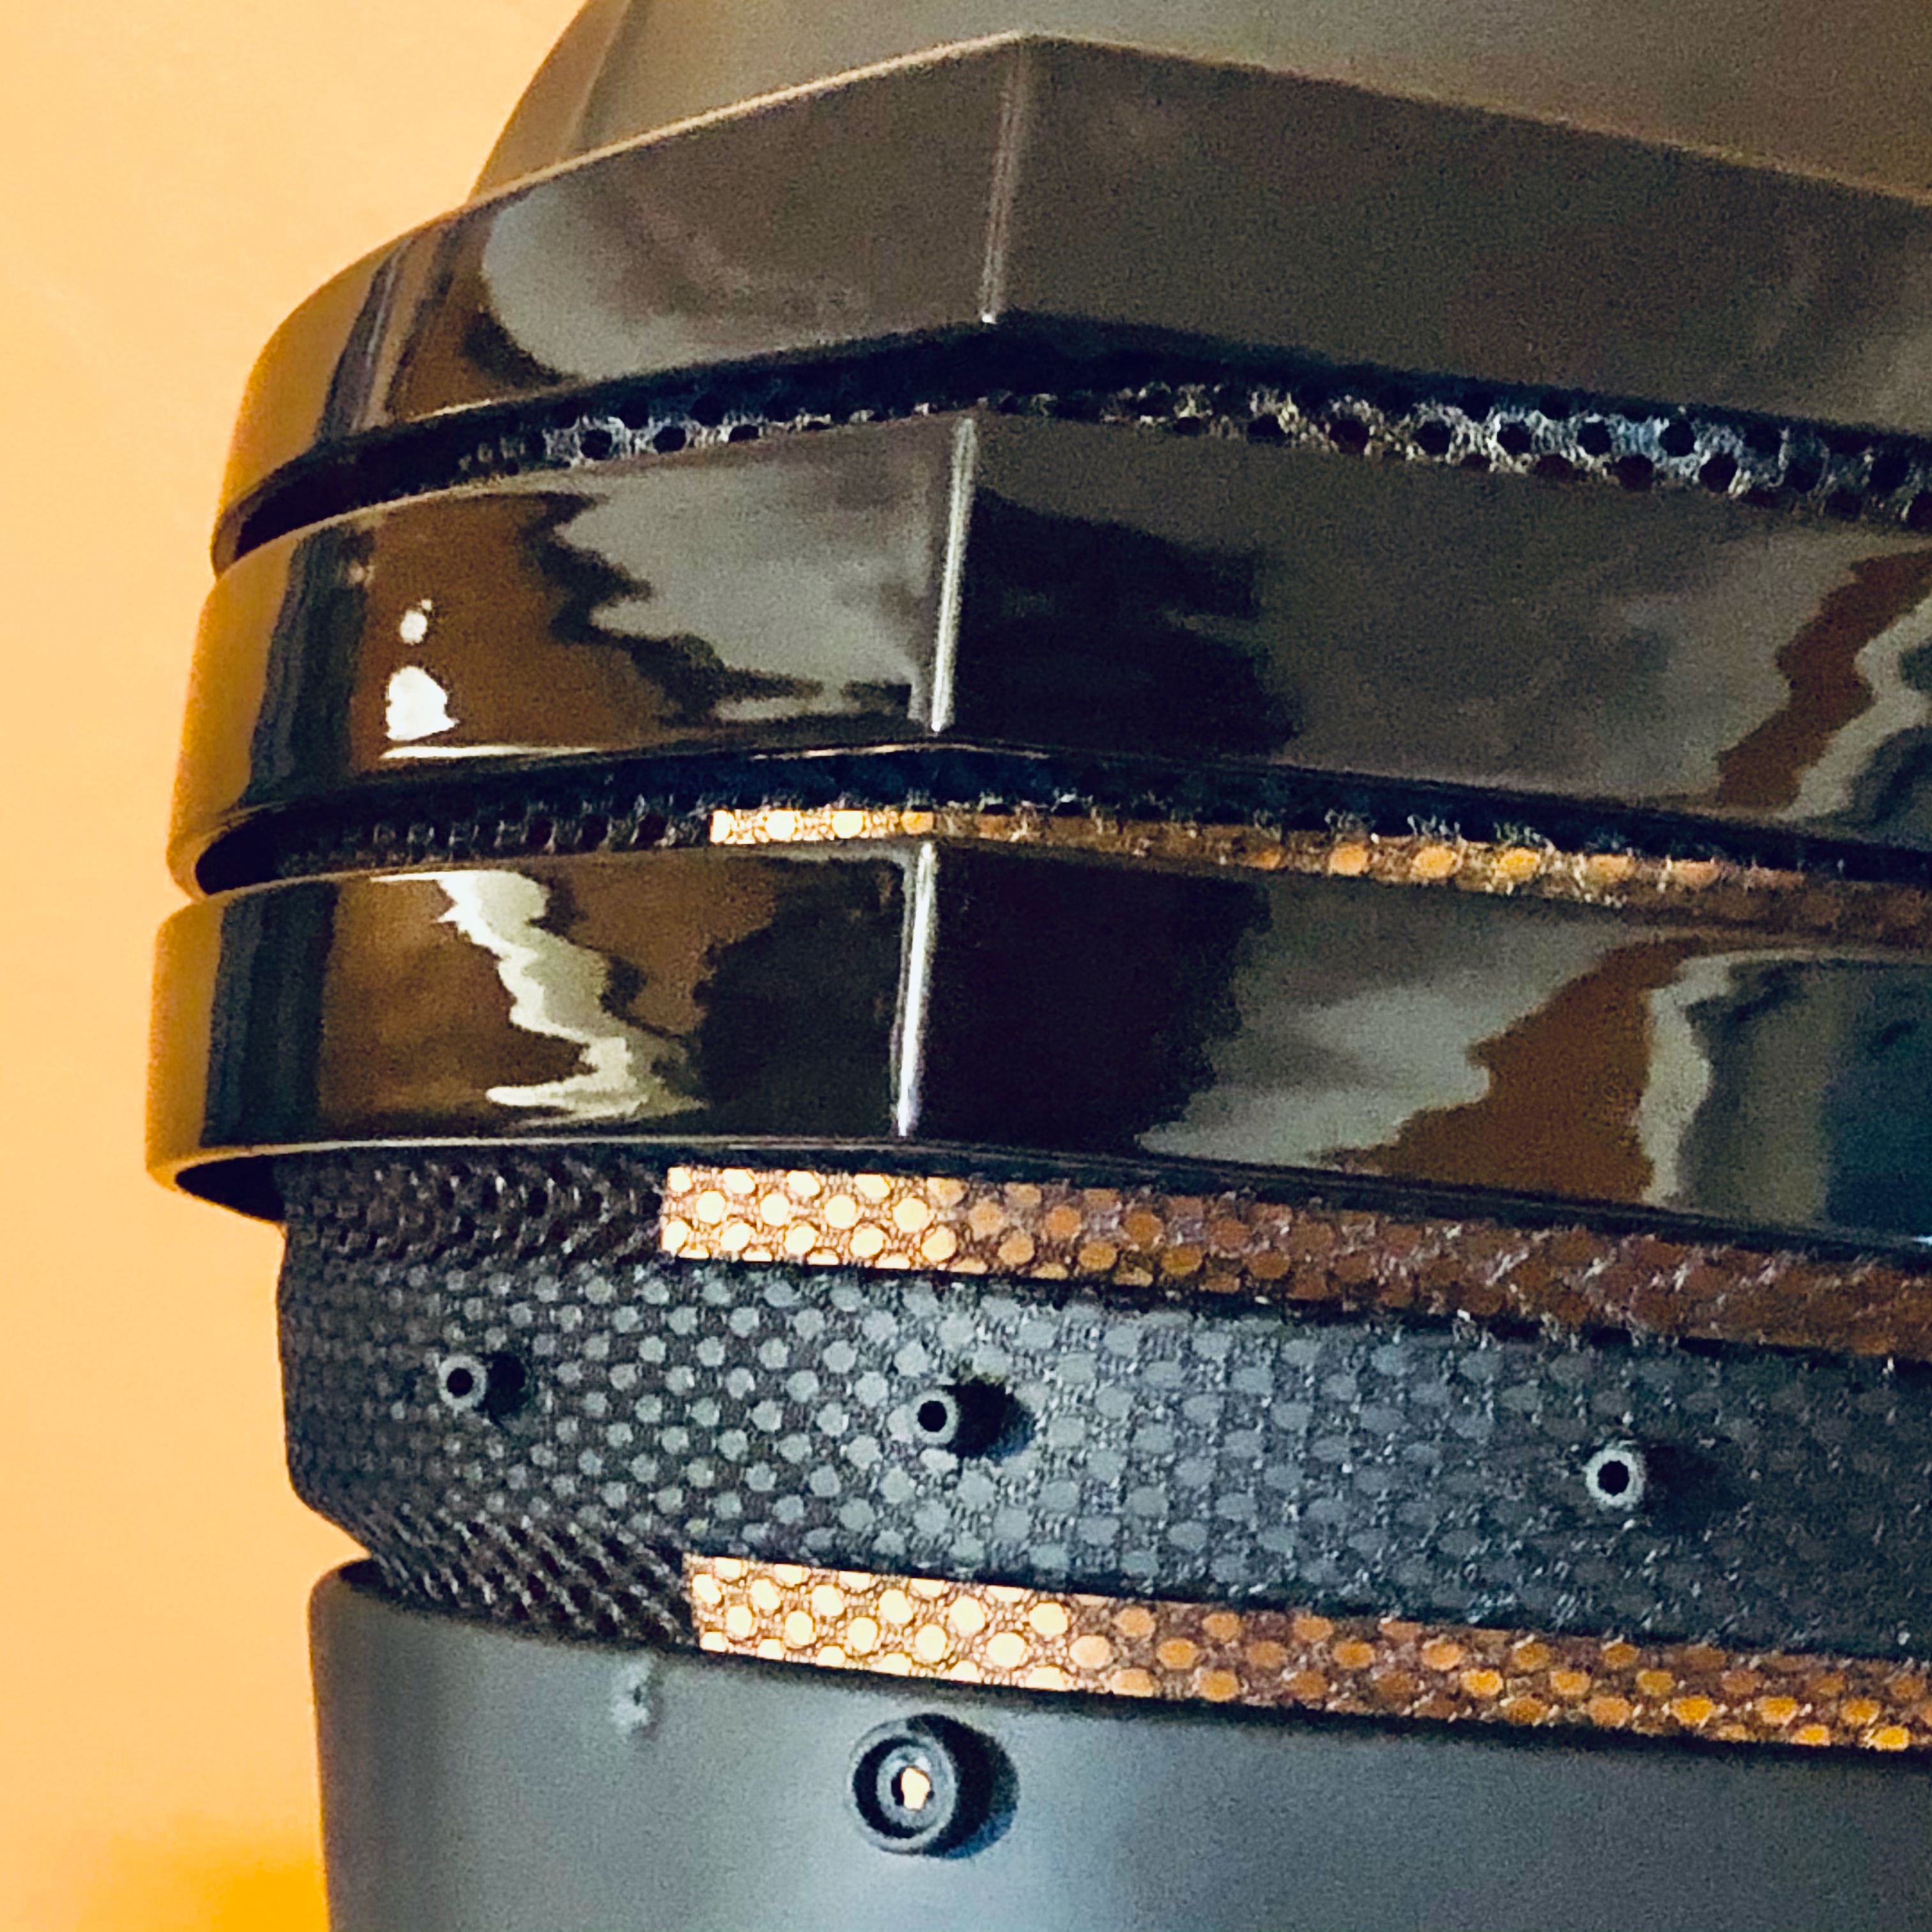
When comparing this helmet to many of the figures I like to see if I could make a costume using this as a base for Snake Eyes, I couldn’t get past the 5 bars in the mask.
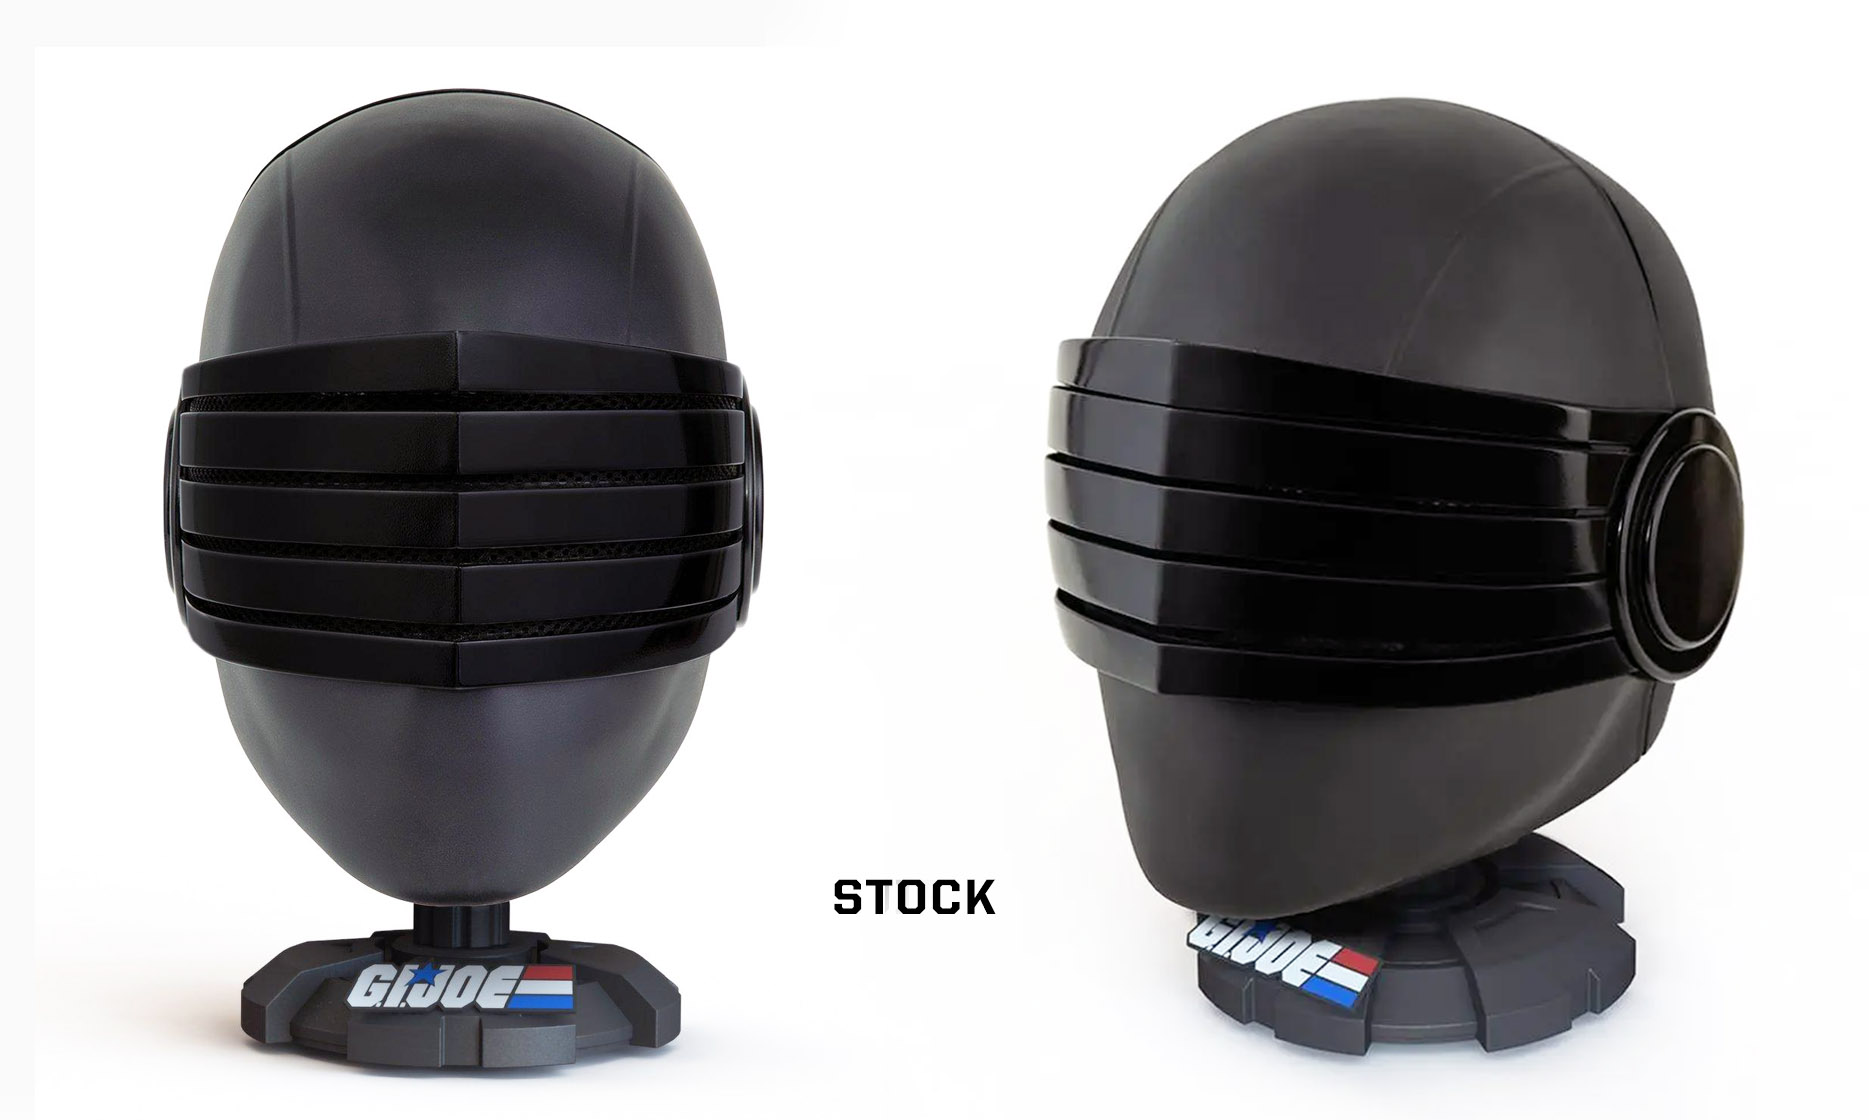
I took the images from Gamestocks website to see if a quick fix could be achieved from just removing the bottom bar before I did anything rash. I immediately liked what I saw so it was just a matter of if it could be done.
The first step was to disassemble the mask which was pretty easy to do: Two screws on the inside of the face and two more hidden screws on the edge where the “ears” are located at the split of the mask. These screws are different lengths so it wouldn’t hurt to keep all of these separate if you plan to follow along.
At this point you can remove the face from the back with the rig that holds the two halves together.
Now for what’s left: There are 4 screws in each “ear” area that hold the sides together of the visor and two screws at the center to help hold the mask in place. Everything else relies on the pegs that hold things in place. Good news! NO GLUE!!!
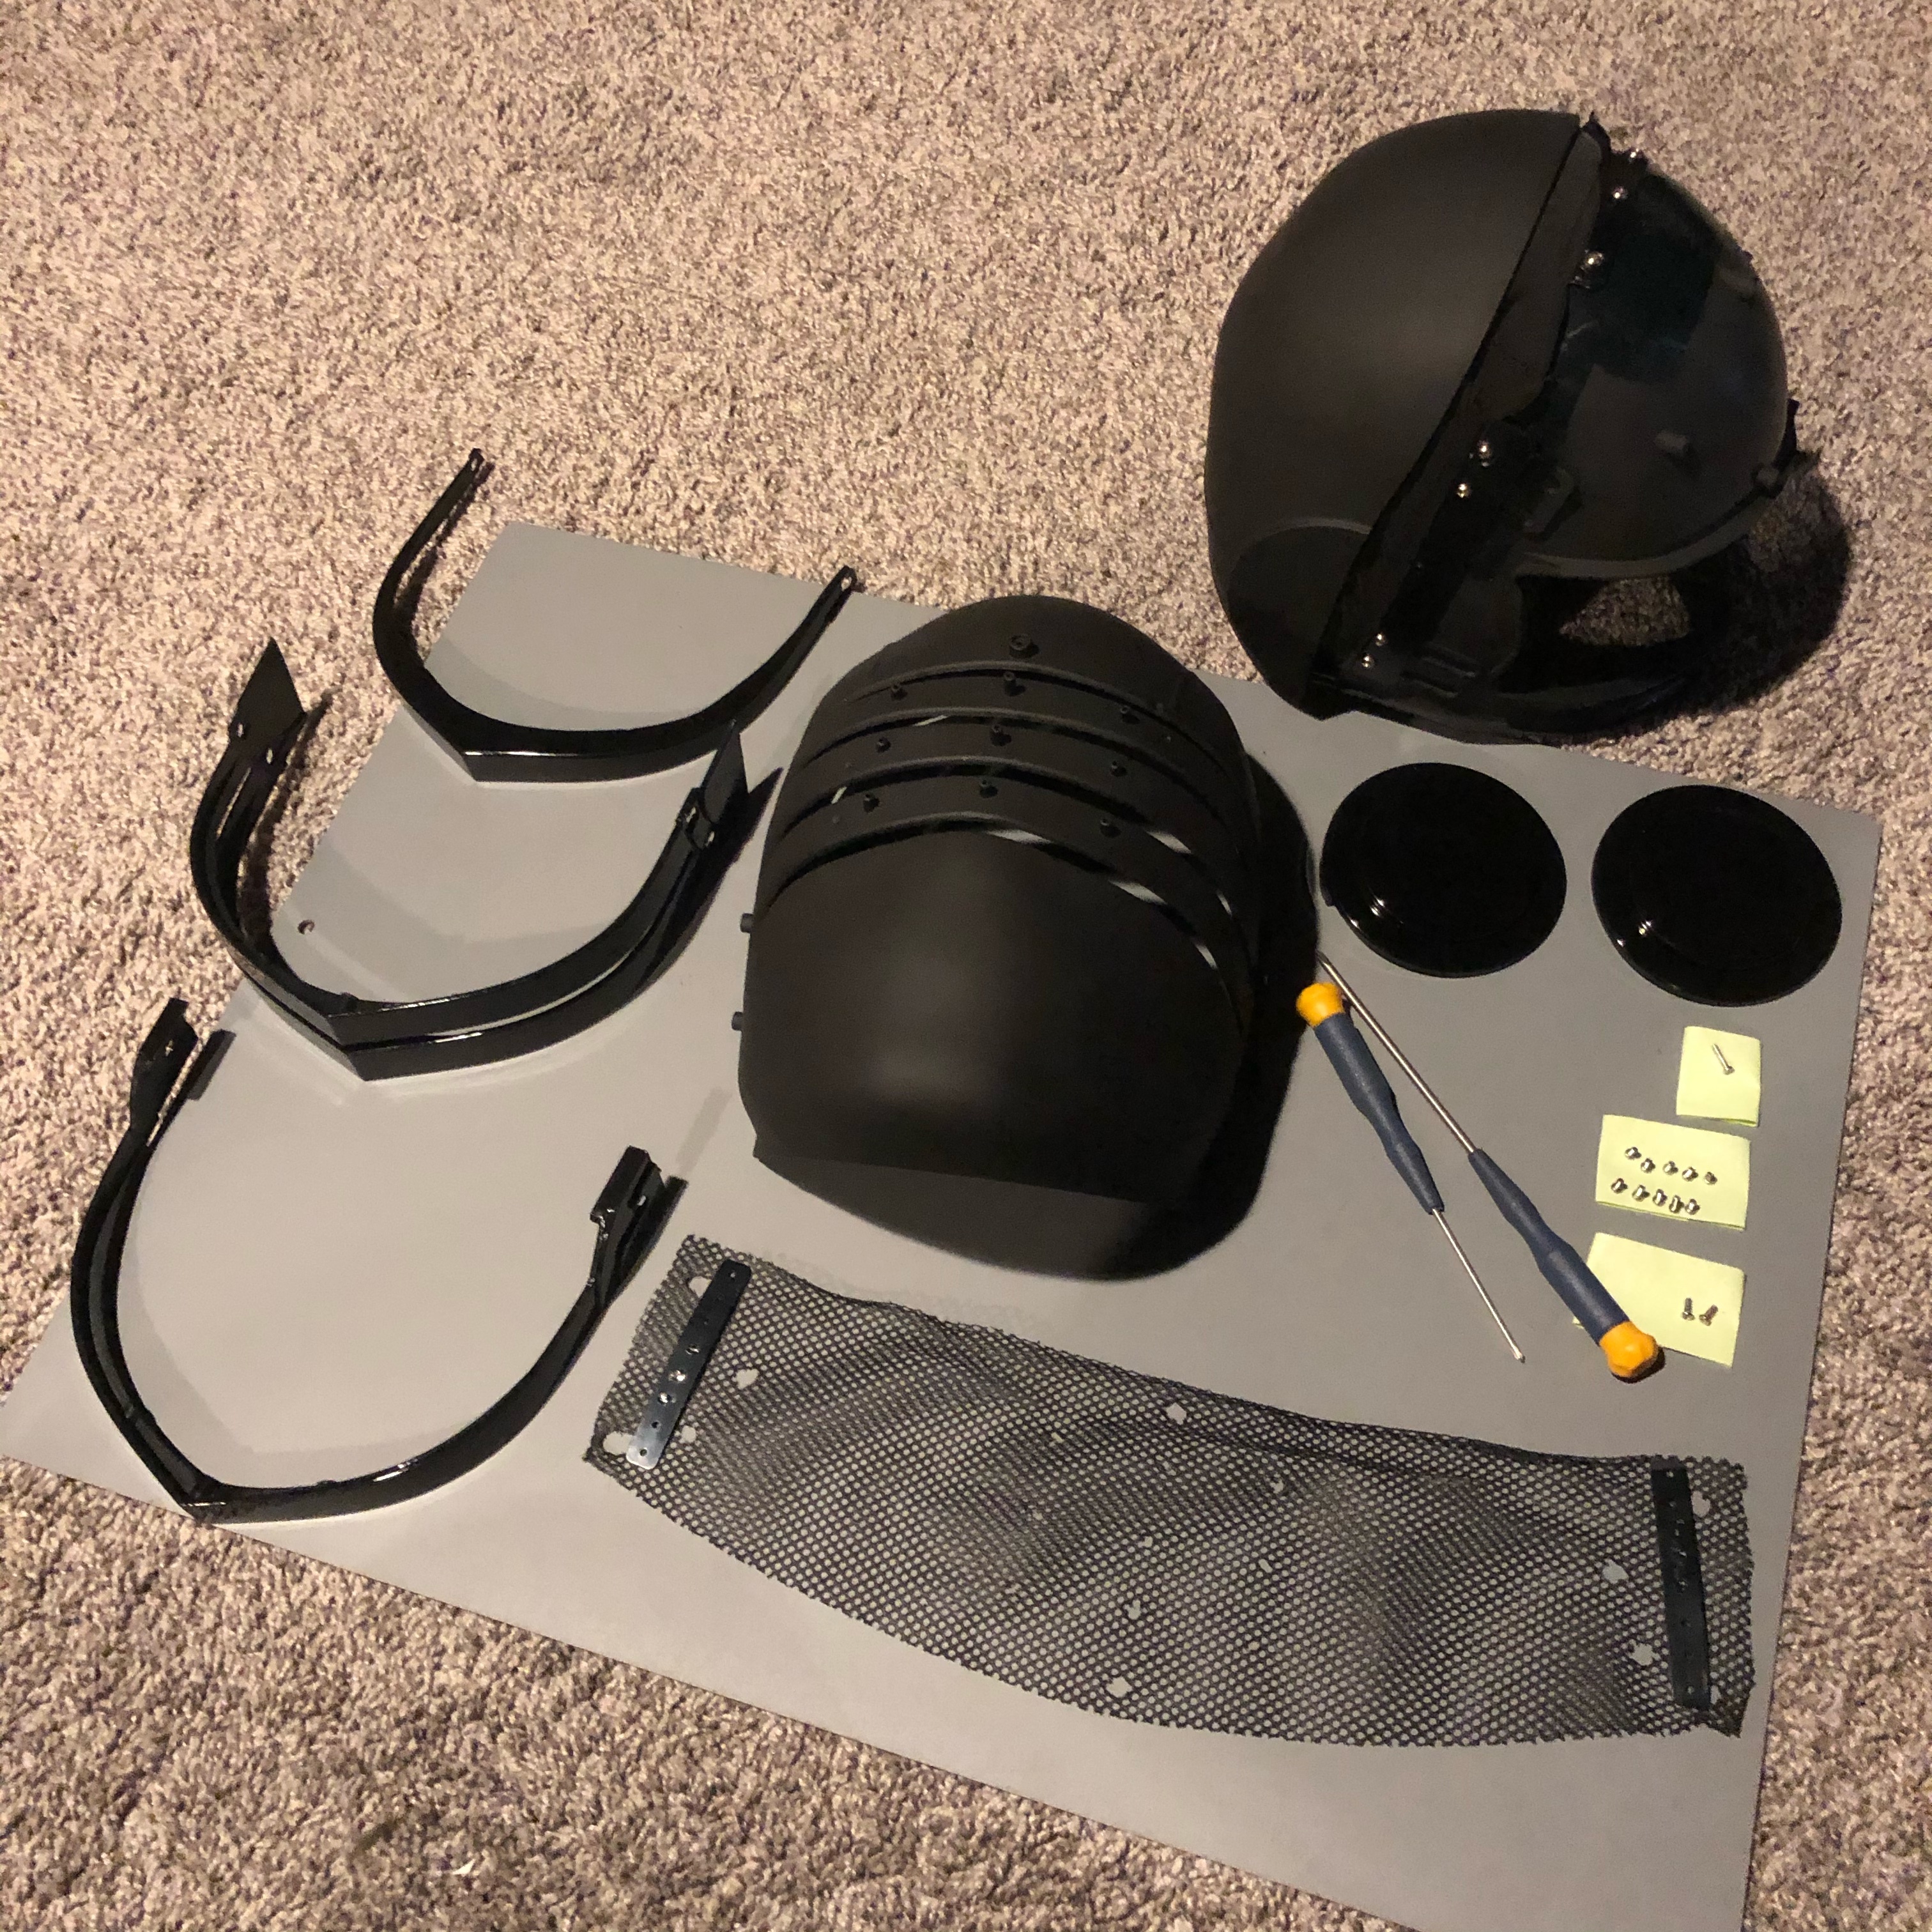
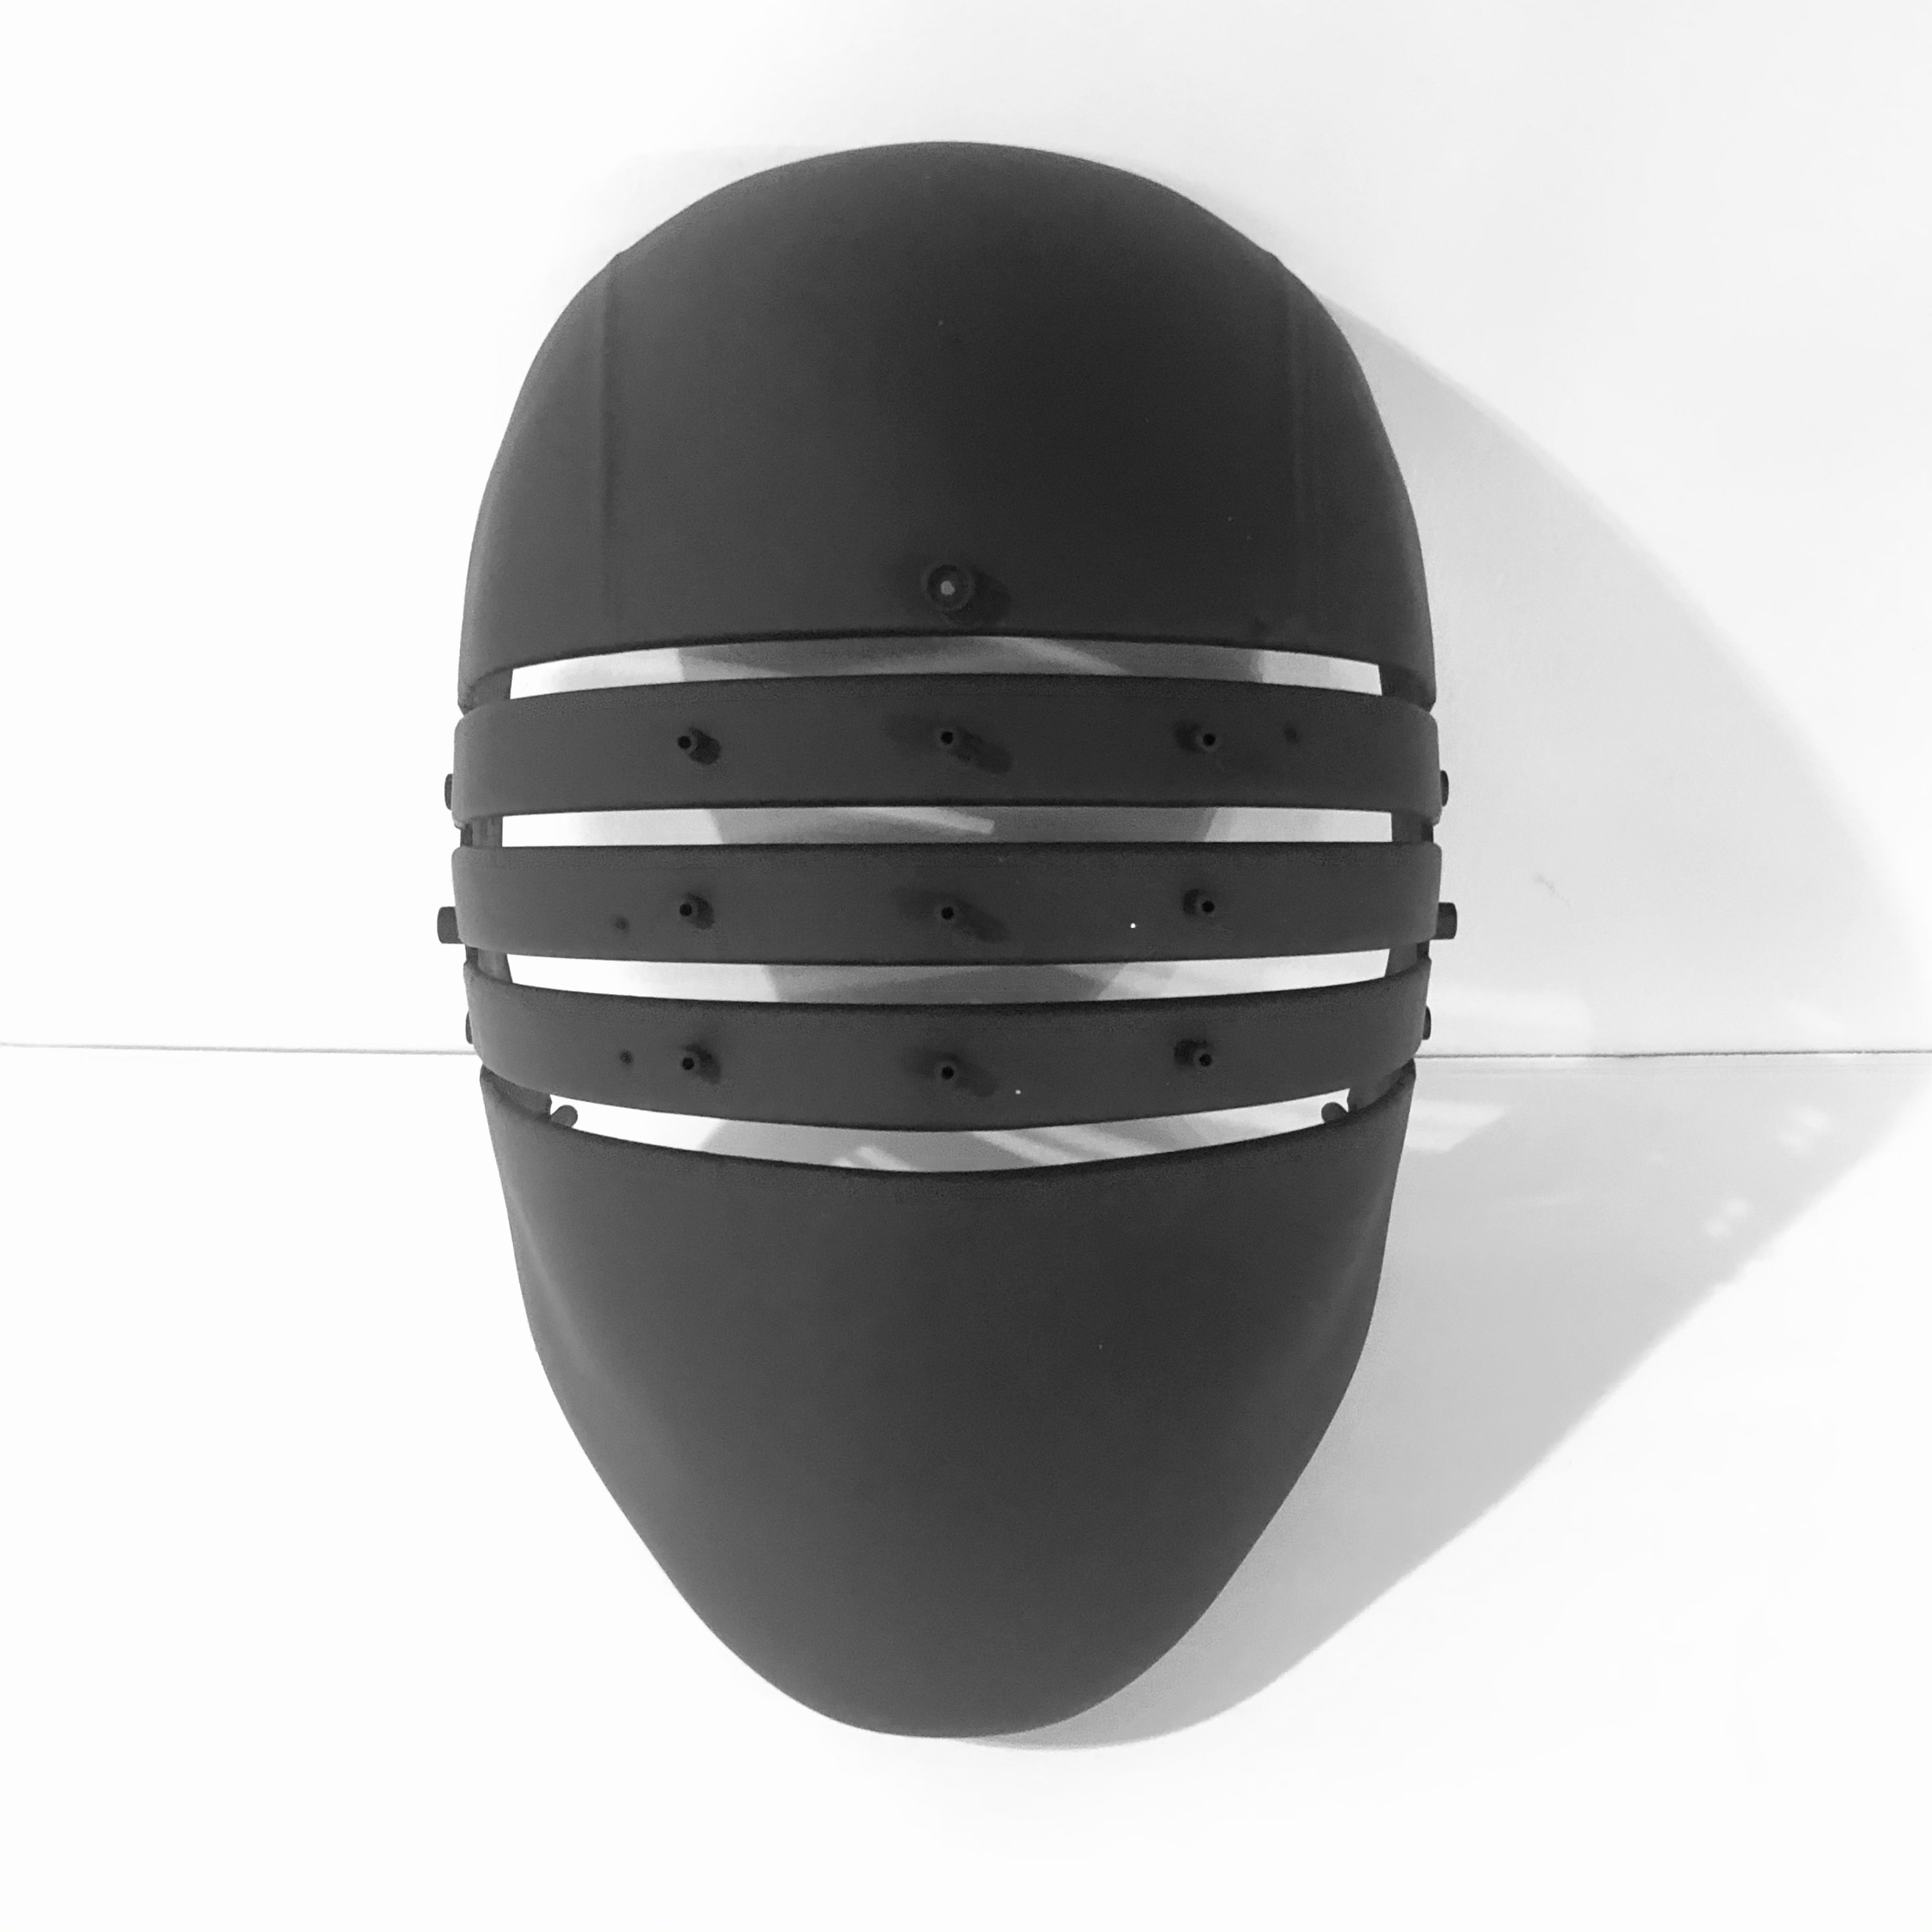
The visor itself is 4 separate pieces 1 bar on top, two connected in the center and two connected at the bottom. This made it super easy to just trim away the bottom bar from that segment. The real trick is what you’re left with on the face area.
At the bottom of the face you have two issues to tackle: The screw peg area that this was screwed into and a “slump” from the molding process.

I took a pair of plastic nippers and just trimmed a little at a time until I removed the nub and smoothed it with a nail filling stick until smooth.
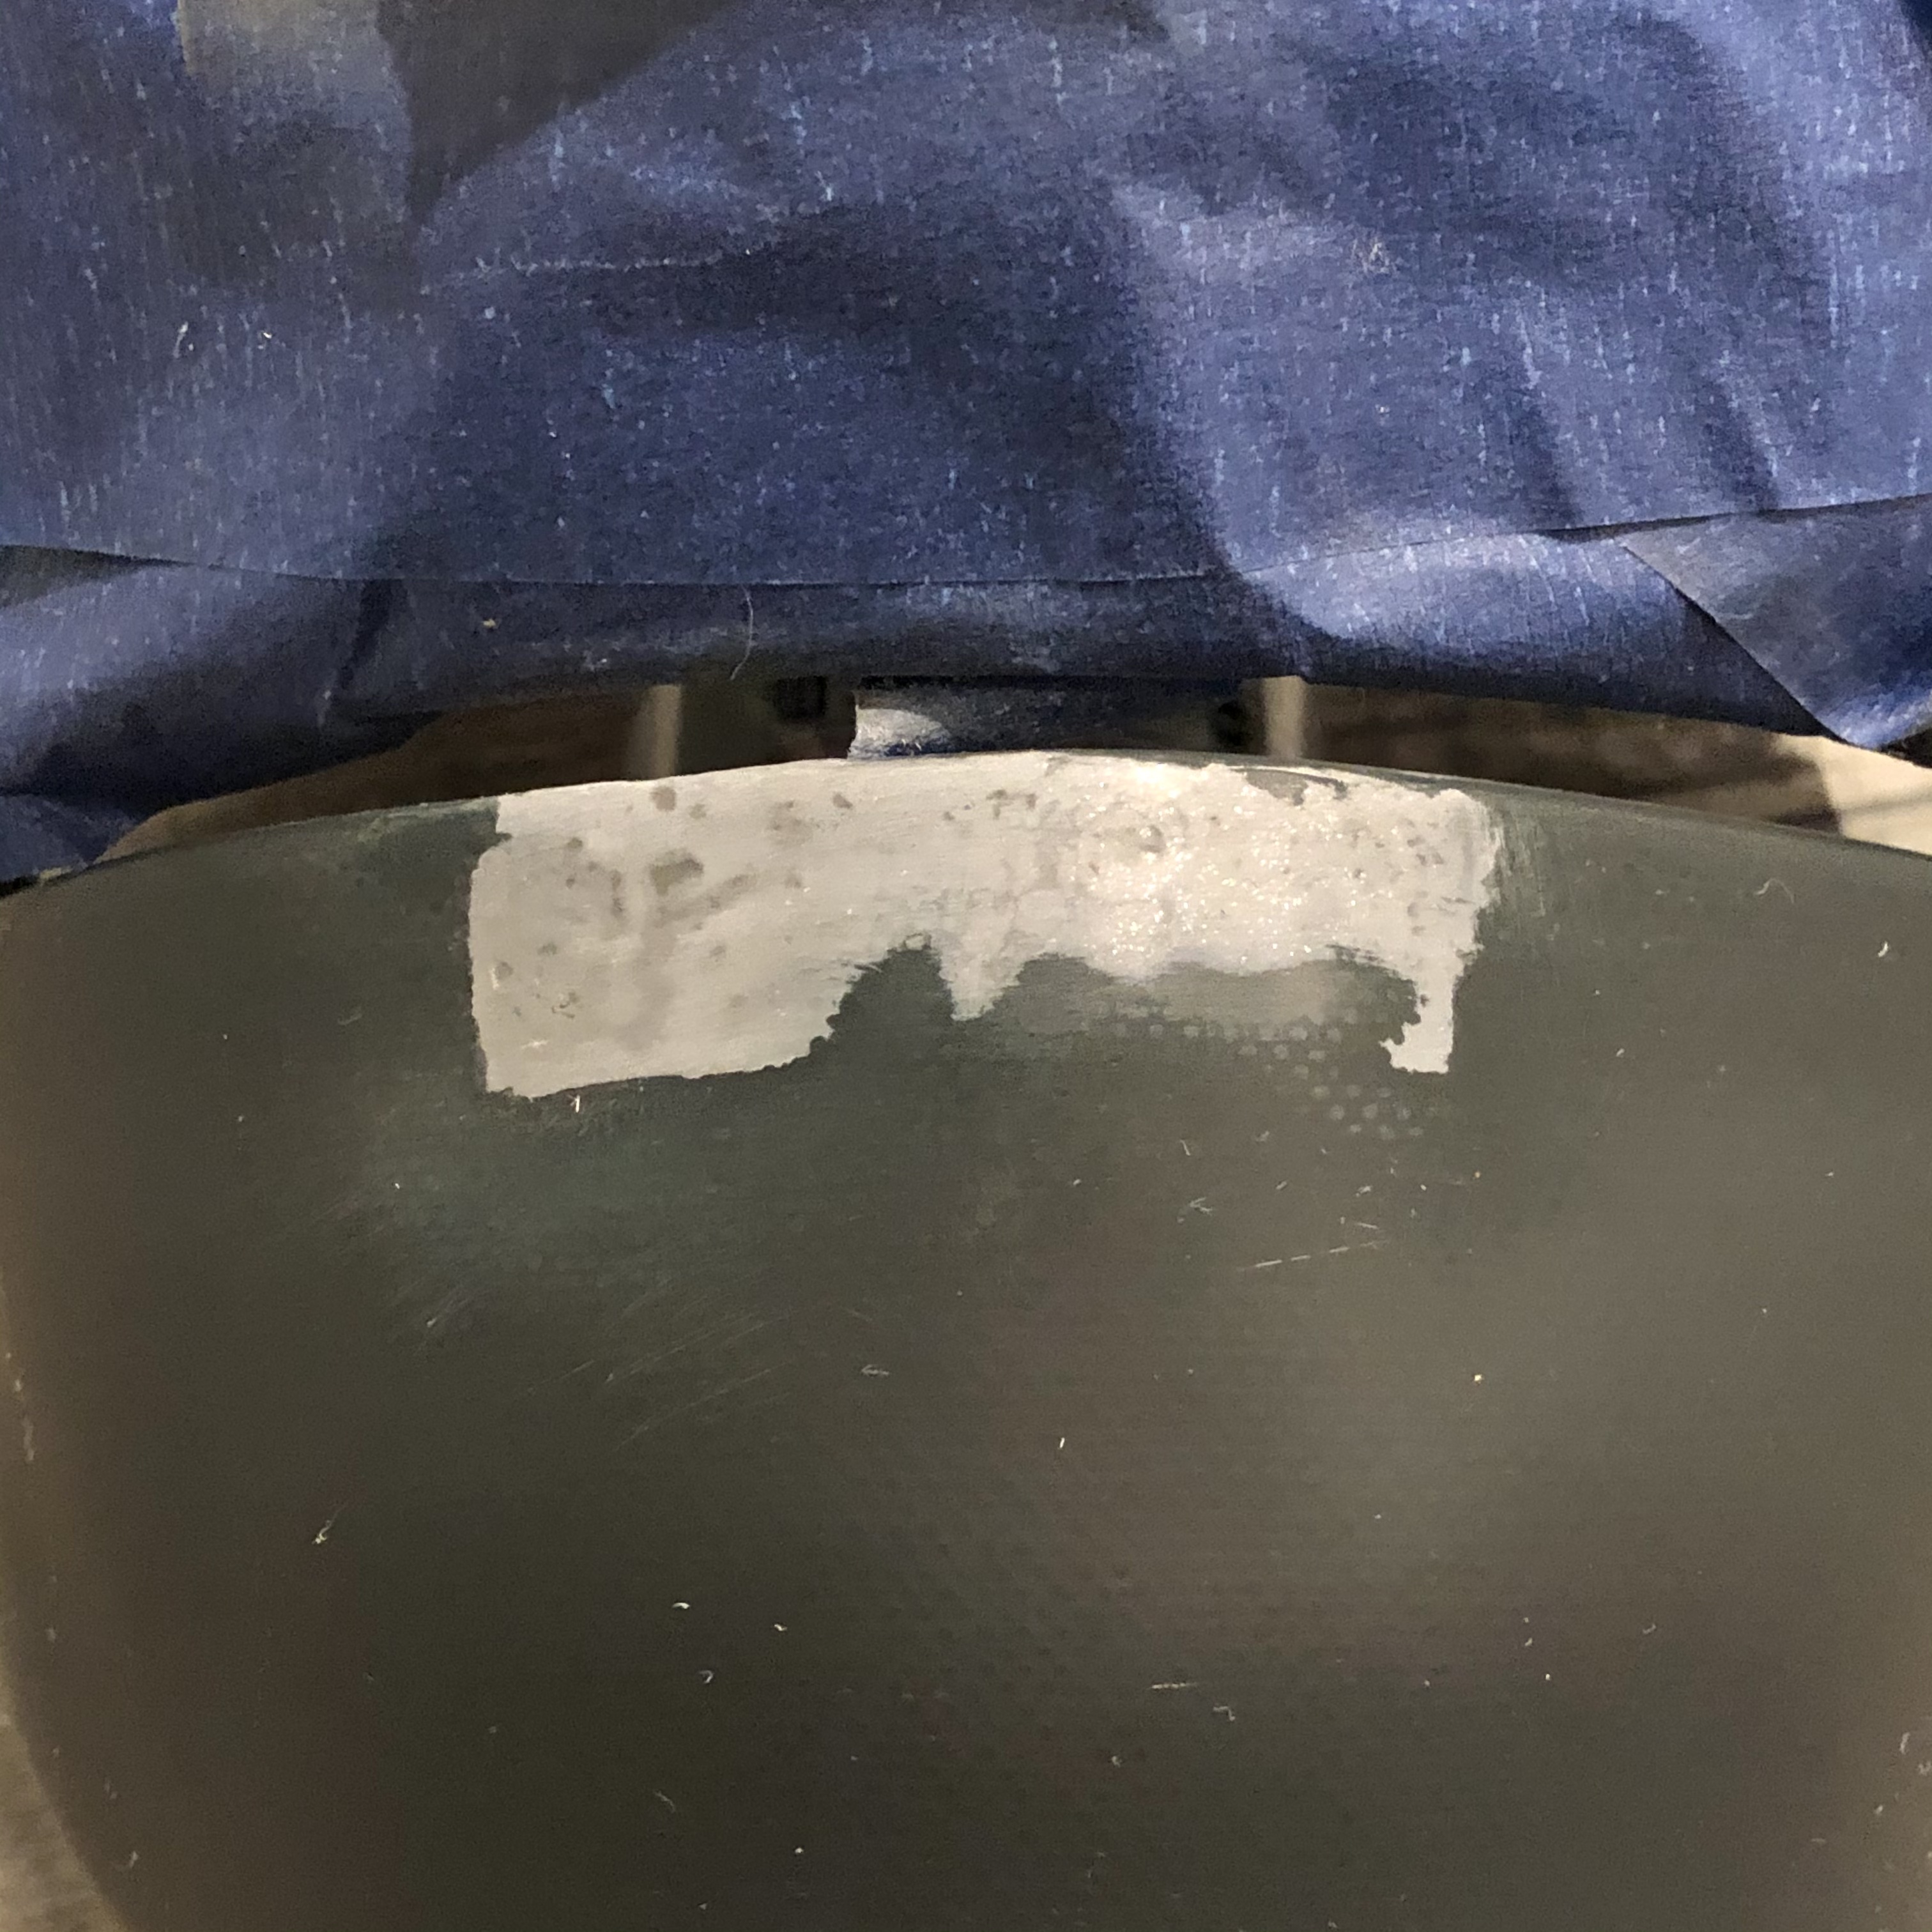
Once it was pretty smooth I took some painters tape and tapped off the surrounding area to make sure I didn’t get any filling material outside of the area. I used JB Weld that I mixed up and spread on thin to the area. For the hole I just used a piece of tape on the back and let some of the JB weld sag into that space to have a good bond that transfers from the front to the back.
After about the first hour of letting the JB Weld set up, I came back with a razor blade to the surface to help smooth out any bumps. You have a decent amount of working time with JB Weld and part of the reason I recommend it in my builds.
This next stage is UGLY!
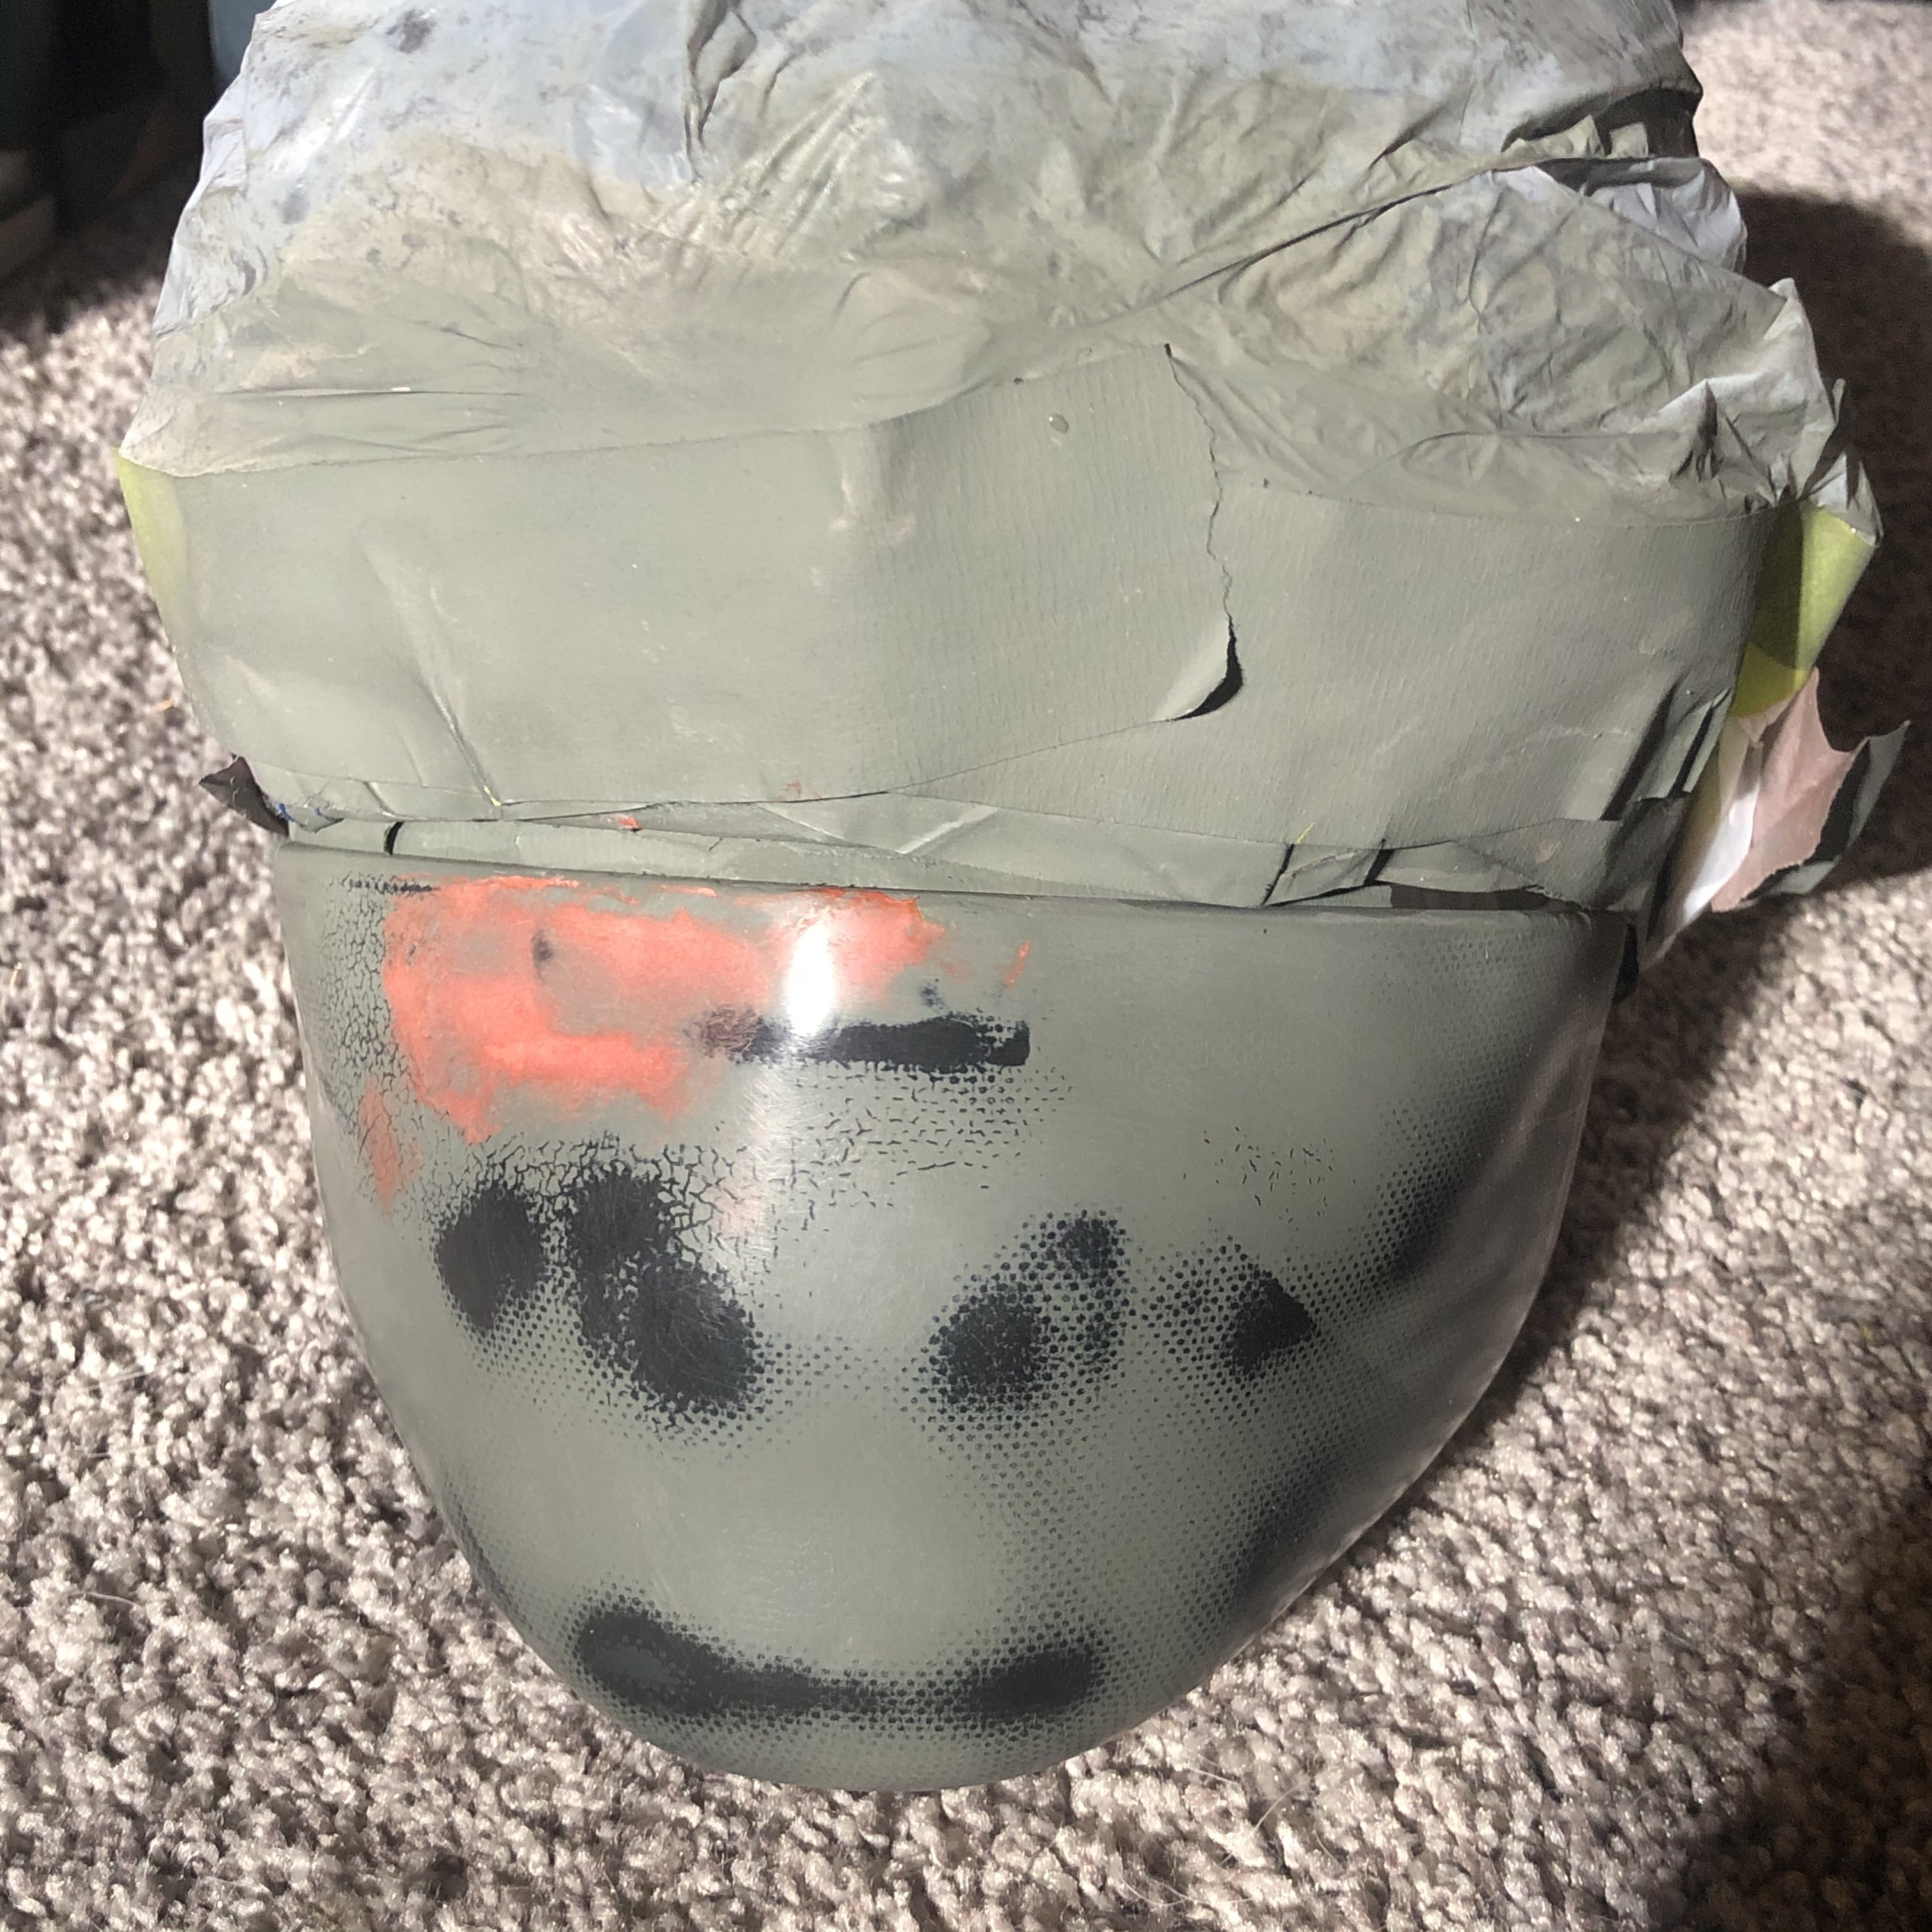
Basically after the JB Weld was fully cured I got the sanding stick back out and worked the patched area until it started to smooth out. Using two different sandal primers I was able to see the highs and lows and ultimately used glazing putty to dab into a couple of tiny dimples in the surface.
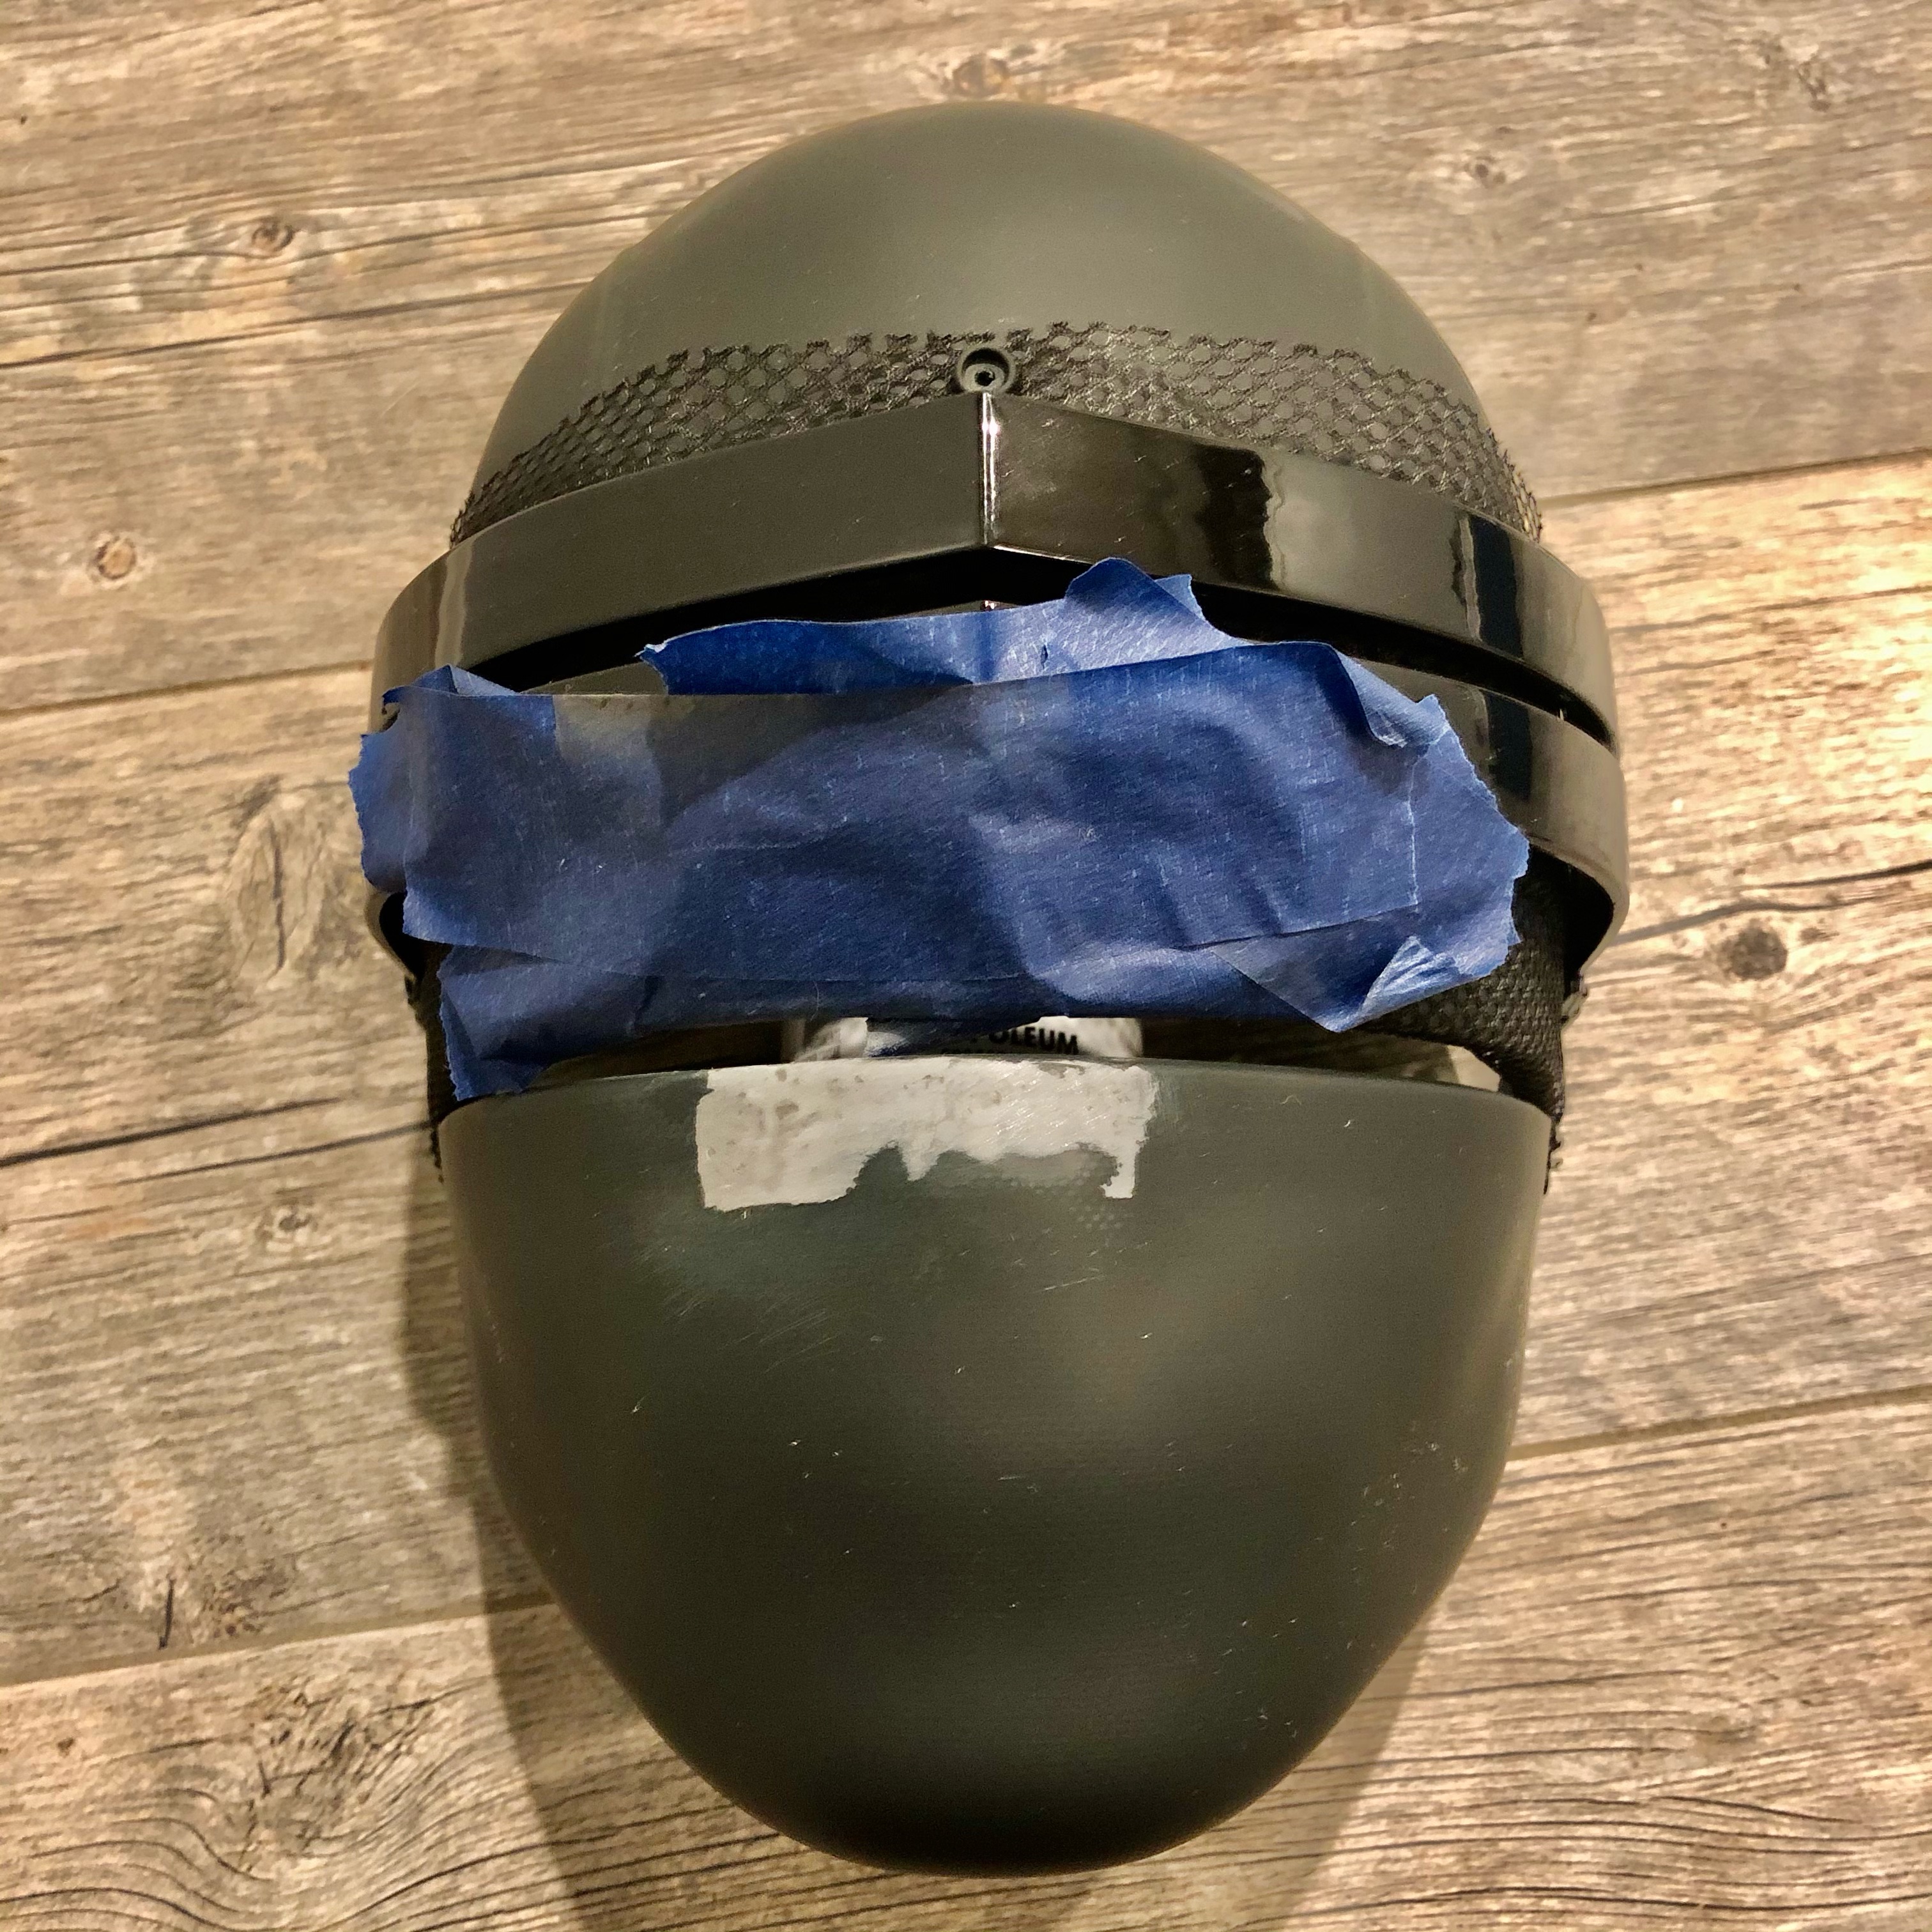
When it was all cured and sanded I prepped the surface for the top coat with some isopropyl alcohol.
I both the front and the back halves of the mask with flat black spray paint to make sure they’d match. As you can see my patchwork to the lower area of the face worked pretty well! No more peg/screw hole, no more slump.
For the visor area removing the lowest bar was done with a dremel cut off tool and then followed up with a sanding drum to smooth it out. I followed that up with a fine file used for miniature model work. The finish below is black, but not as shiny as the paint obviously so I used a little touch up gloss black on the cut area. But fear not, if you cut close to the ear curvature its basically hidden when reassembled.
The last thing to tackle is the netting. My choice here was to just pull the netting that hangs off the front of the bars to the inside and use some strong double sided tape to hold it until I could screw the two halves back together, where its’ sandwiched between the sections.
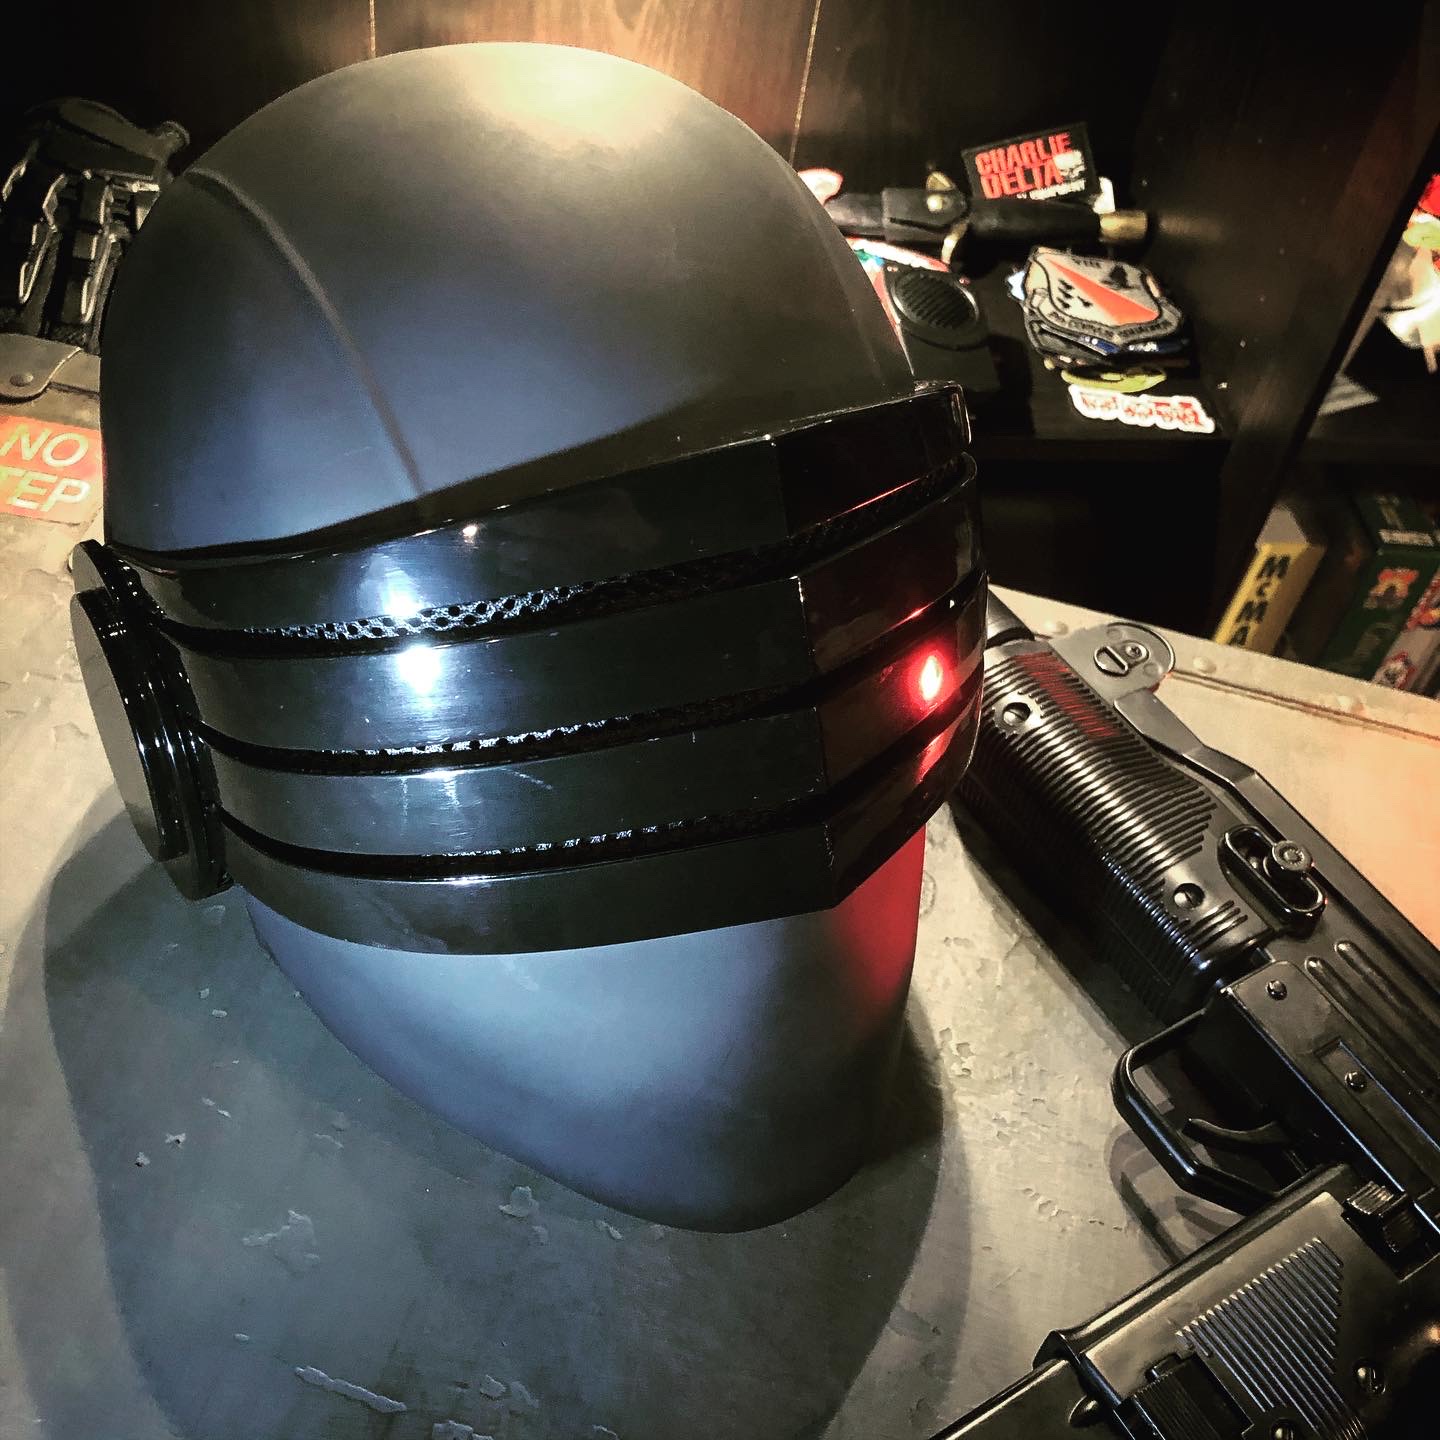
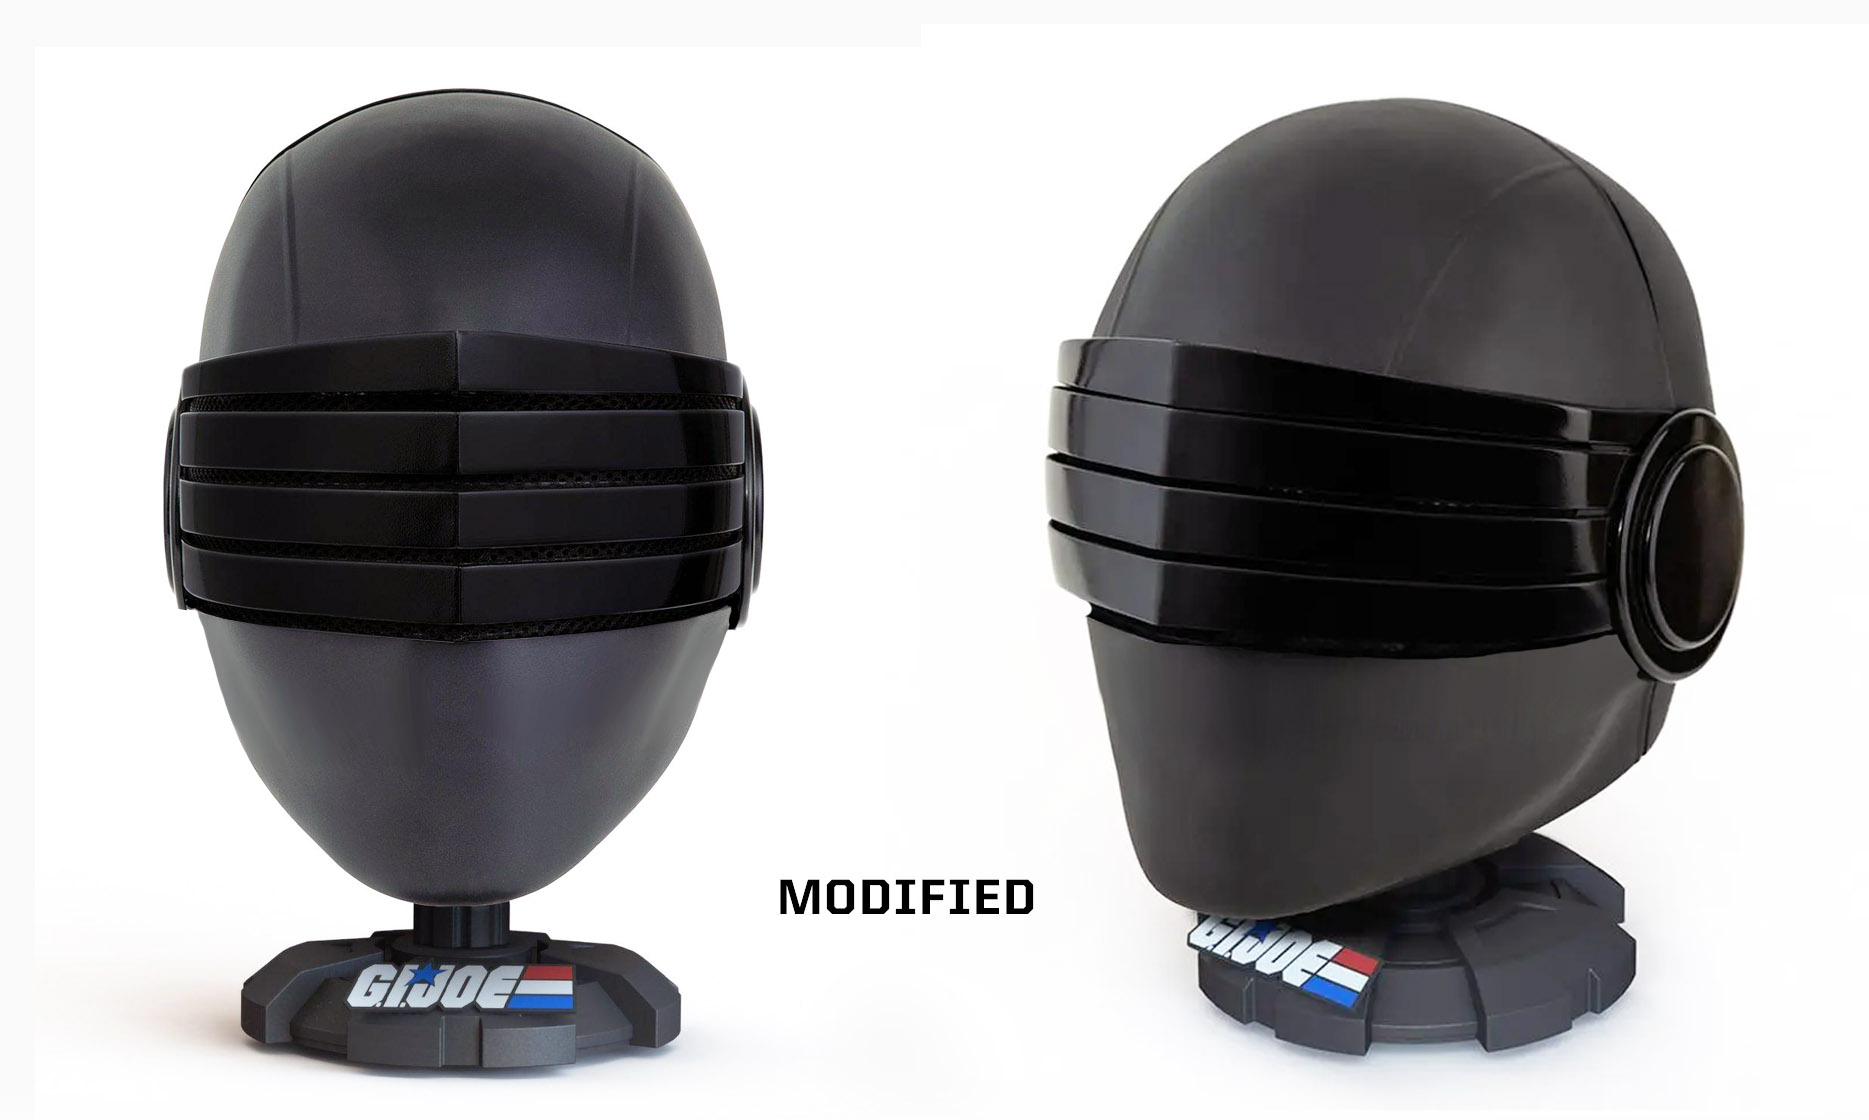
Finished piece! It looks good and has a 4 Bar visor now.
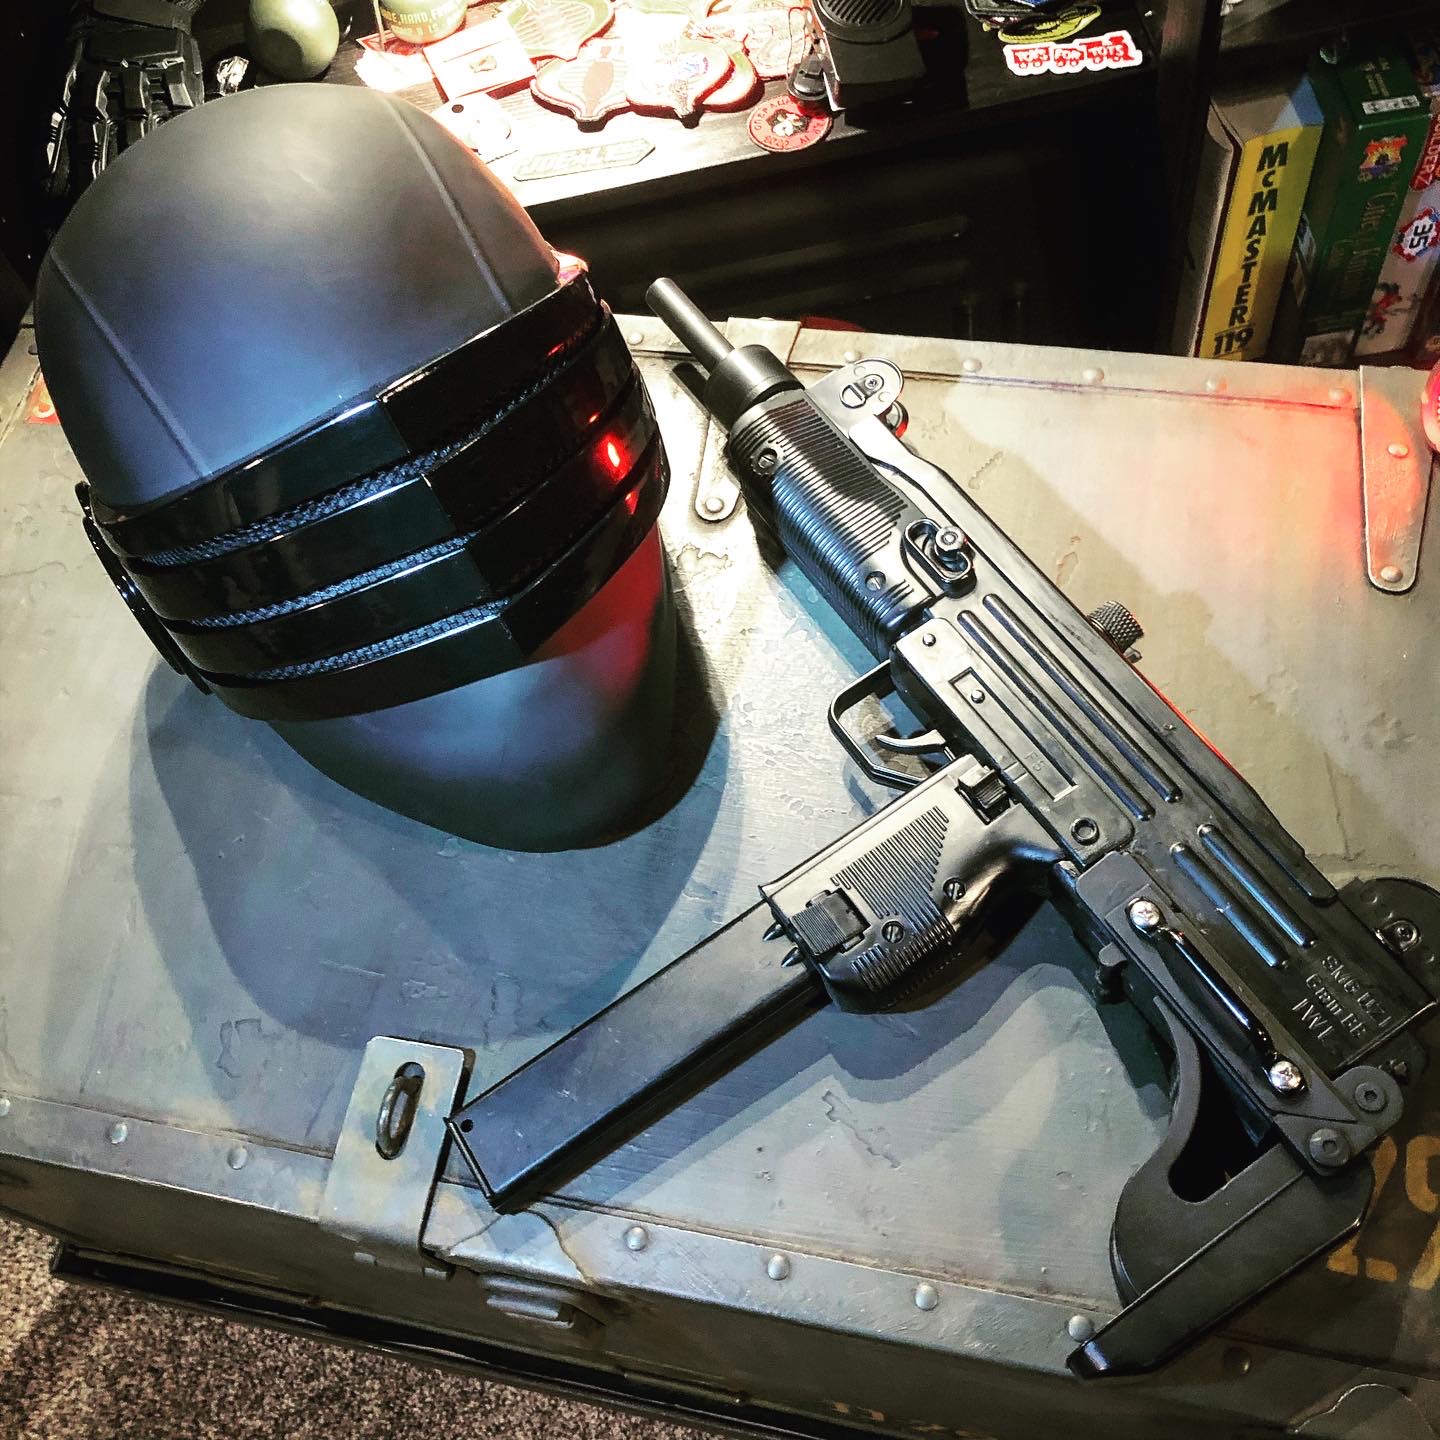
Though I’d hoped this helmet would work for me, I find it very uncomfortable to wear for too long. Mine is now part of my display case of Joe Helmets and I’m happy to have a custom piece to display.
2 Likes
I am on the “one less row is better” team.
2 Likes