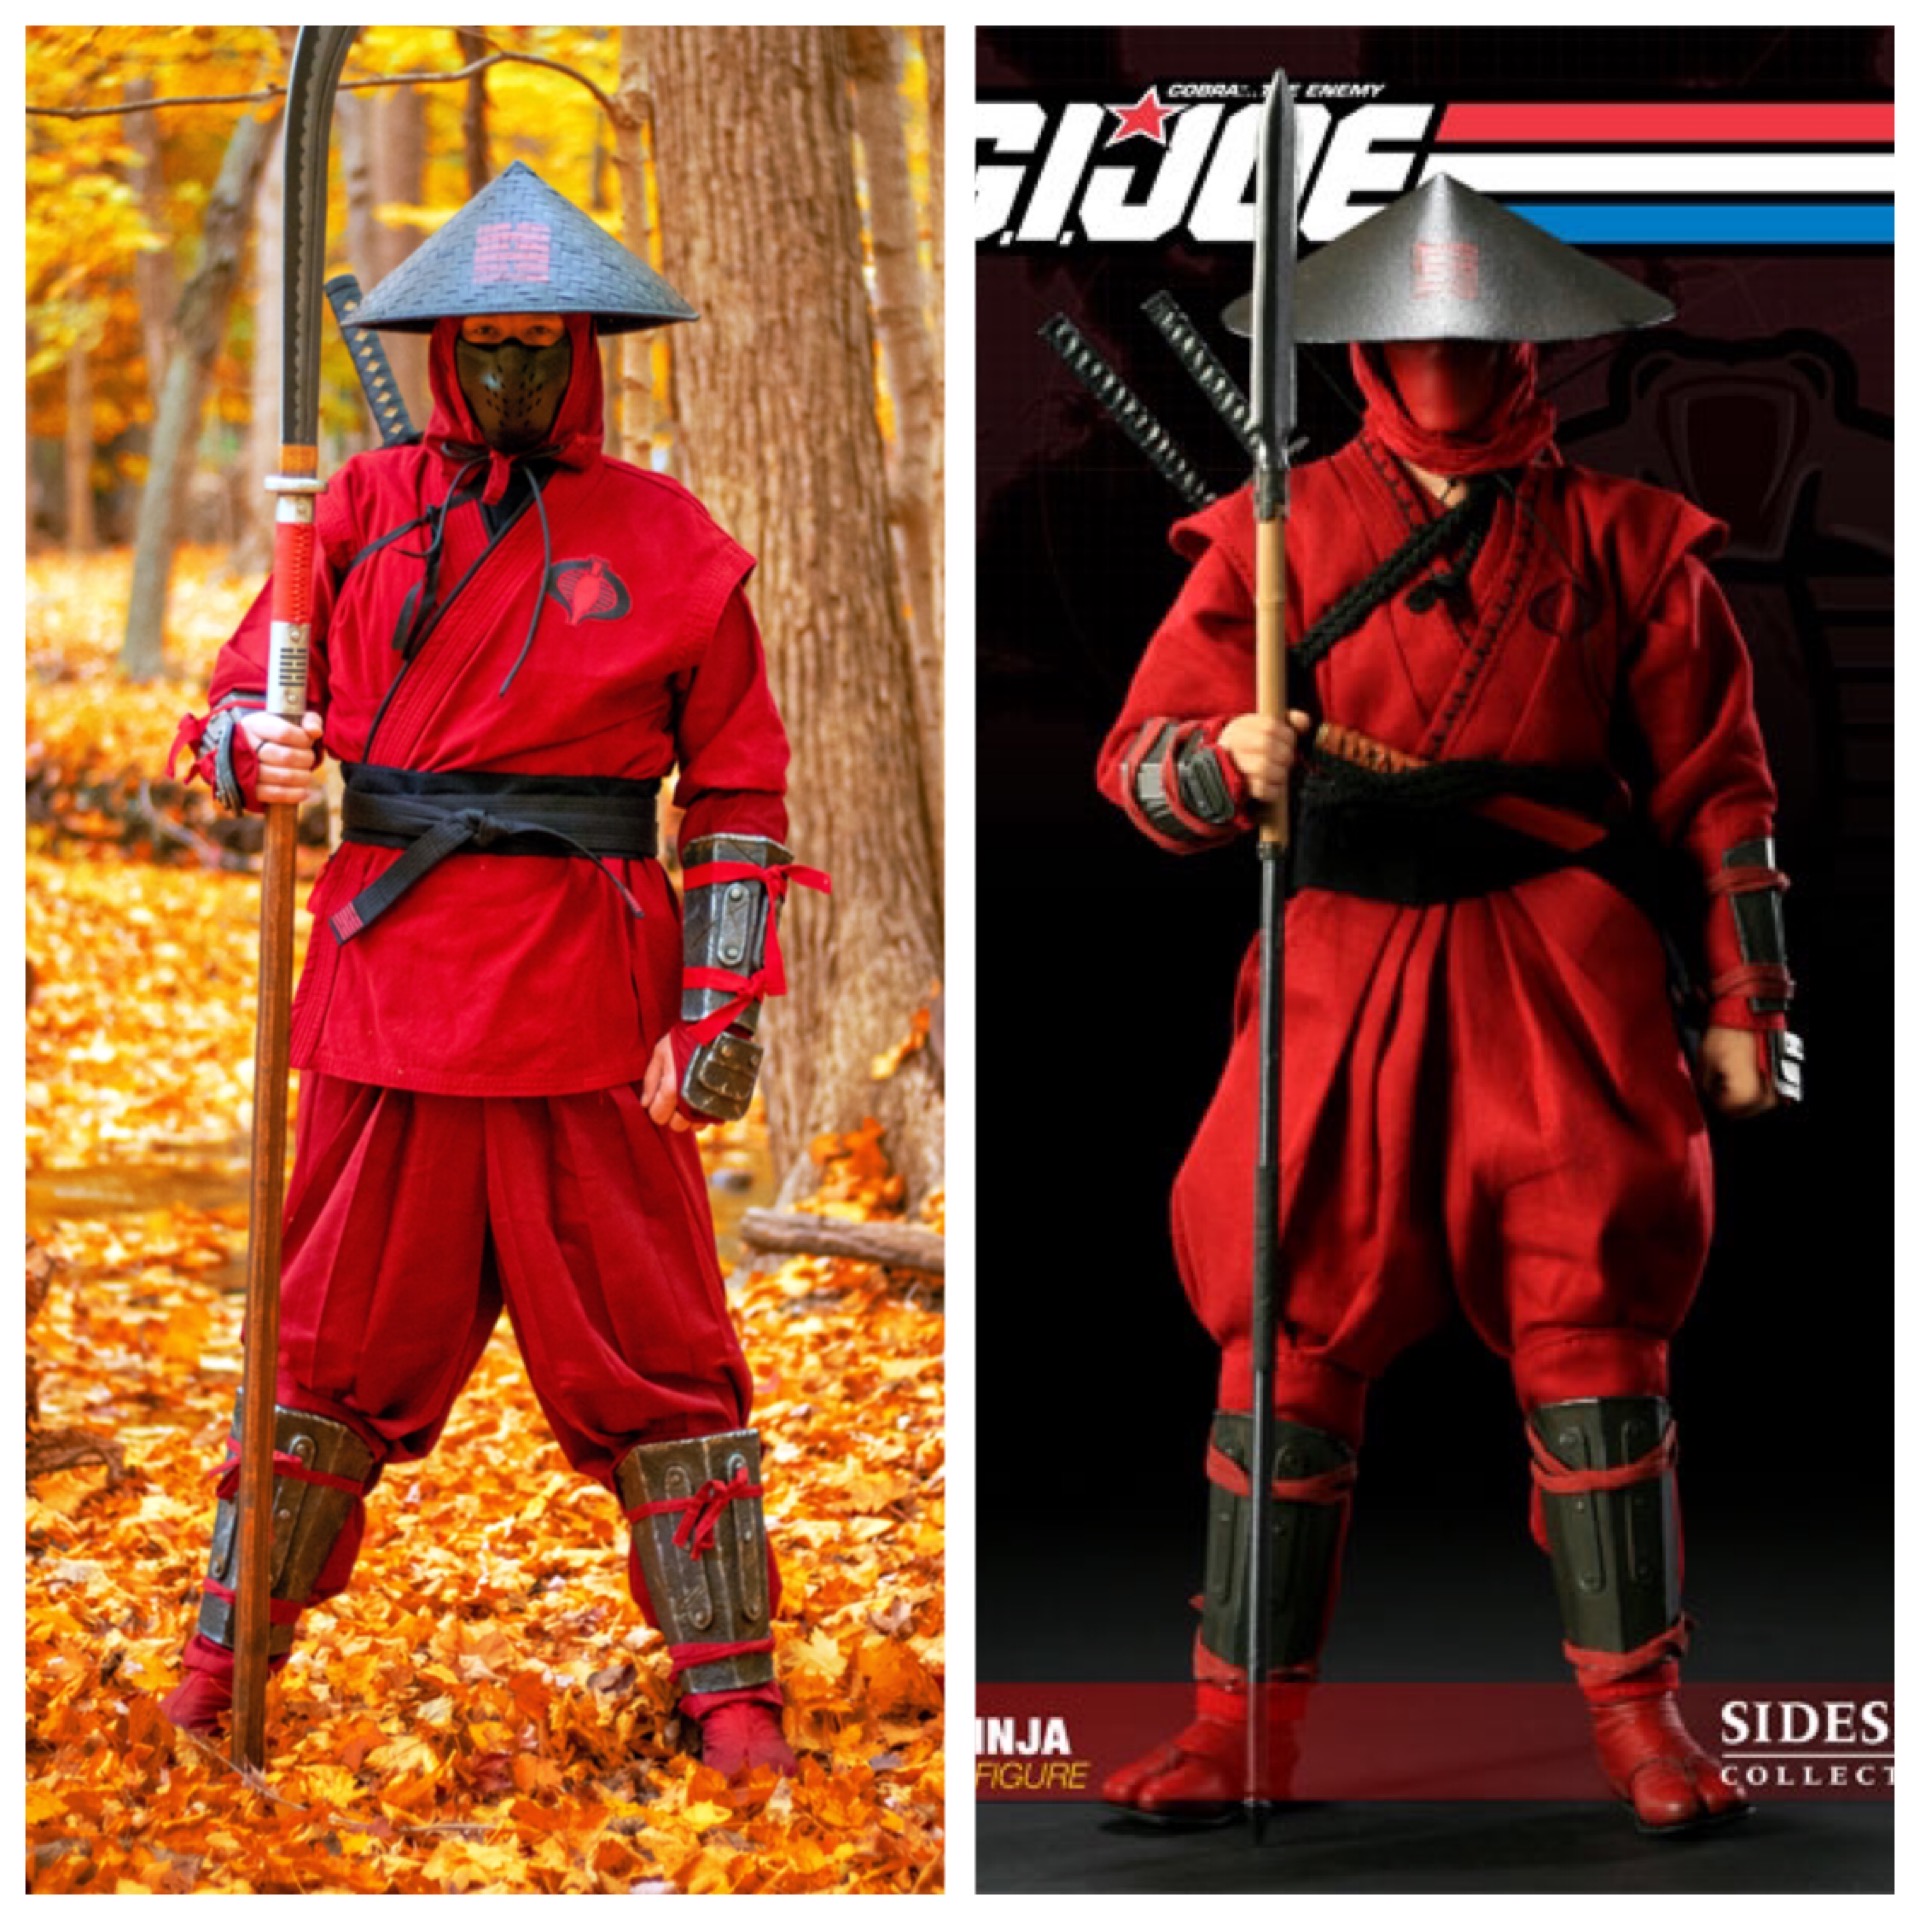
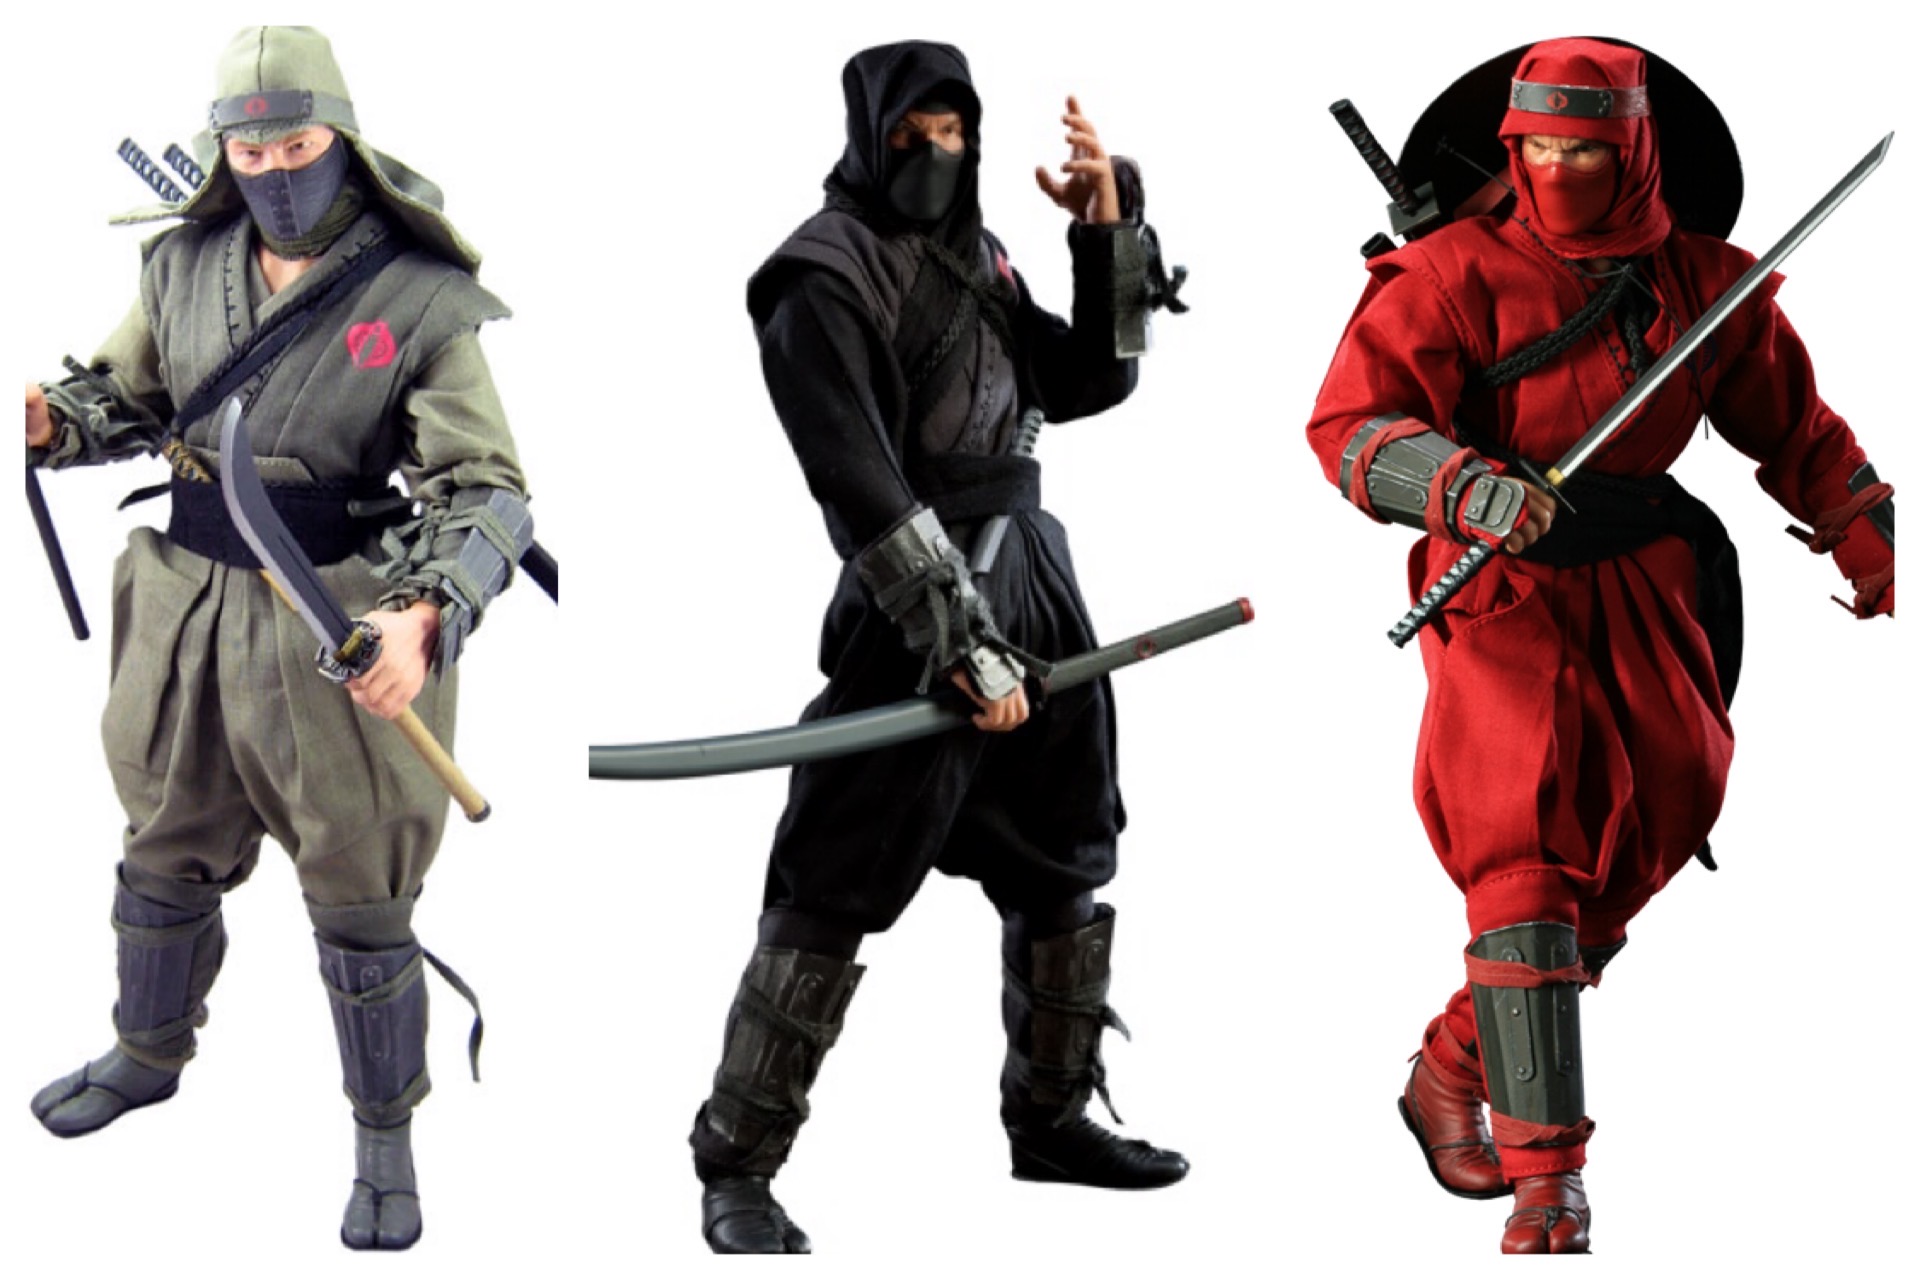
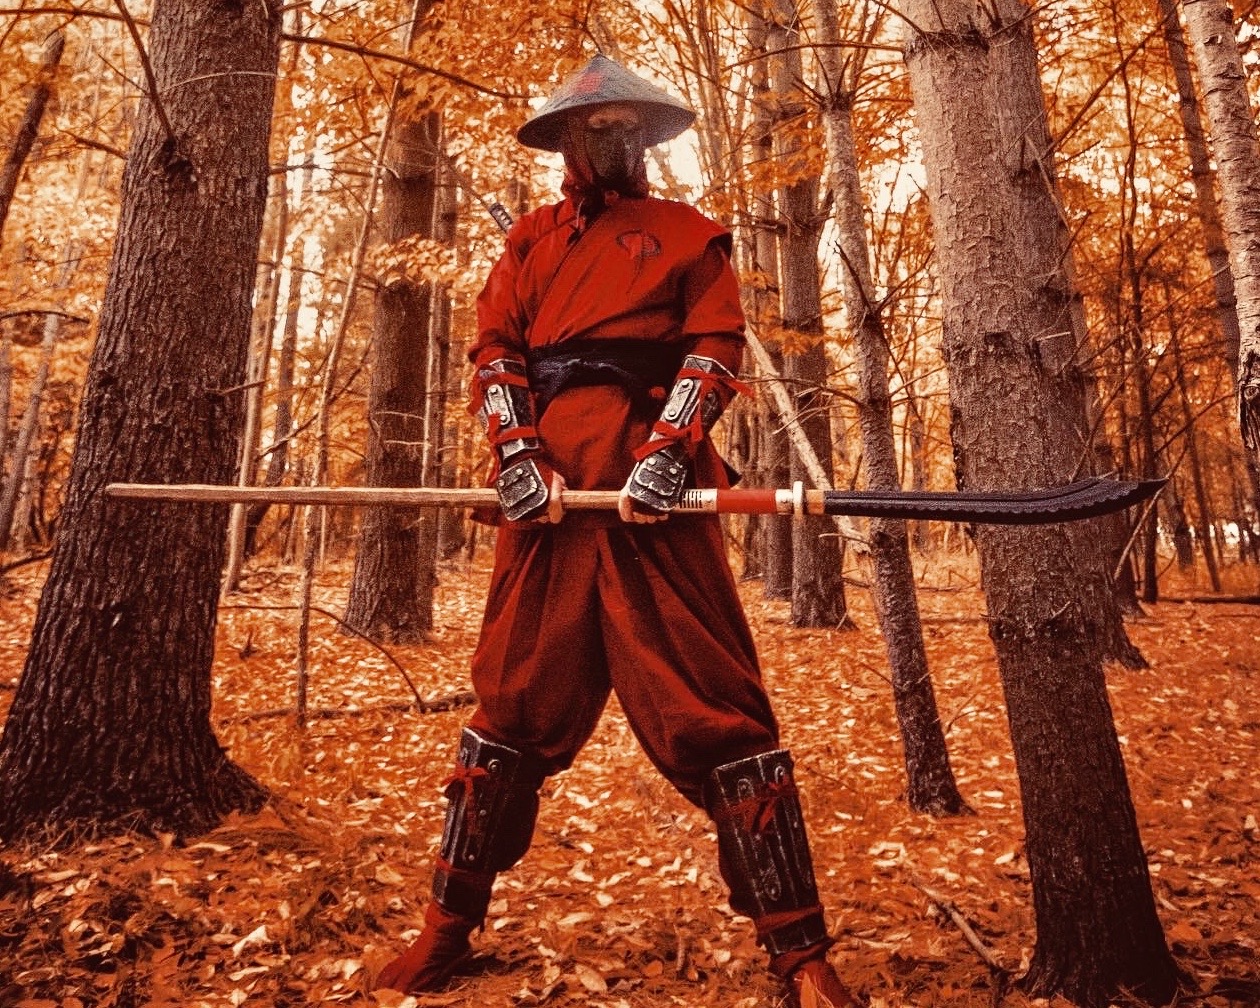
Good Morning! I recently put together a Red Ninja costume based on the Sideshow Collectables 1/6th scale figure. Sideshow produced 3 different versions of the figure all with the same or similar armor pieces on the forearms (vambraces) and lower legs (greaves)
I made mine from EVA and this was really my first venture into making using foam as a base. I would say once I made it past the patterning stage, these were fun and easy, but a little time consuming.
Without going into all the basics of foam construction, as there are many MANY Youtube videos describing/showing the process, I just wanted to share the templates I made in case you wanted to make some as well.
The base pieces are really broken down into 2 pieces, either the arm or the leg splint. The construction of both are the same with basically half of a hexagon shape with 4 panels that make up both parts, with added details.
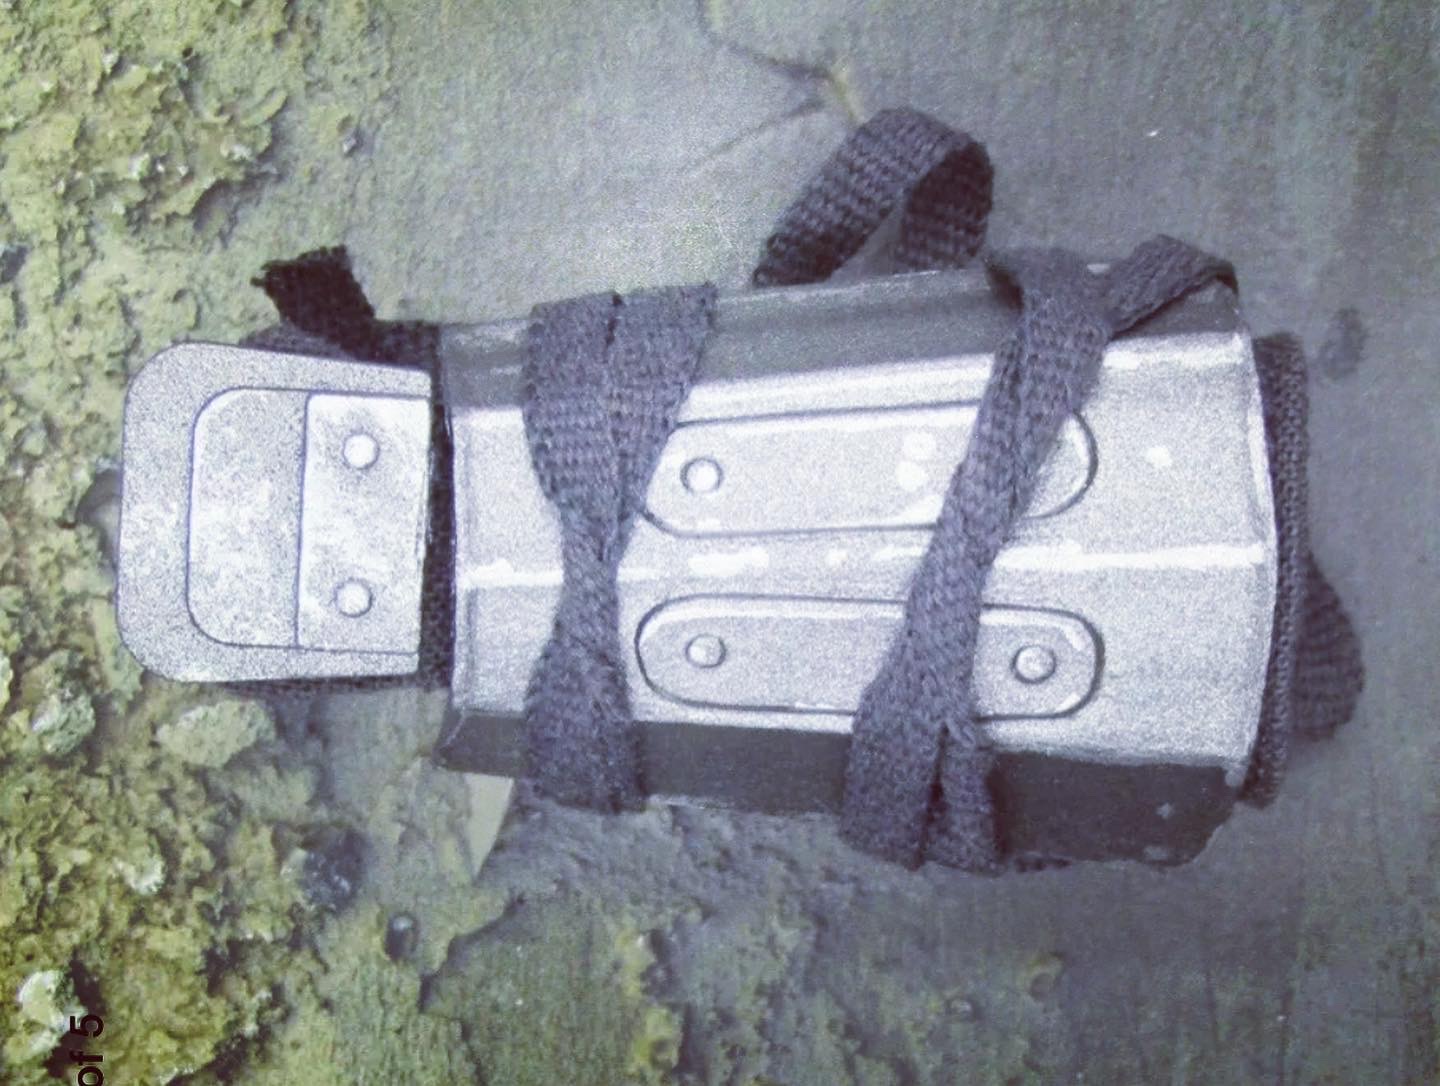
Here’s a detail shot I found of the Sideshow vambrace armor on a ebay listing.

And again an ebay listing of the leg braces from the 1/6th scale figure.
Here’s what I did with these, feel free to vary from the path here.
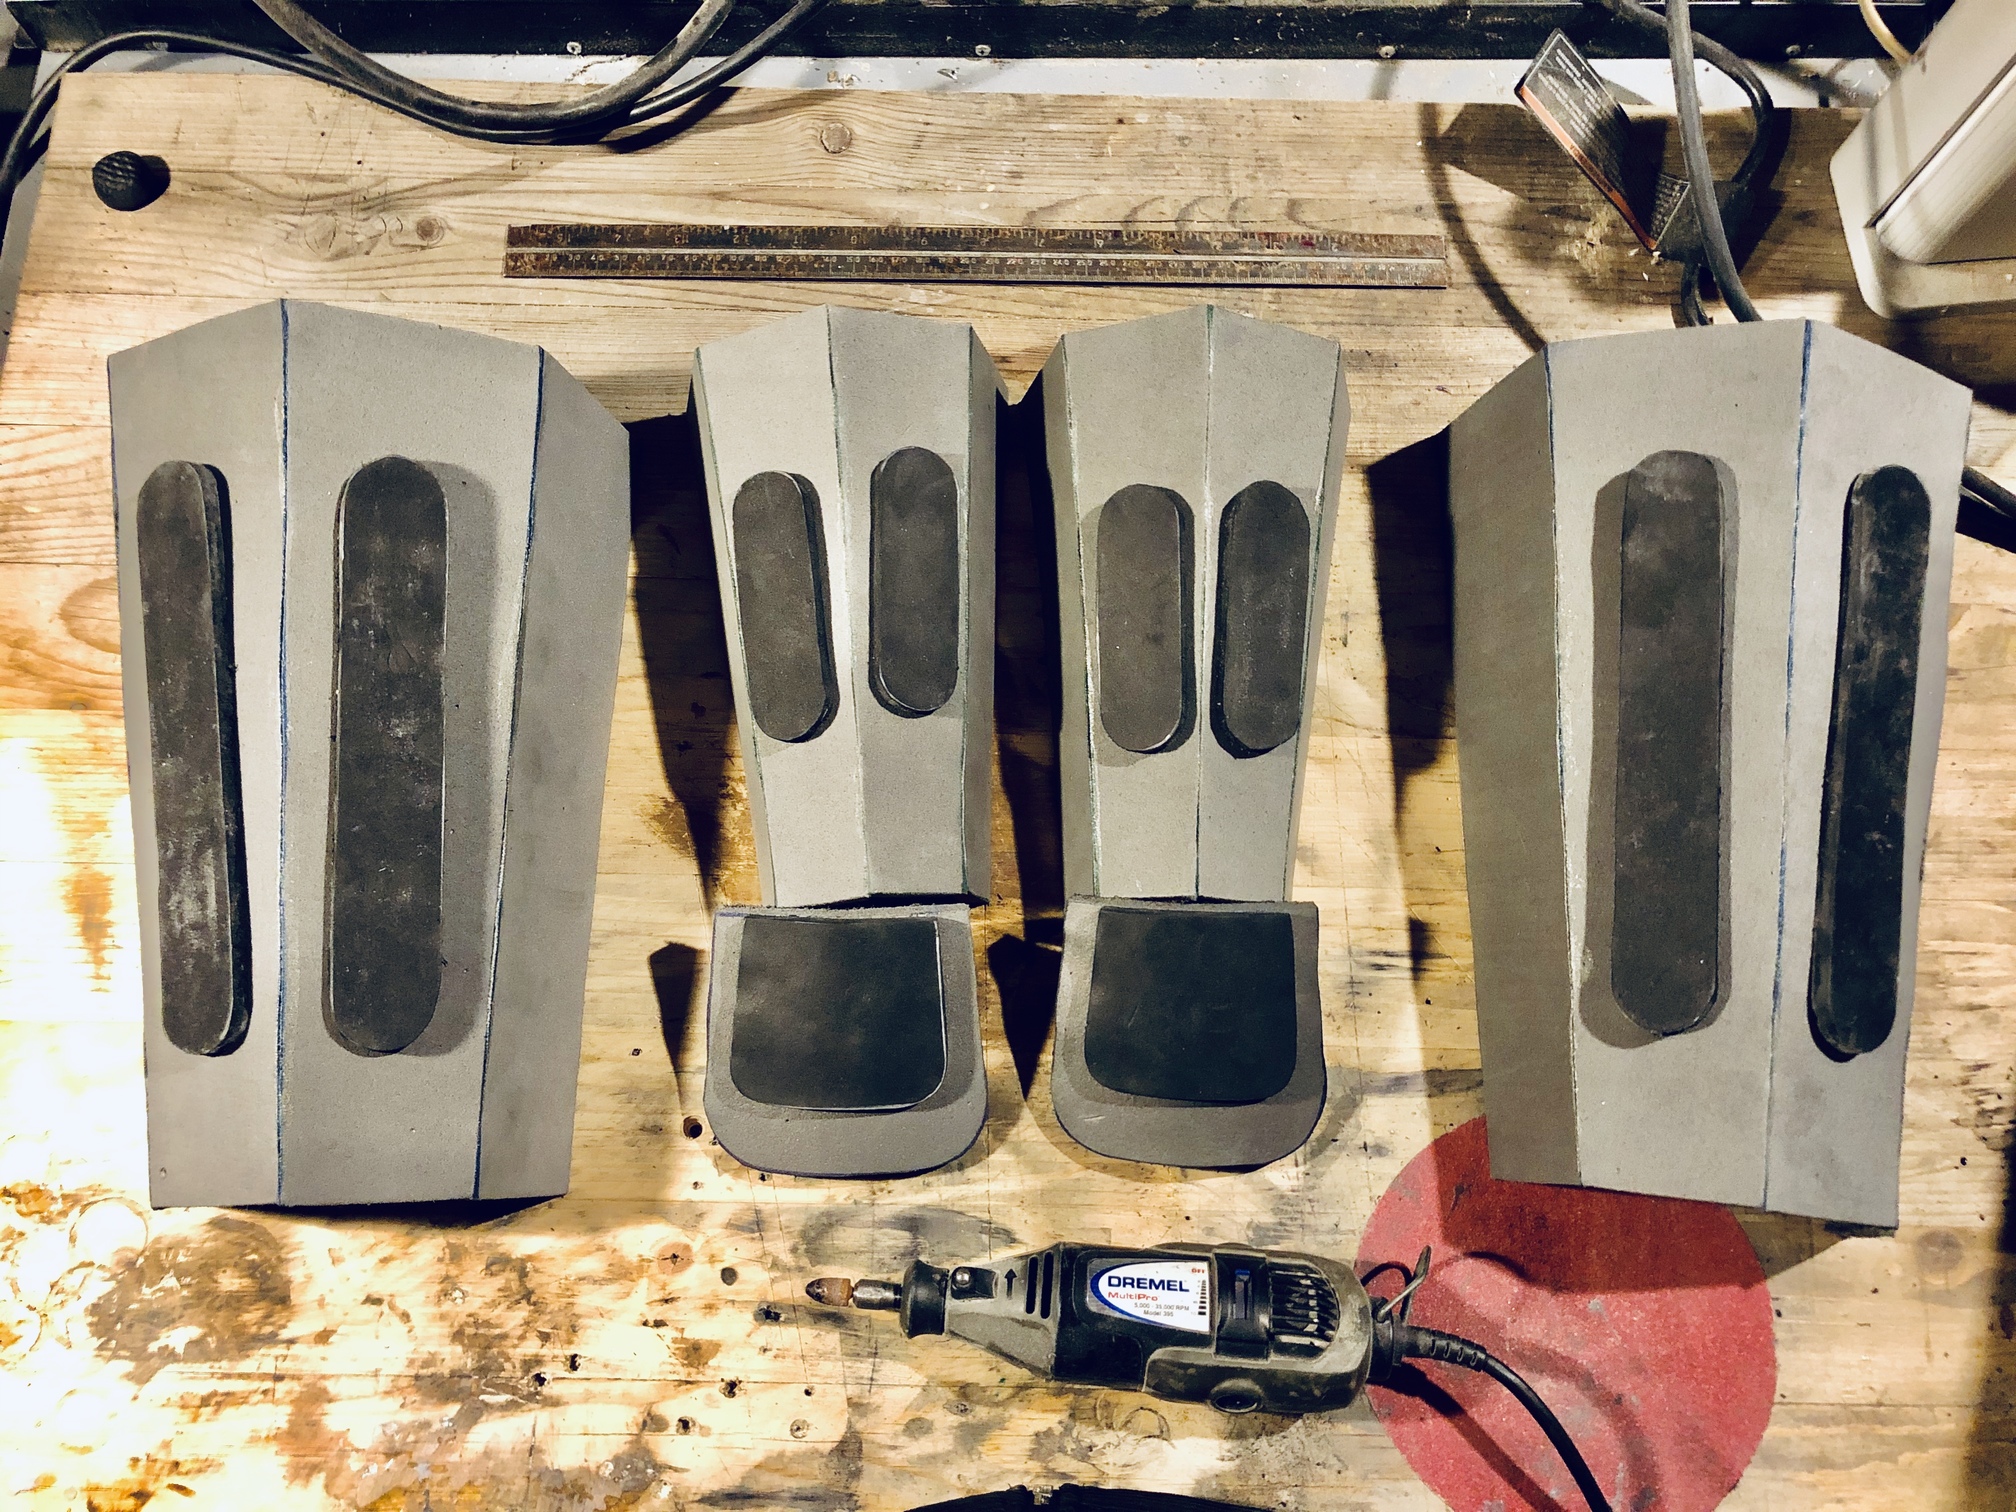
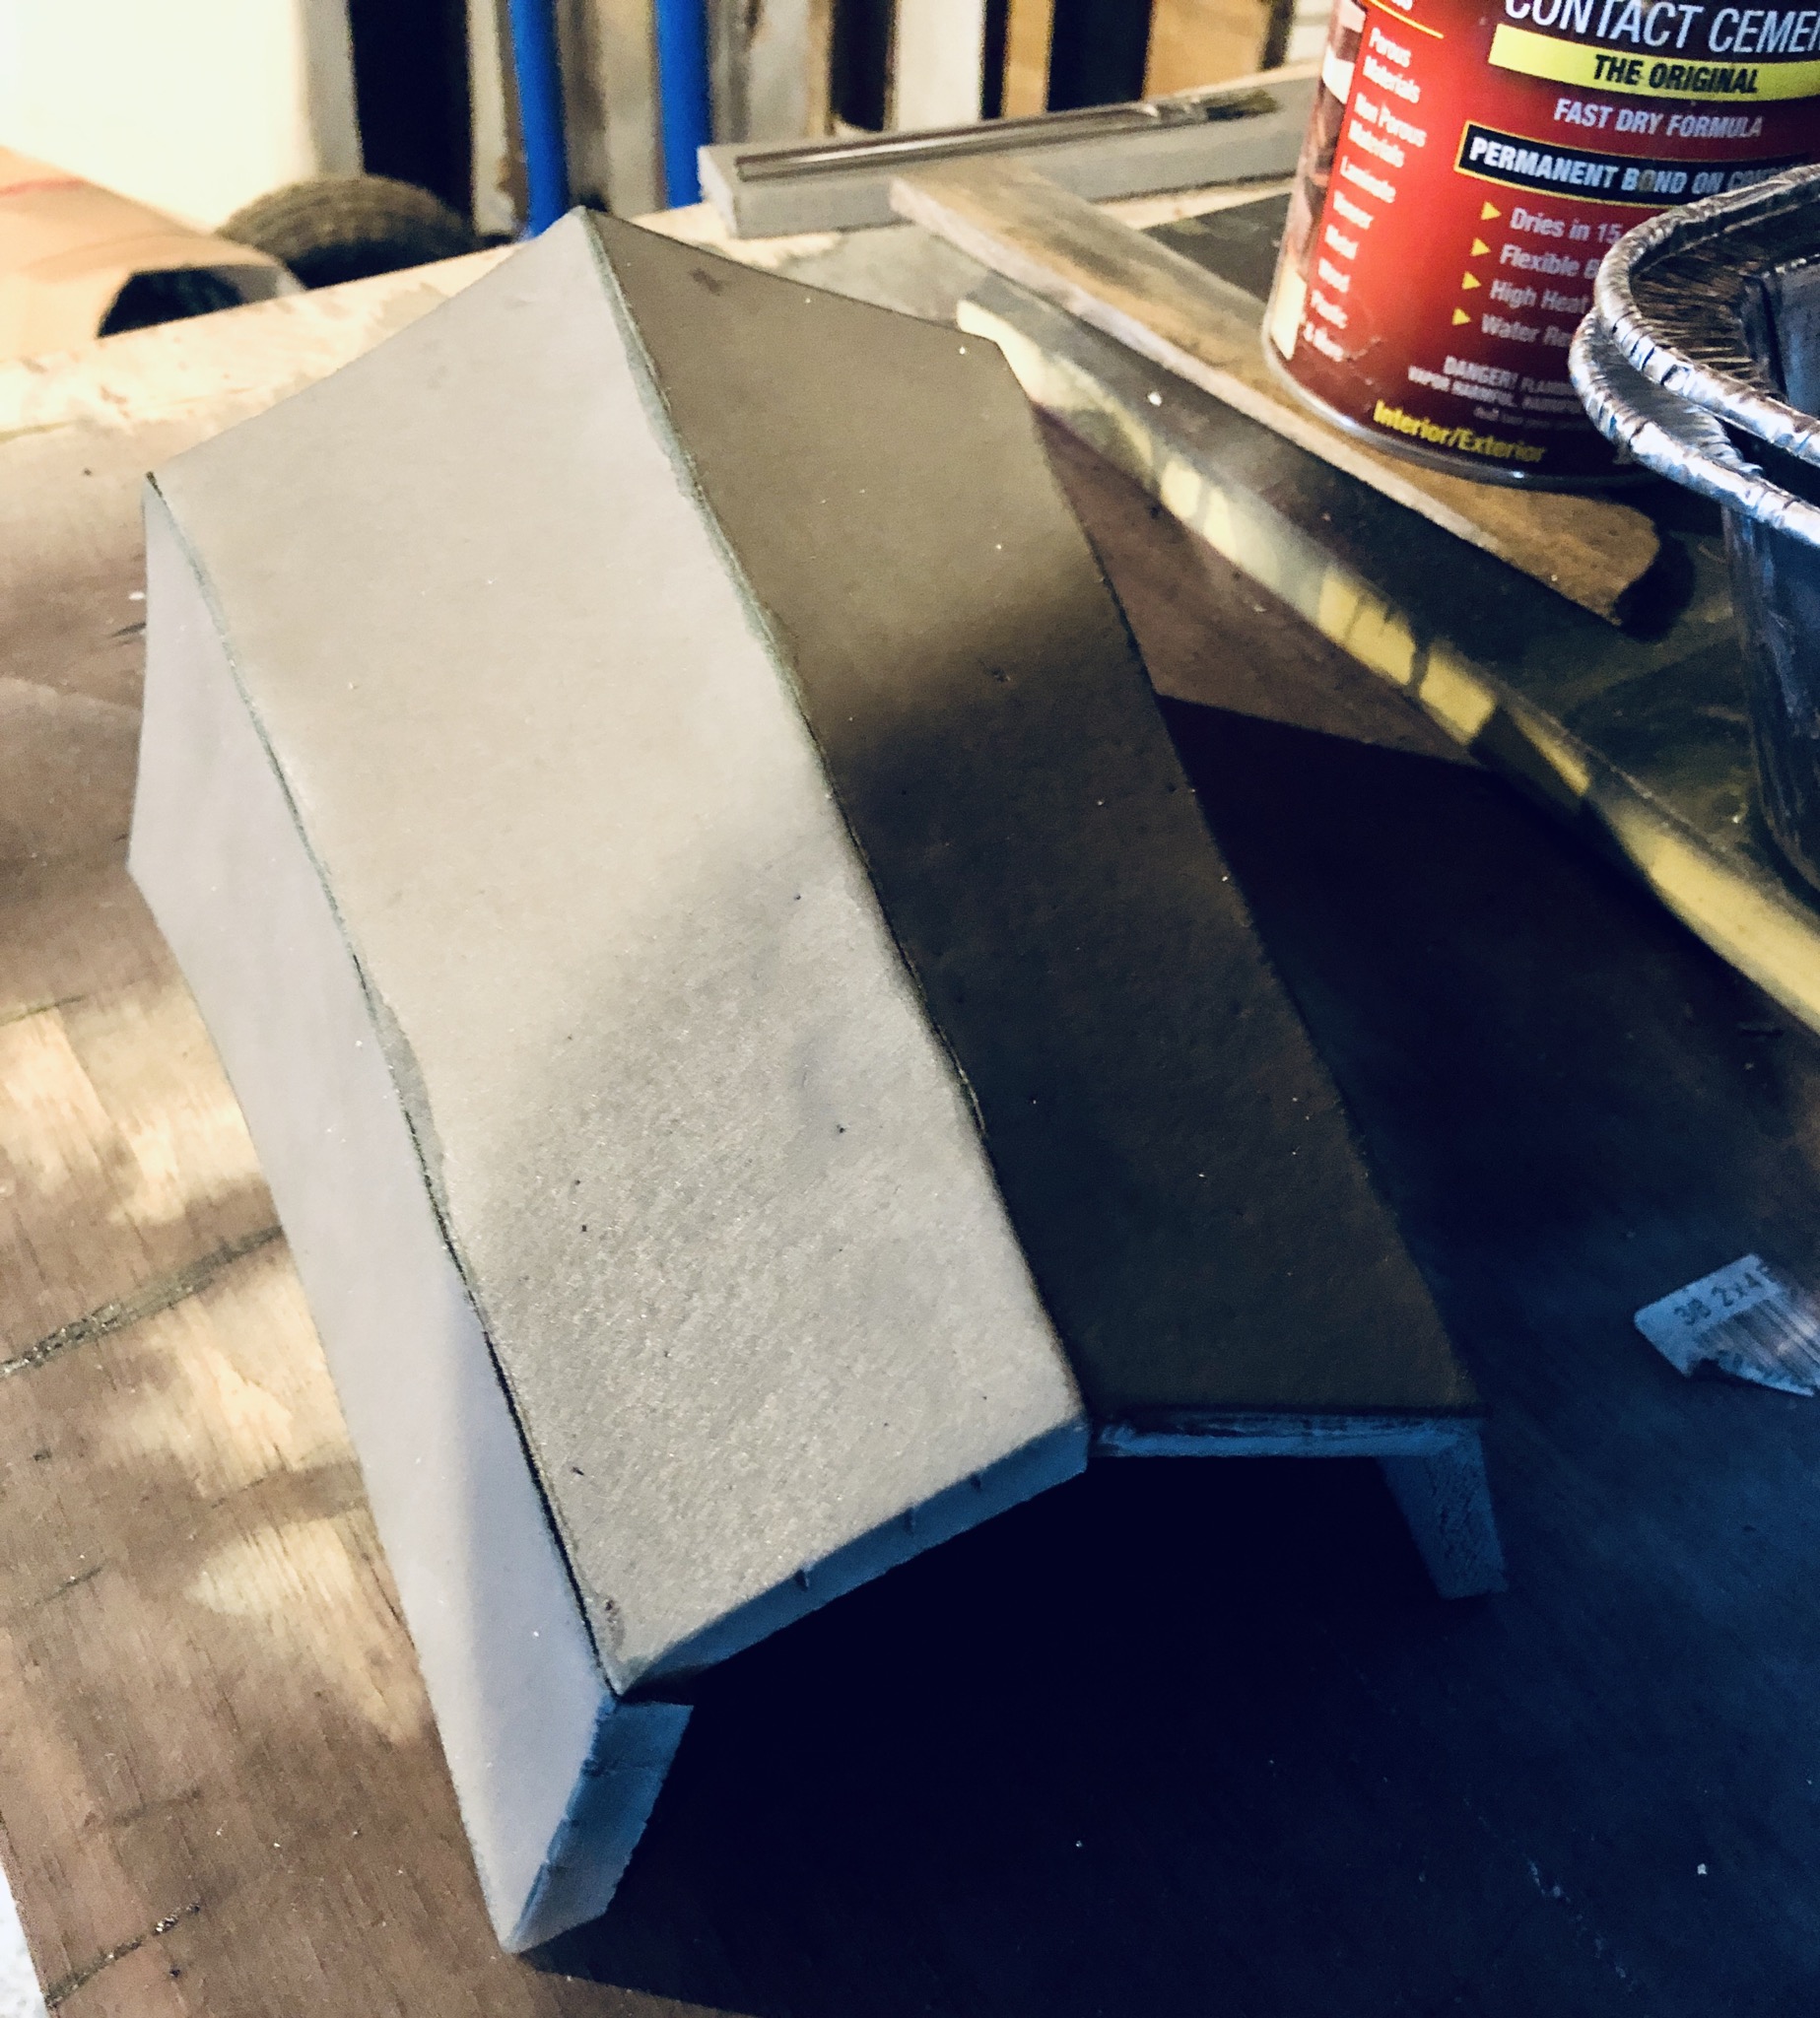
After I cut out my parts on Harbor Freight floor pads (it took 1 and a half pads to make the arms and legs) and glued them up I added the reinforced arm and leg splints from a 4-6 mm shown in black here. To make the rivets and the holes that they fit into, I used a piece of PVC pipe that I sharpened the edge with a belt sander, then pressed that into the foam. for the rivet itself I used the thicker Harbor Freight foam so it stood off the 4-6 mm black foam.
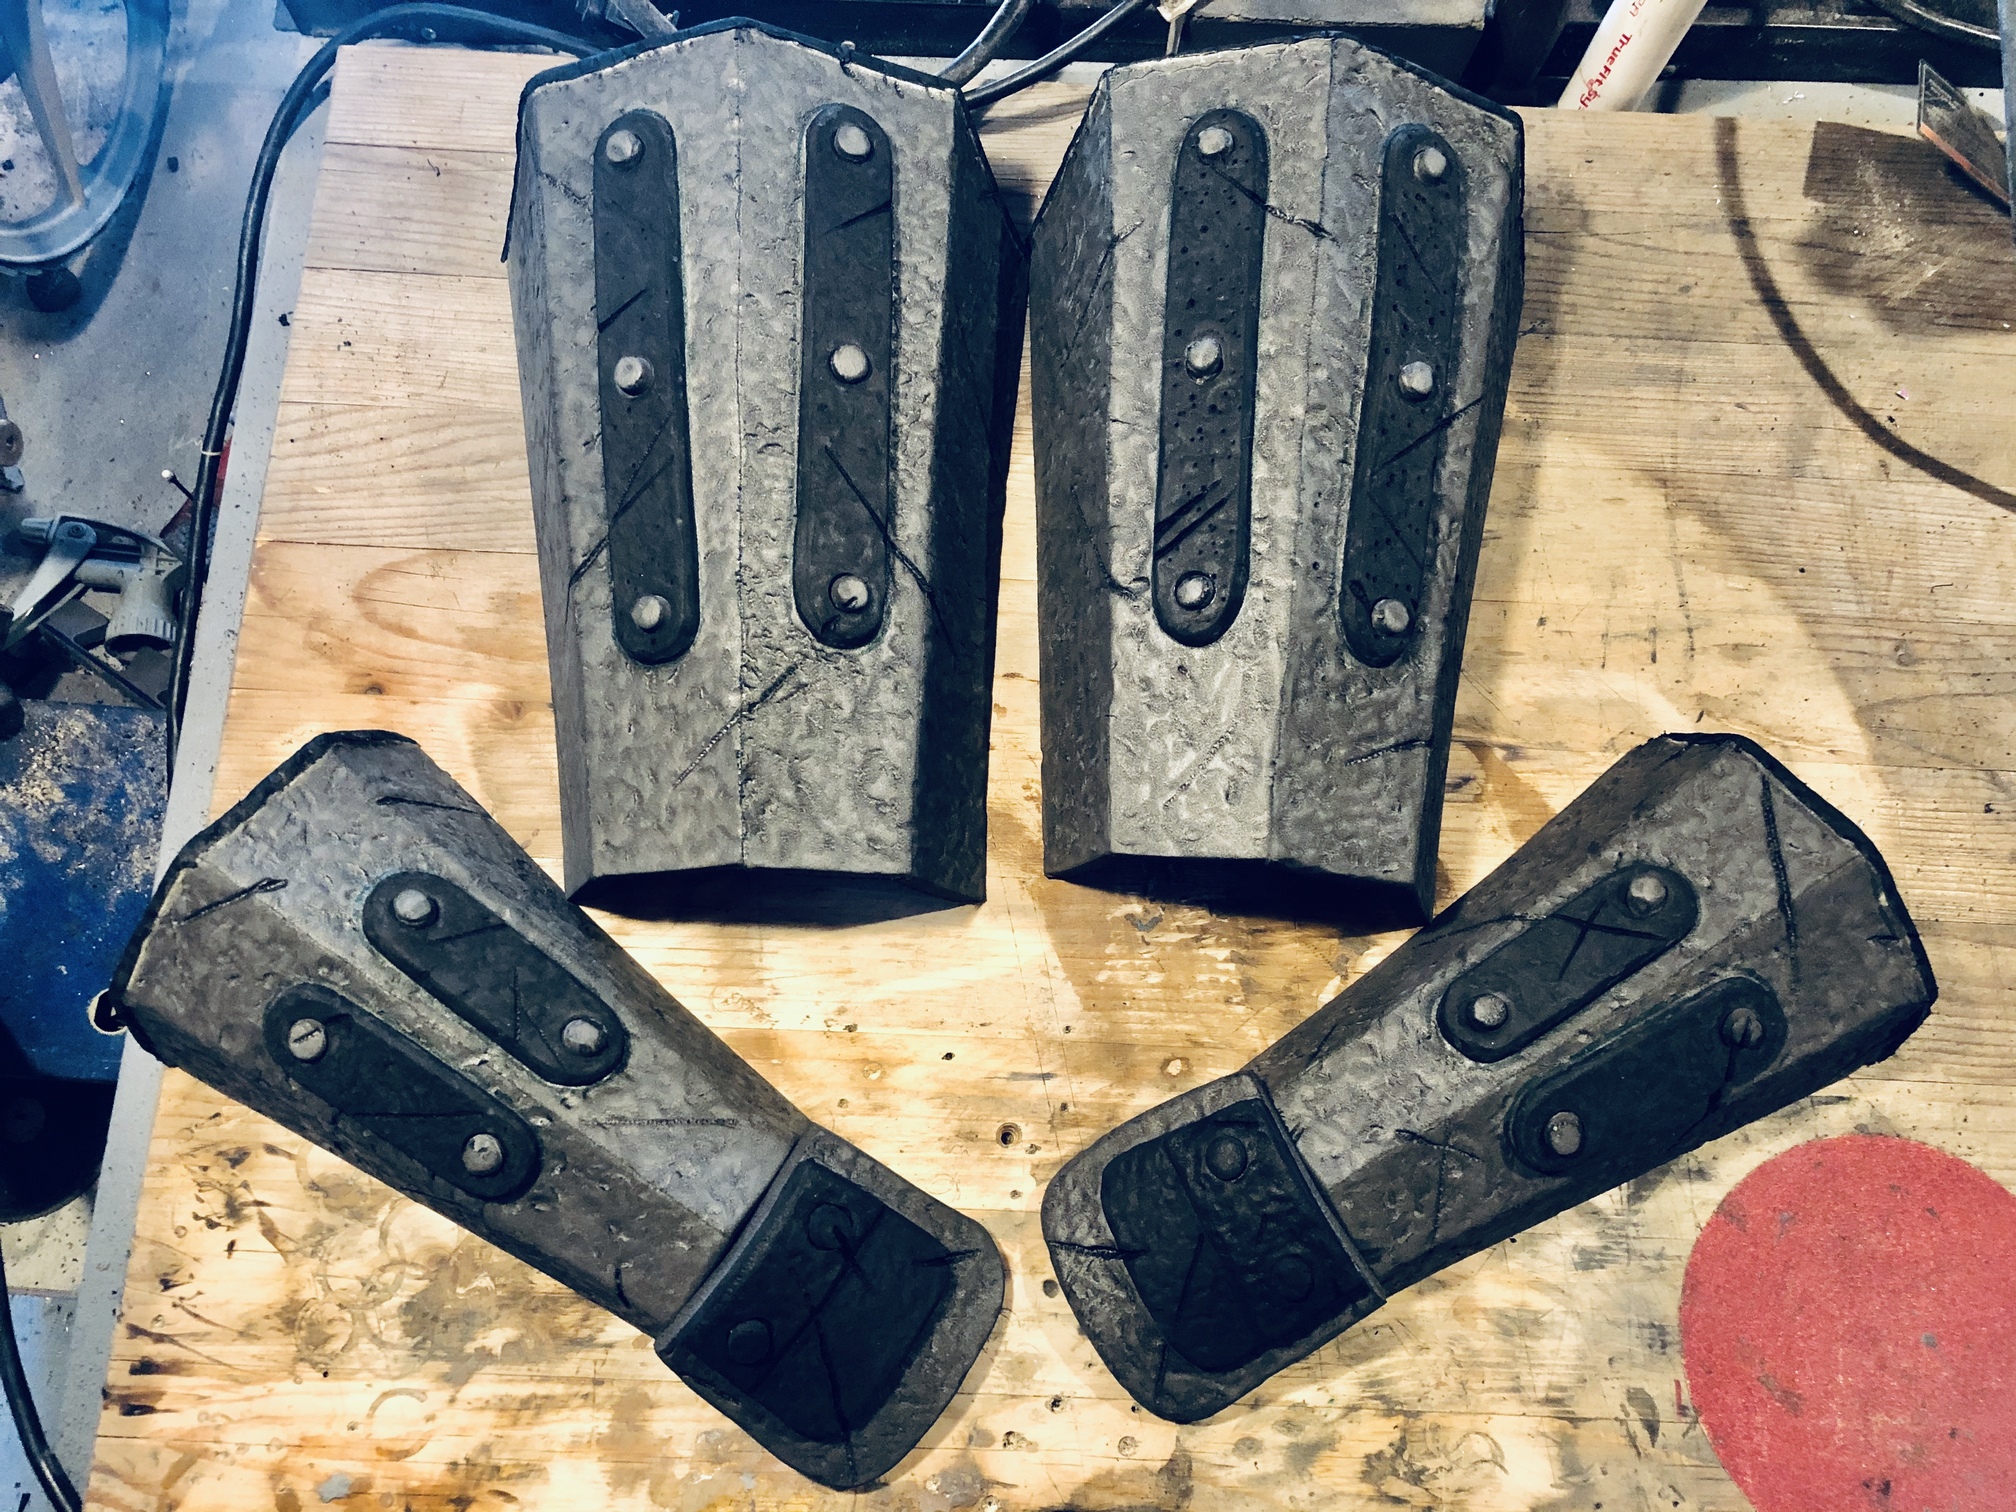
With a stone sanding bit I touched all over the surface to give a pitted metal surface to all the pieces. Though the figure itself didn’t have gashes in the surface, once these were scaled up to human sized, I thought some added details would create some additional interest to the pieces.
It was also at this point that I added to the top edges of the parts a 2mm foam cap to give the look of a rolled, hammered edge. This was not added in the template as everyones final glue up is going to vary, so once you glue up your parts, place the top edge on a piece of thin foam and generously trace the shape and glue to the top edge.
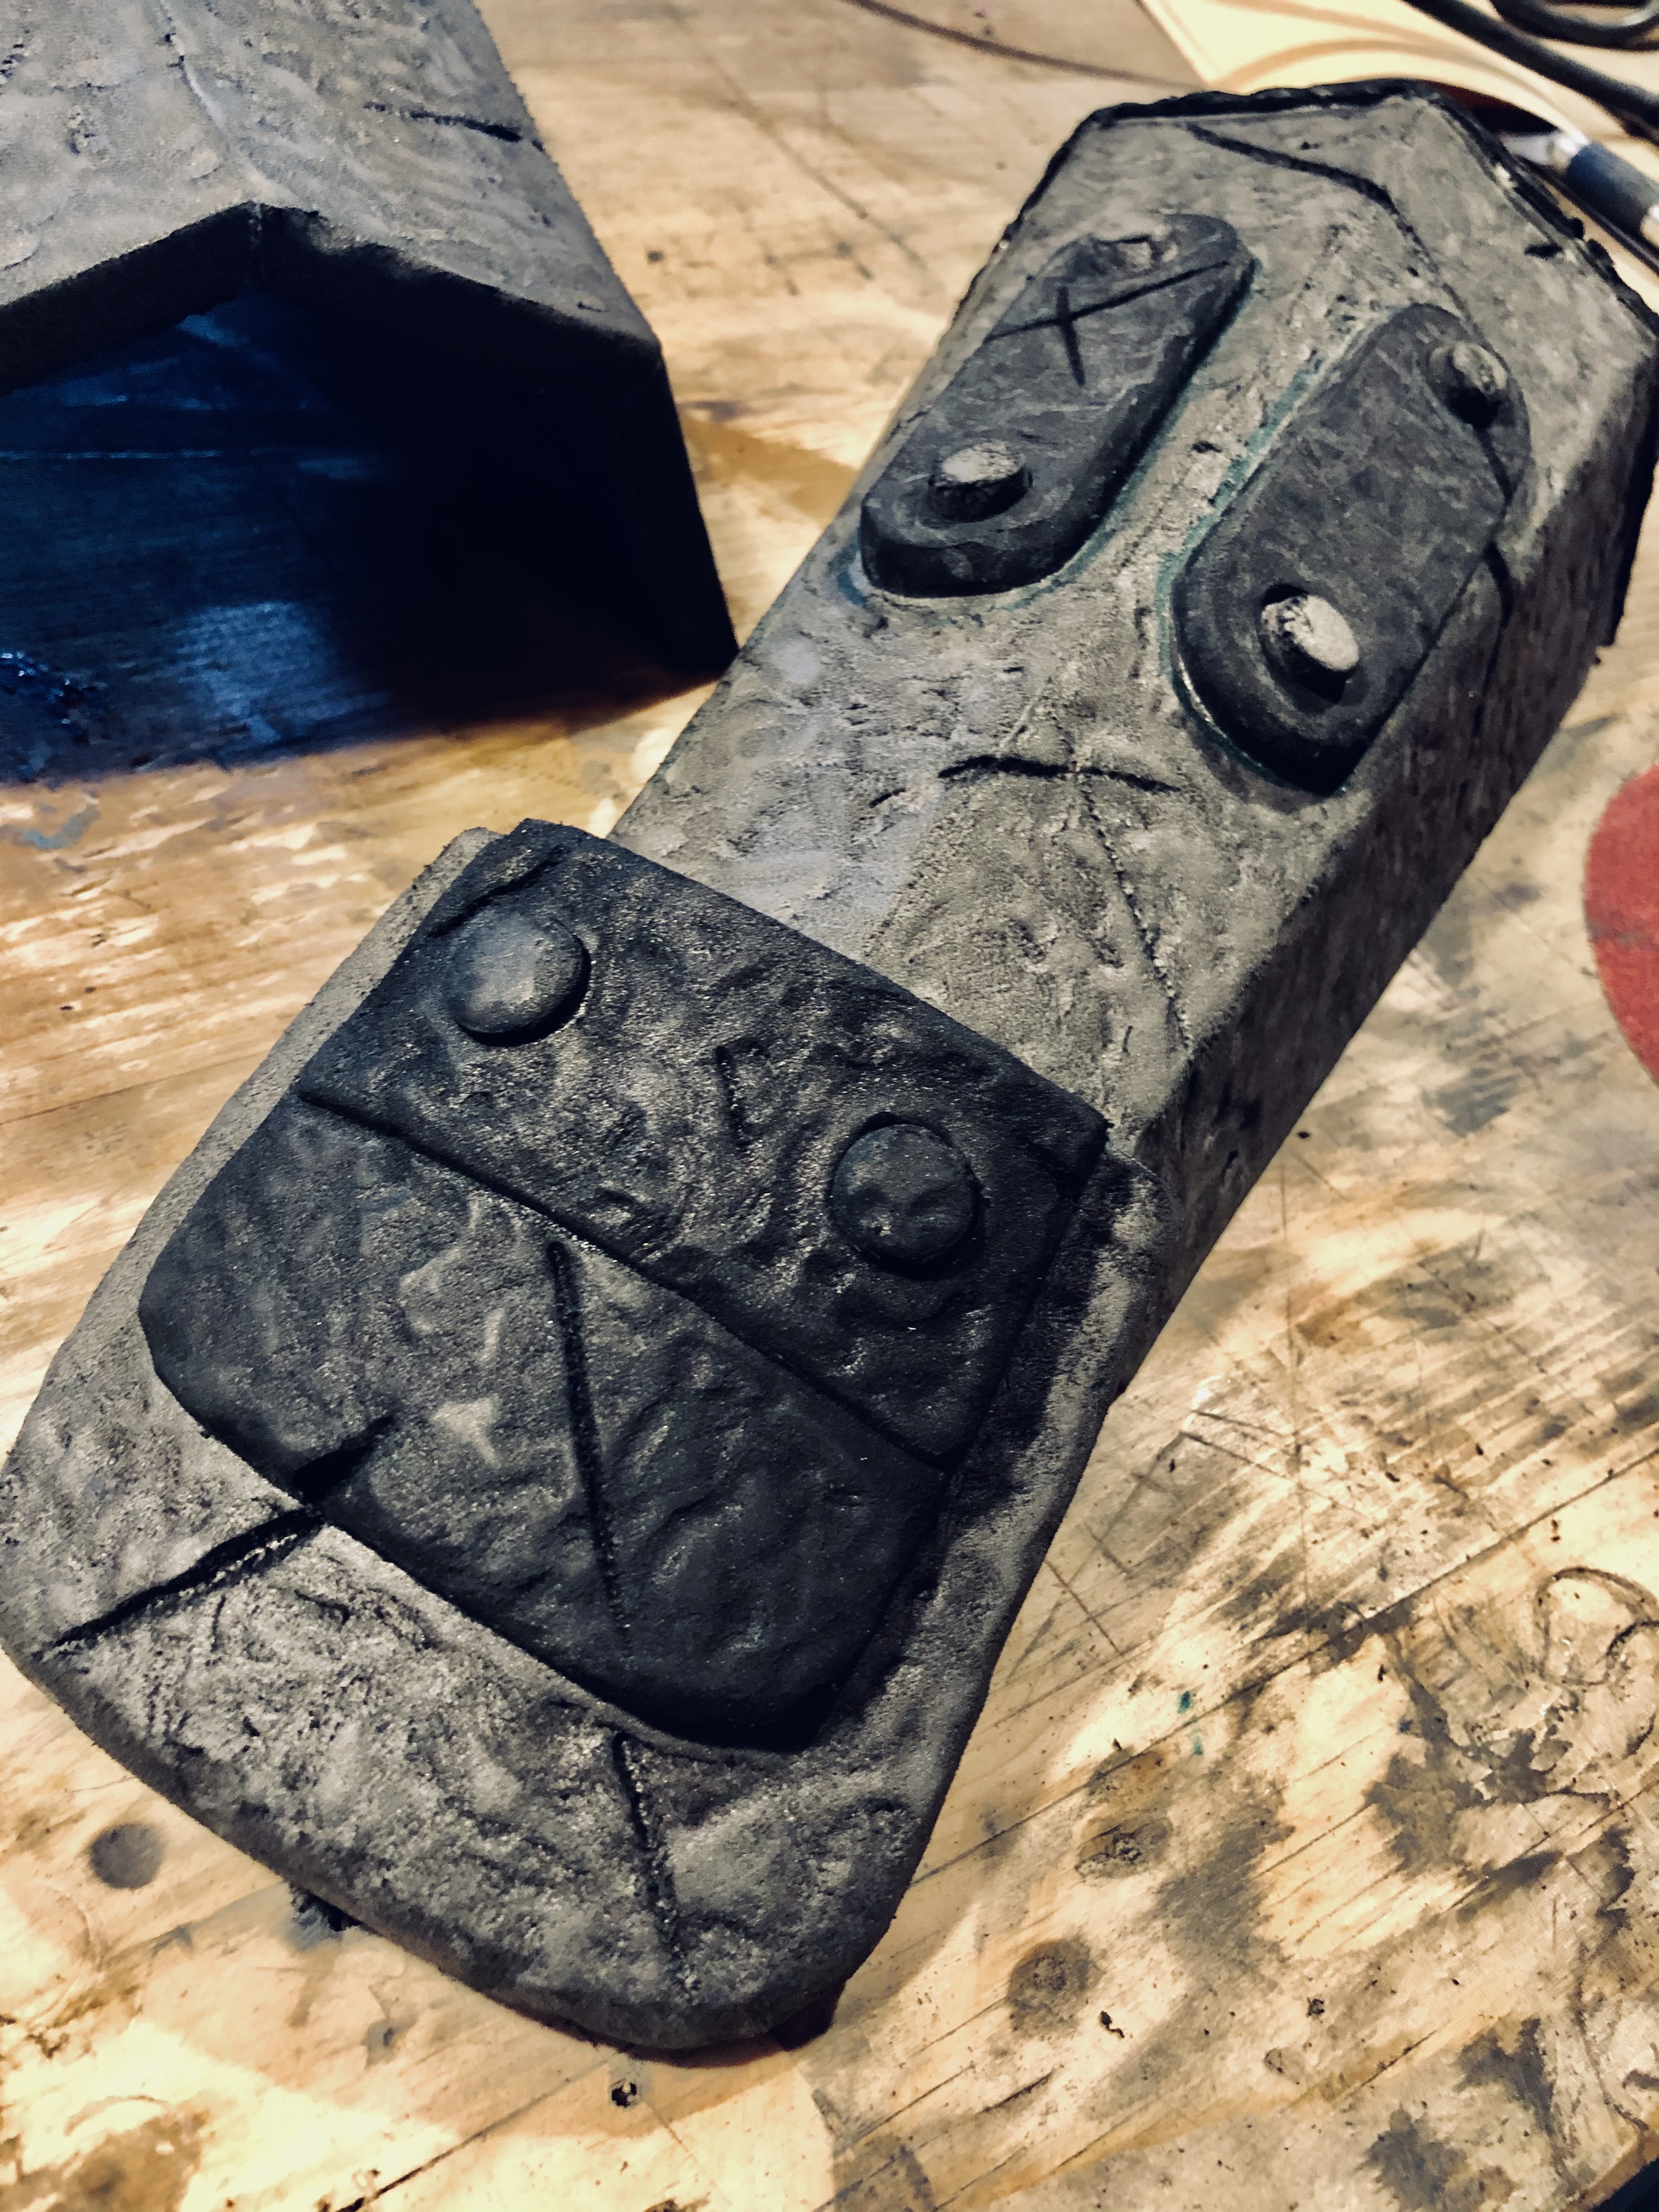
To get the cracks/cuts I used a wood burner tool. The heat will open up the foam pretty easy and quickly. You could also use a soldering iron as well if you don’t have a cheap wood burner, but if you find yourself at Harbor Freight, you can grab the wood burning tool for probably $5-6.
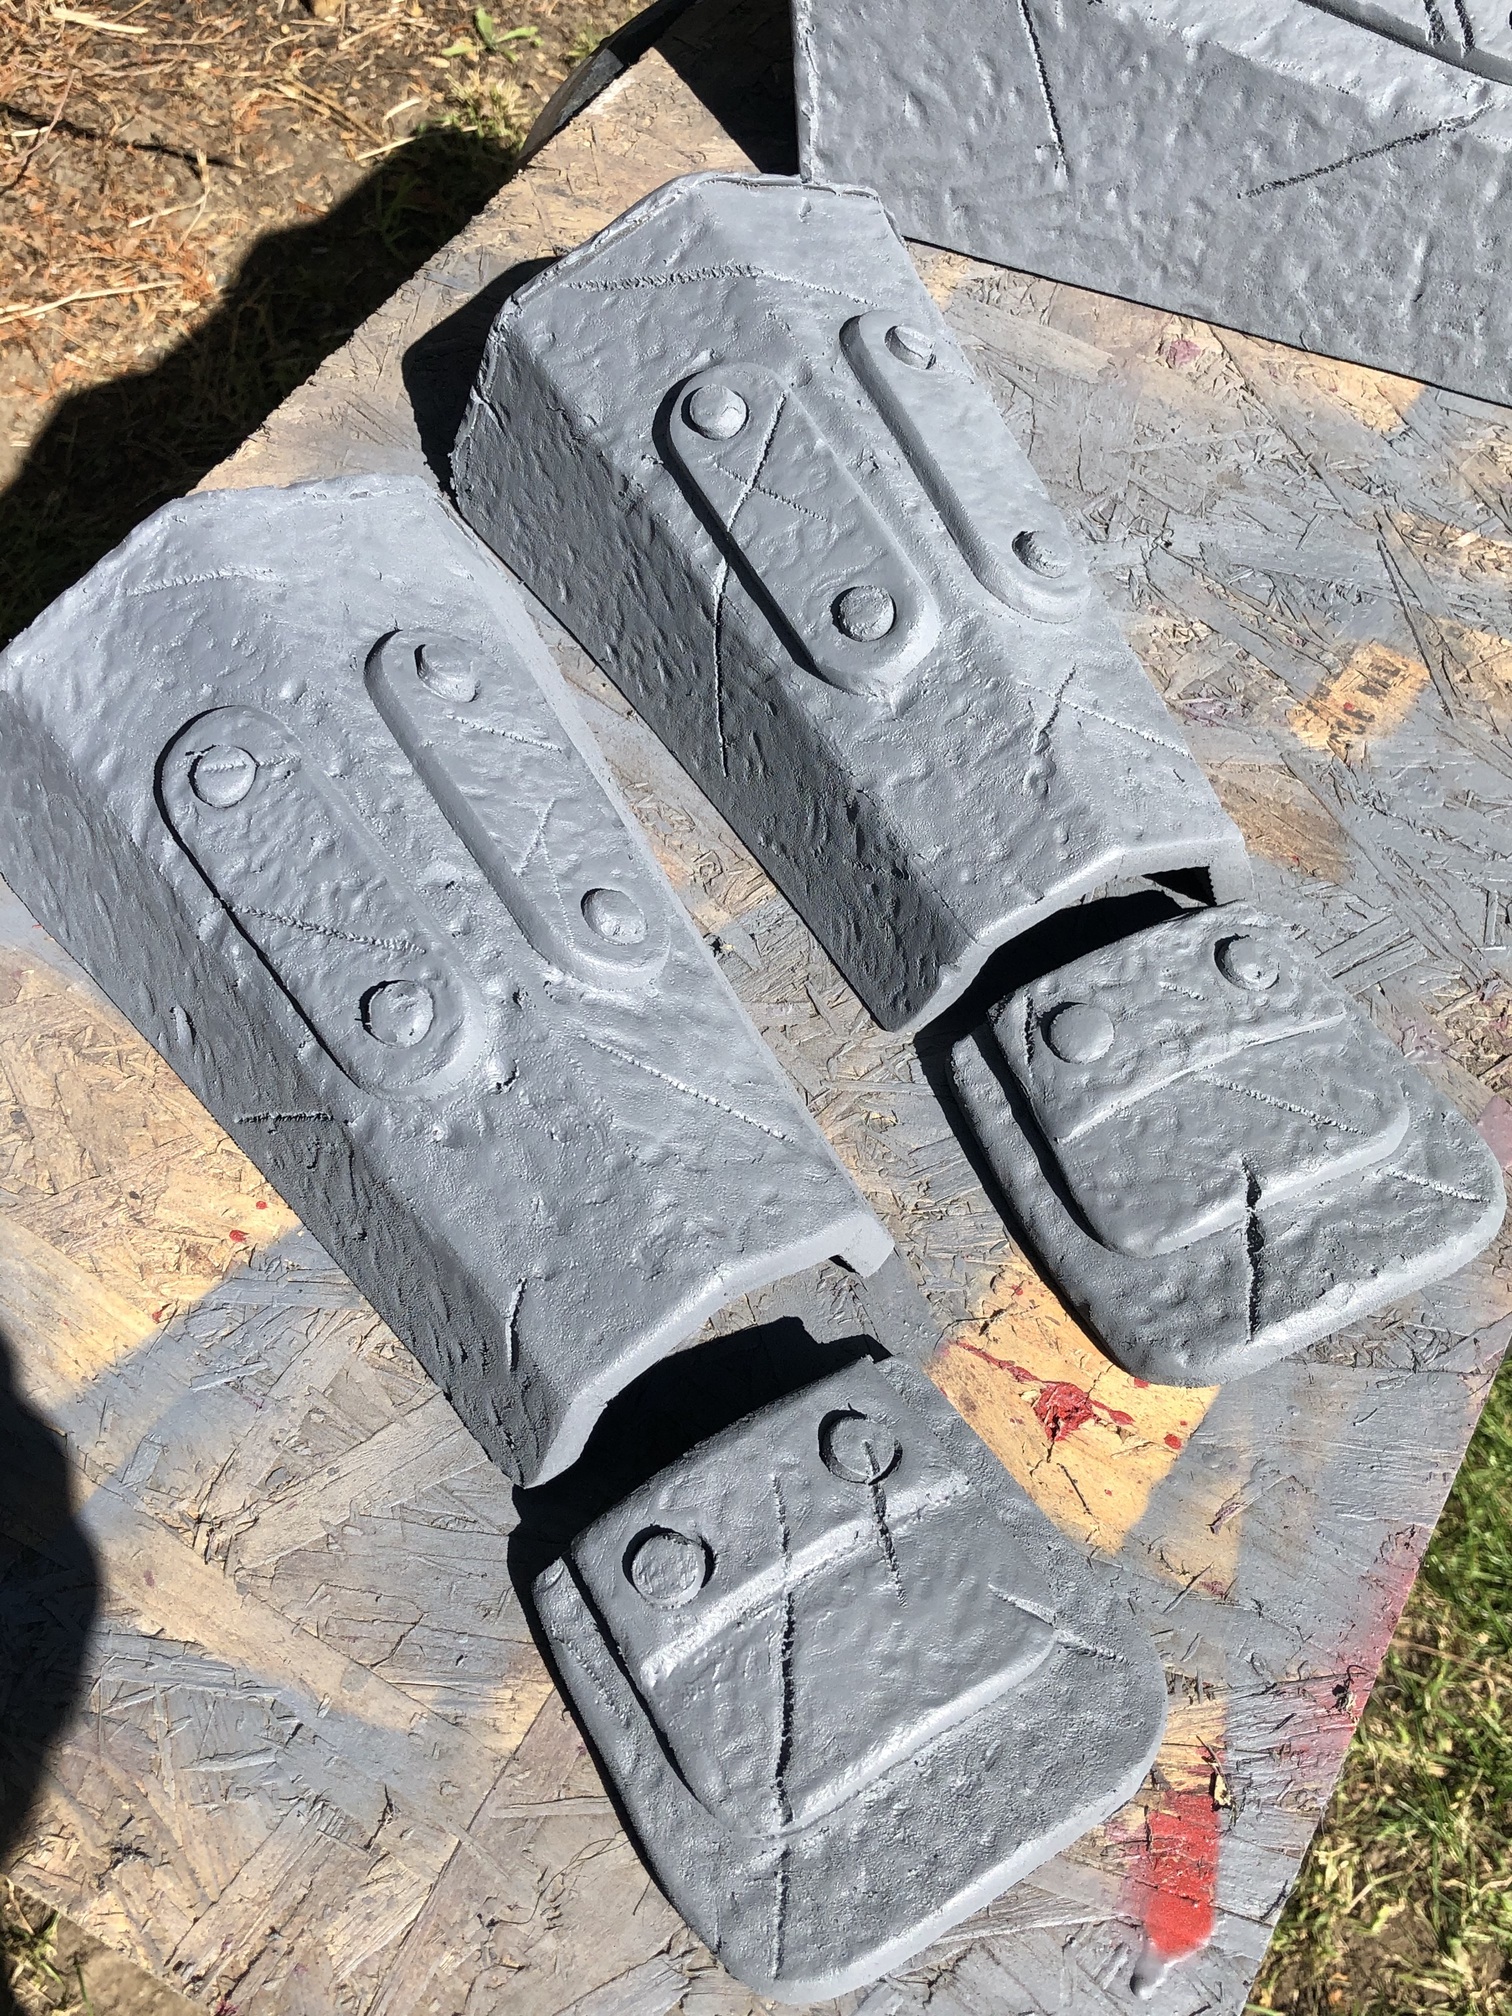
After all the surface work was done I shot it with PlastiDip with a few coats and then sprayed a base layer of Rustoleum Bronze that I had left over from a home improvement project.
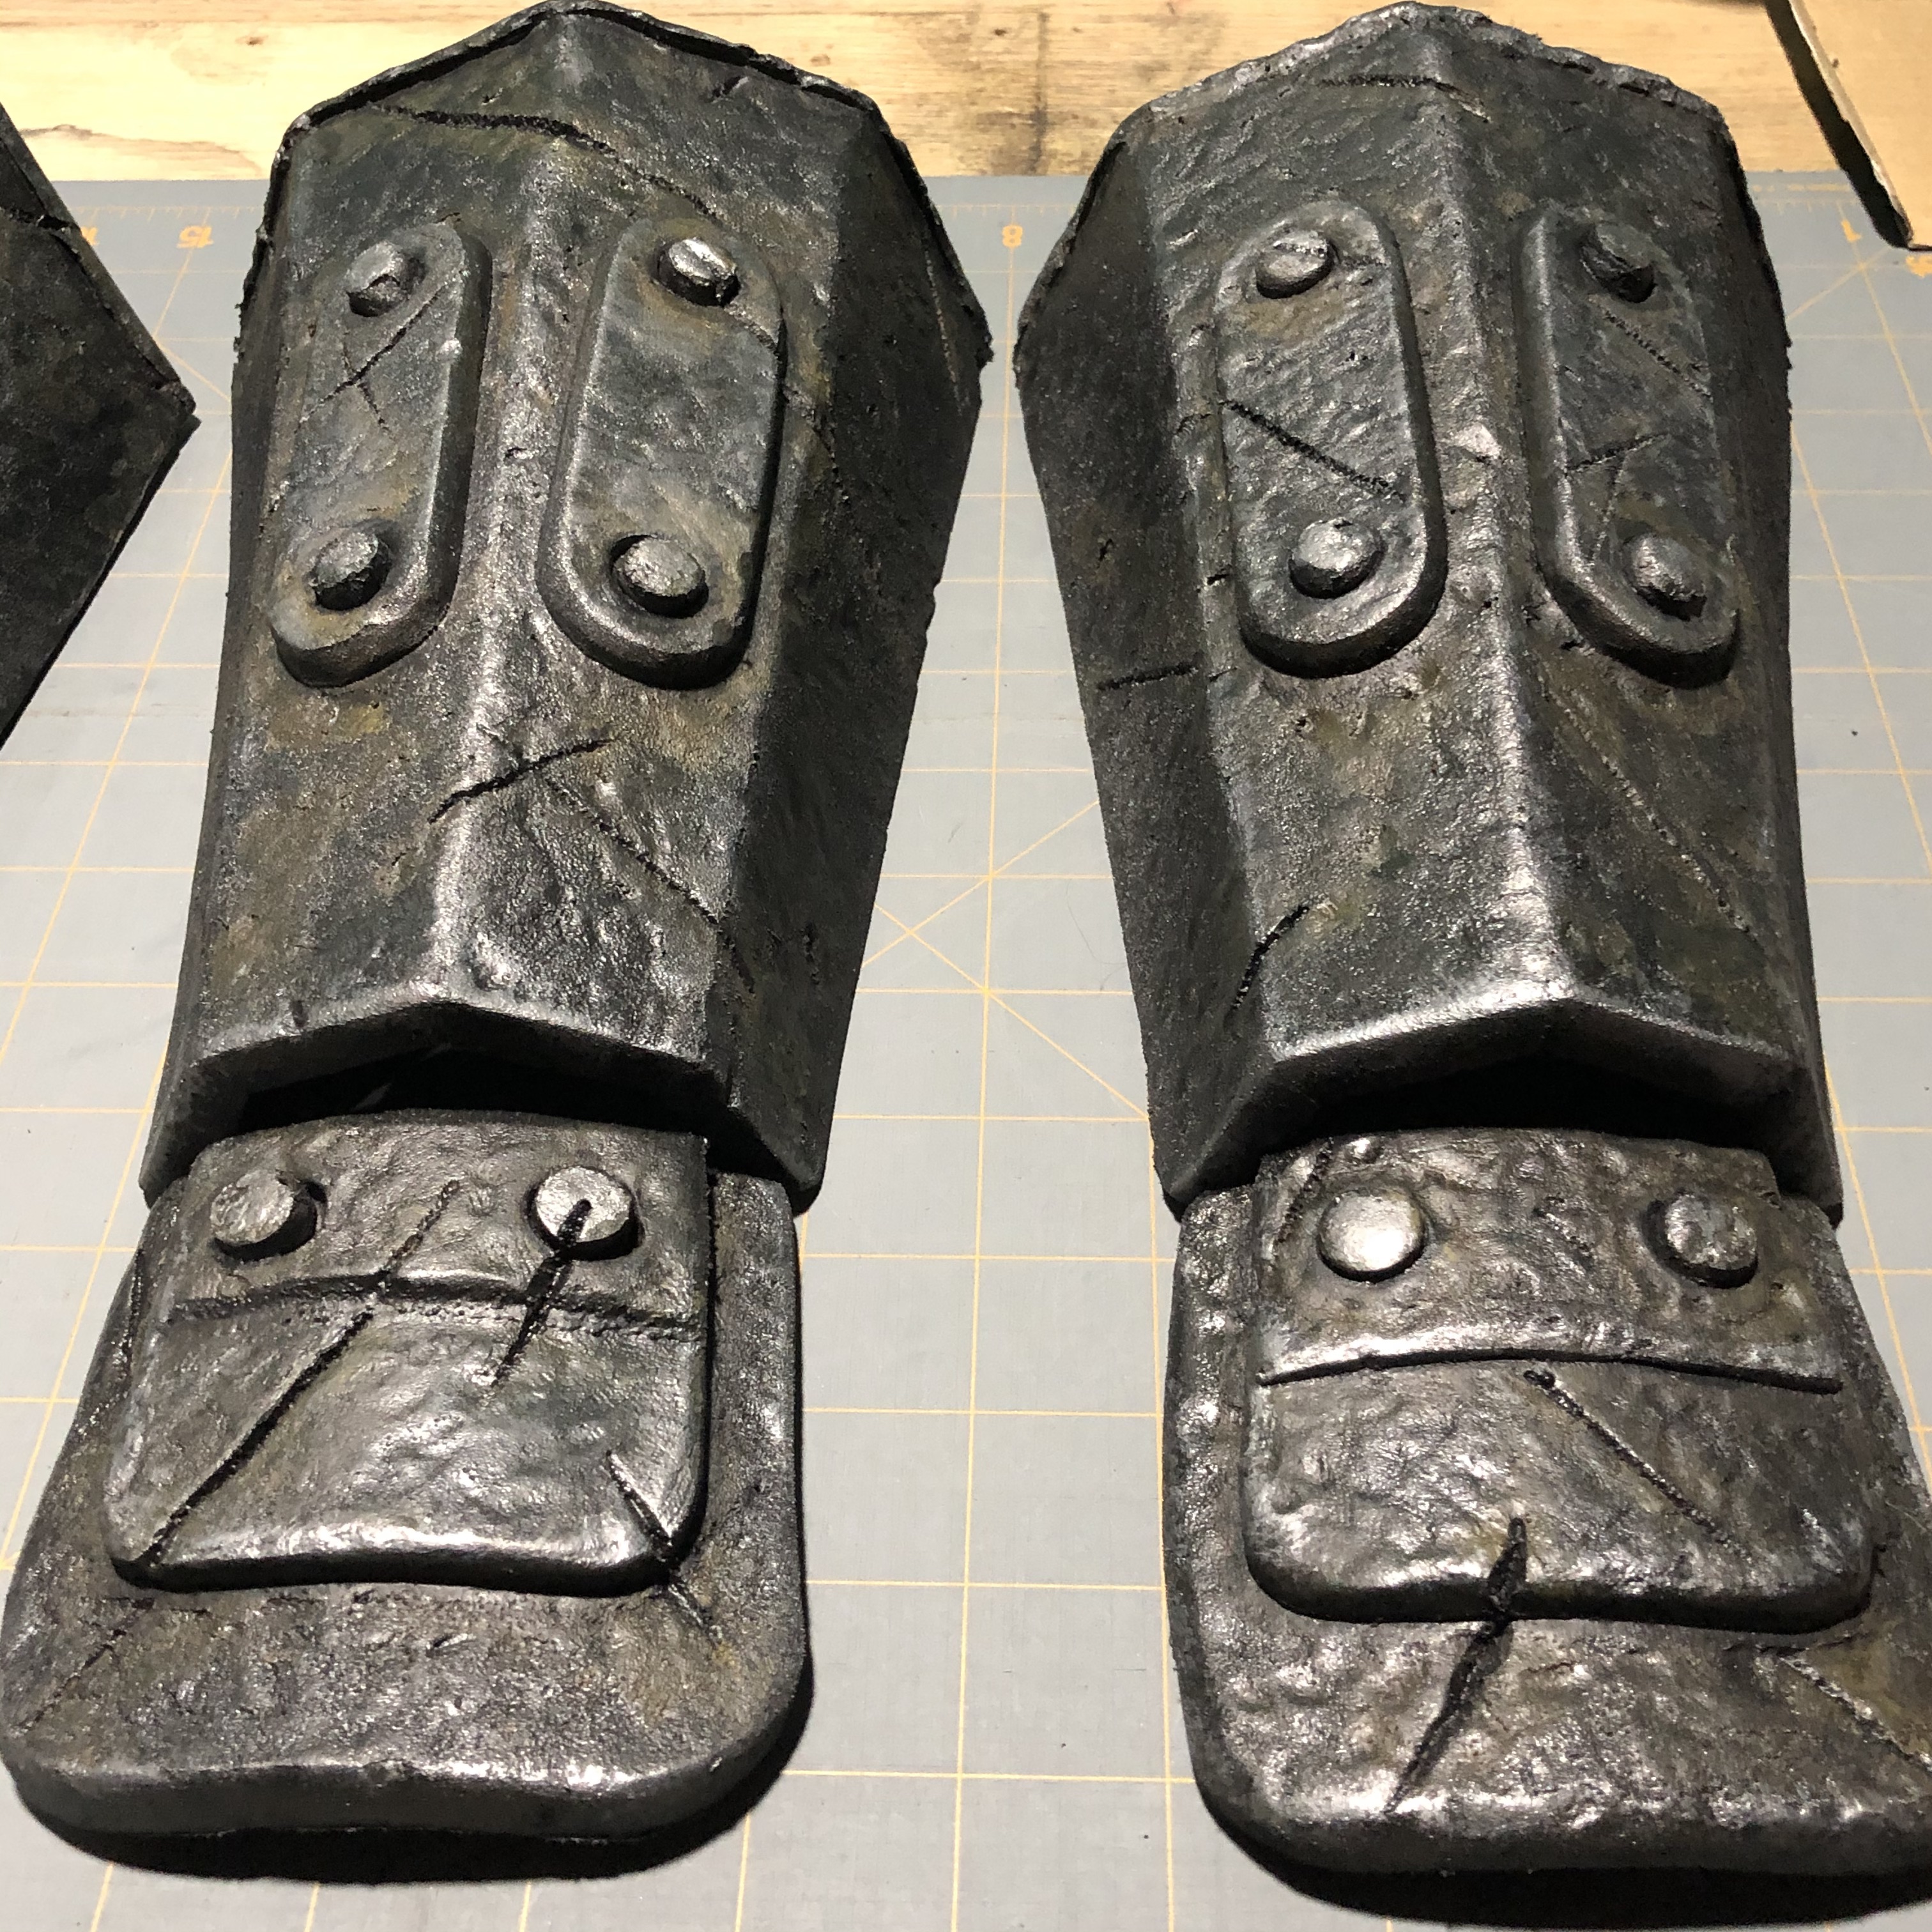
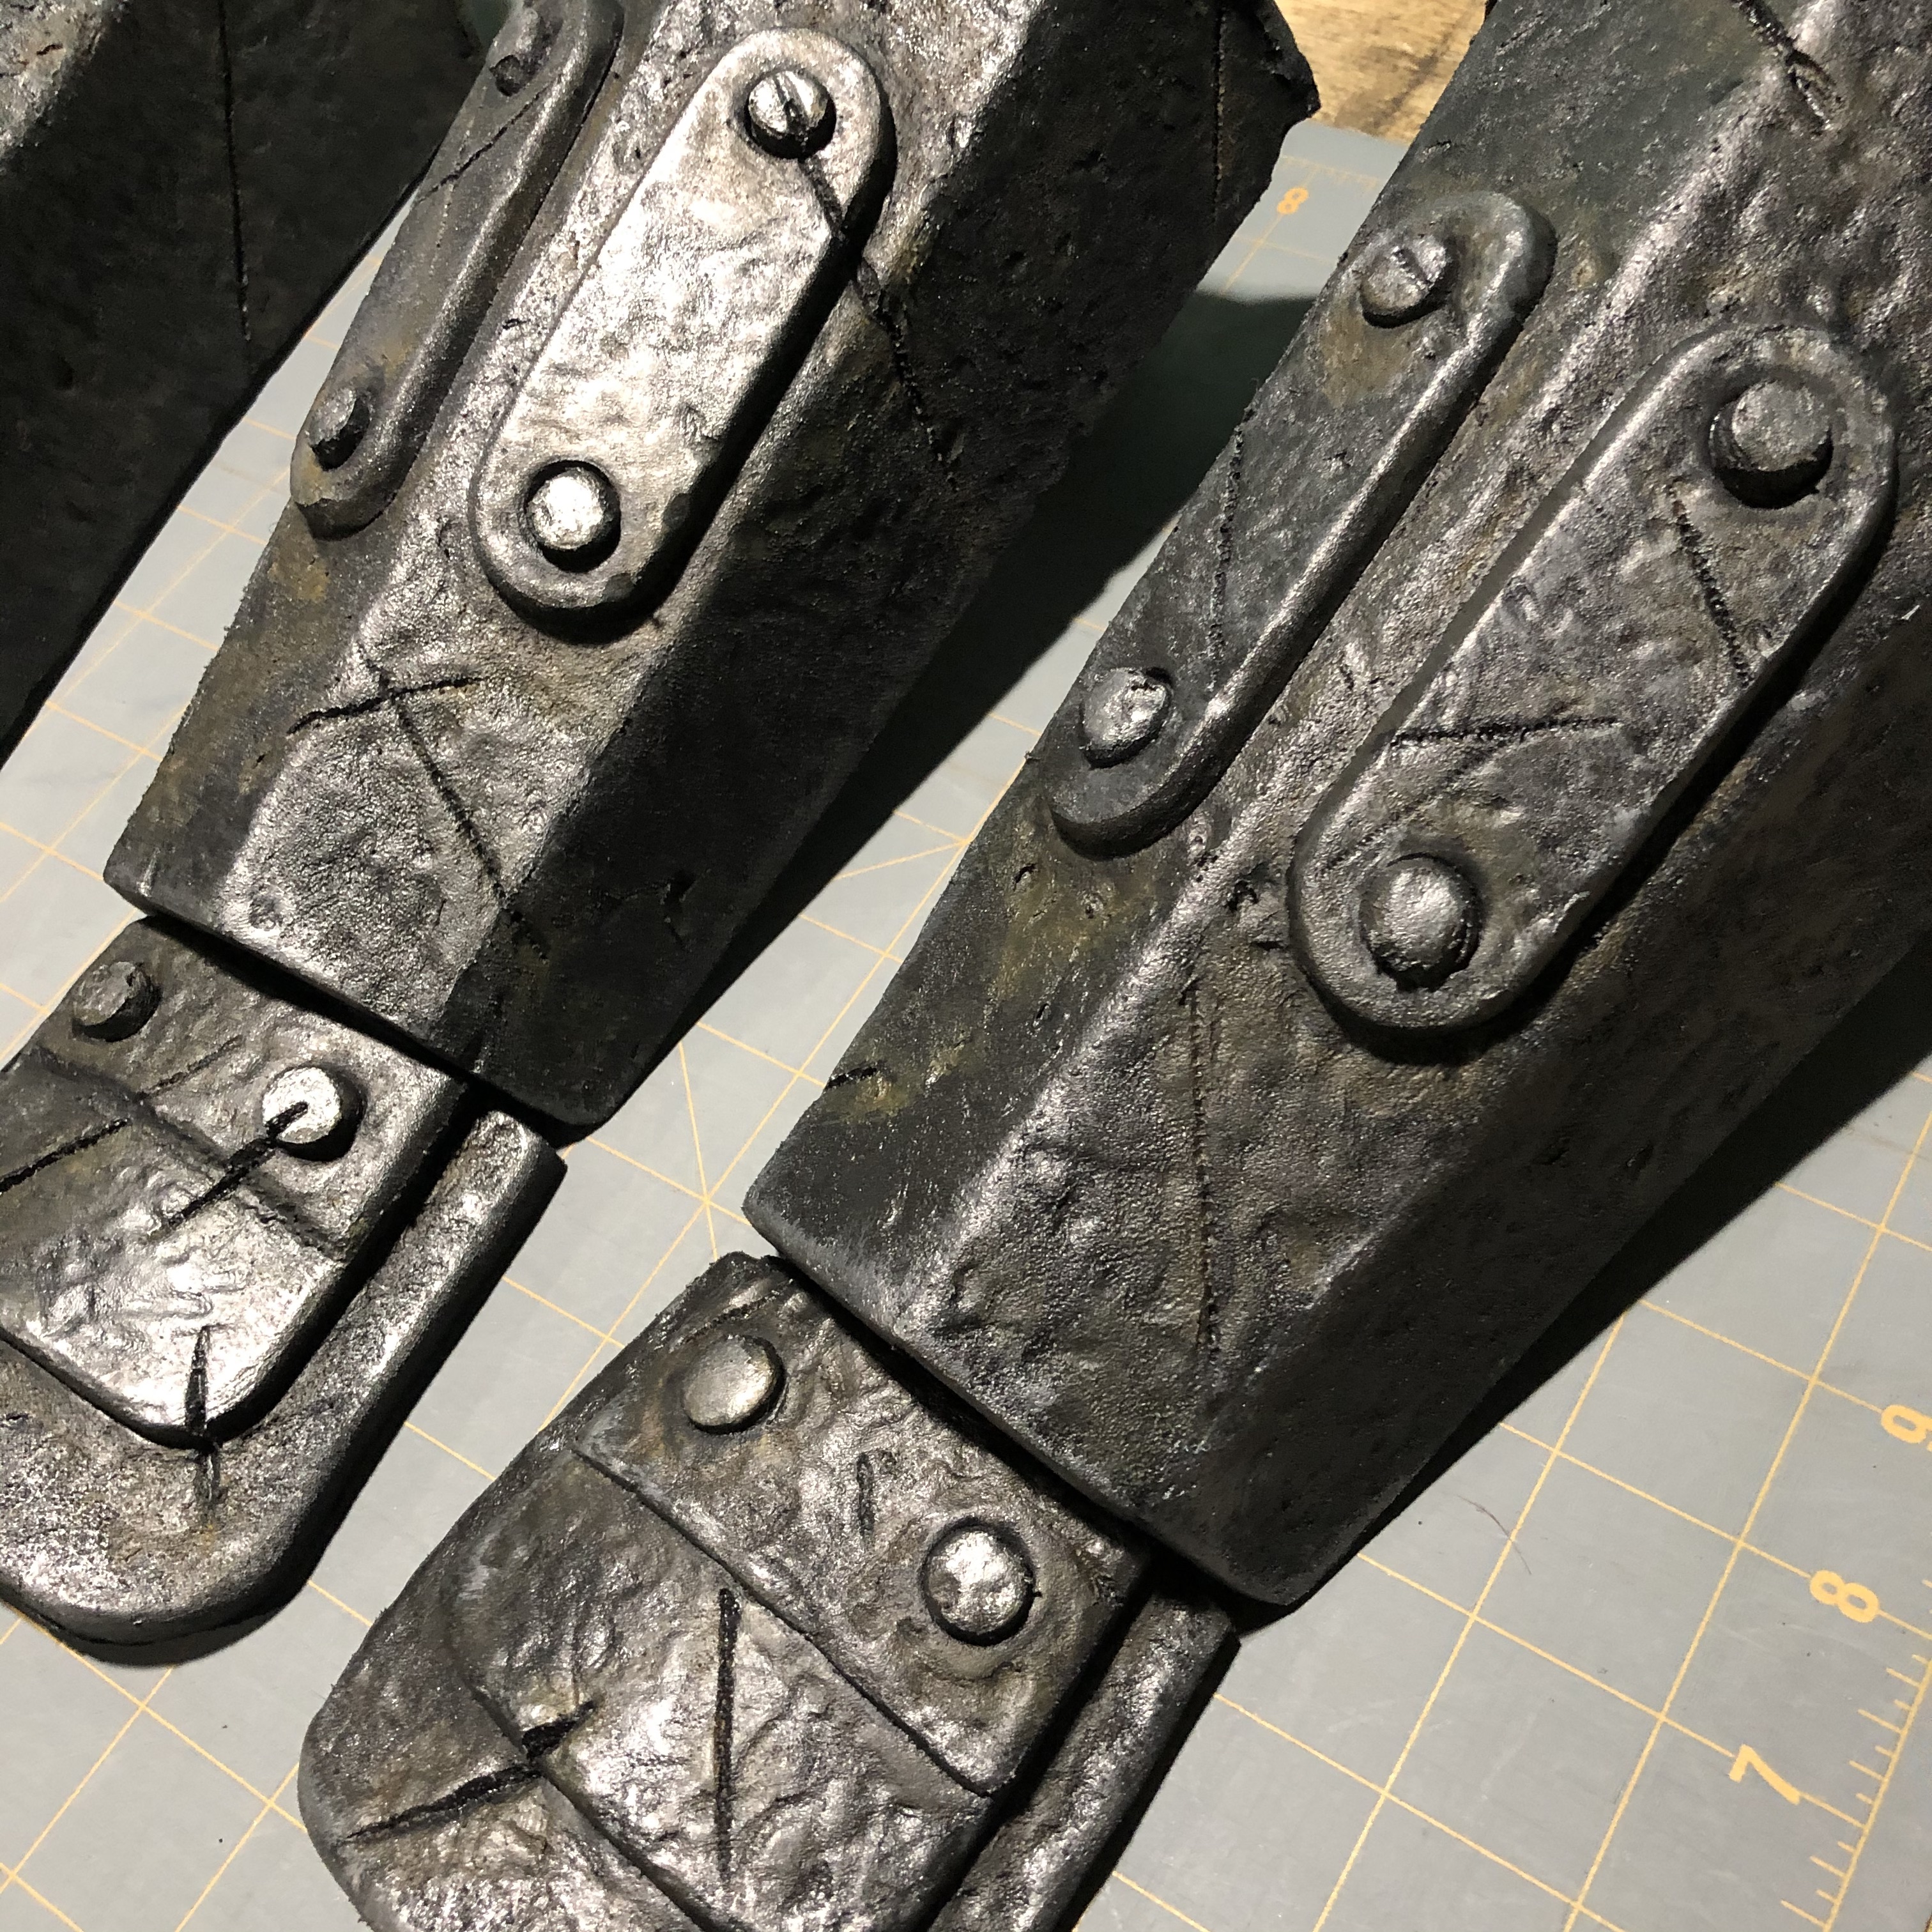
After the base coat was dry it could have been left as is and look decent, but I really wanted to try and the tips and tricks I’ve picked up. I did a wash of black (black acrylic paint plus water) around all the cracks and crevasses. I did a second wash of “rust” which was a could of oranges and browns mixed with water over the surface. Lastly, I did a dry brush of bright sliver on the edges to make the edges pop.
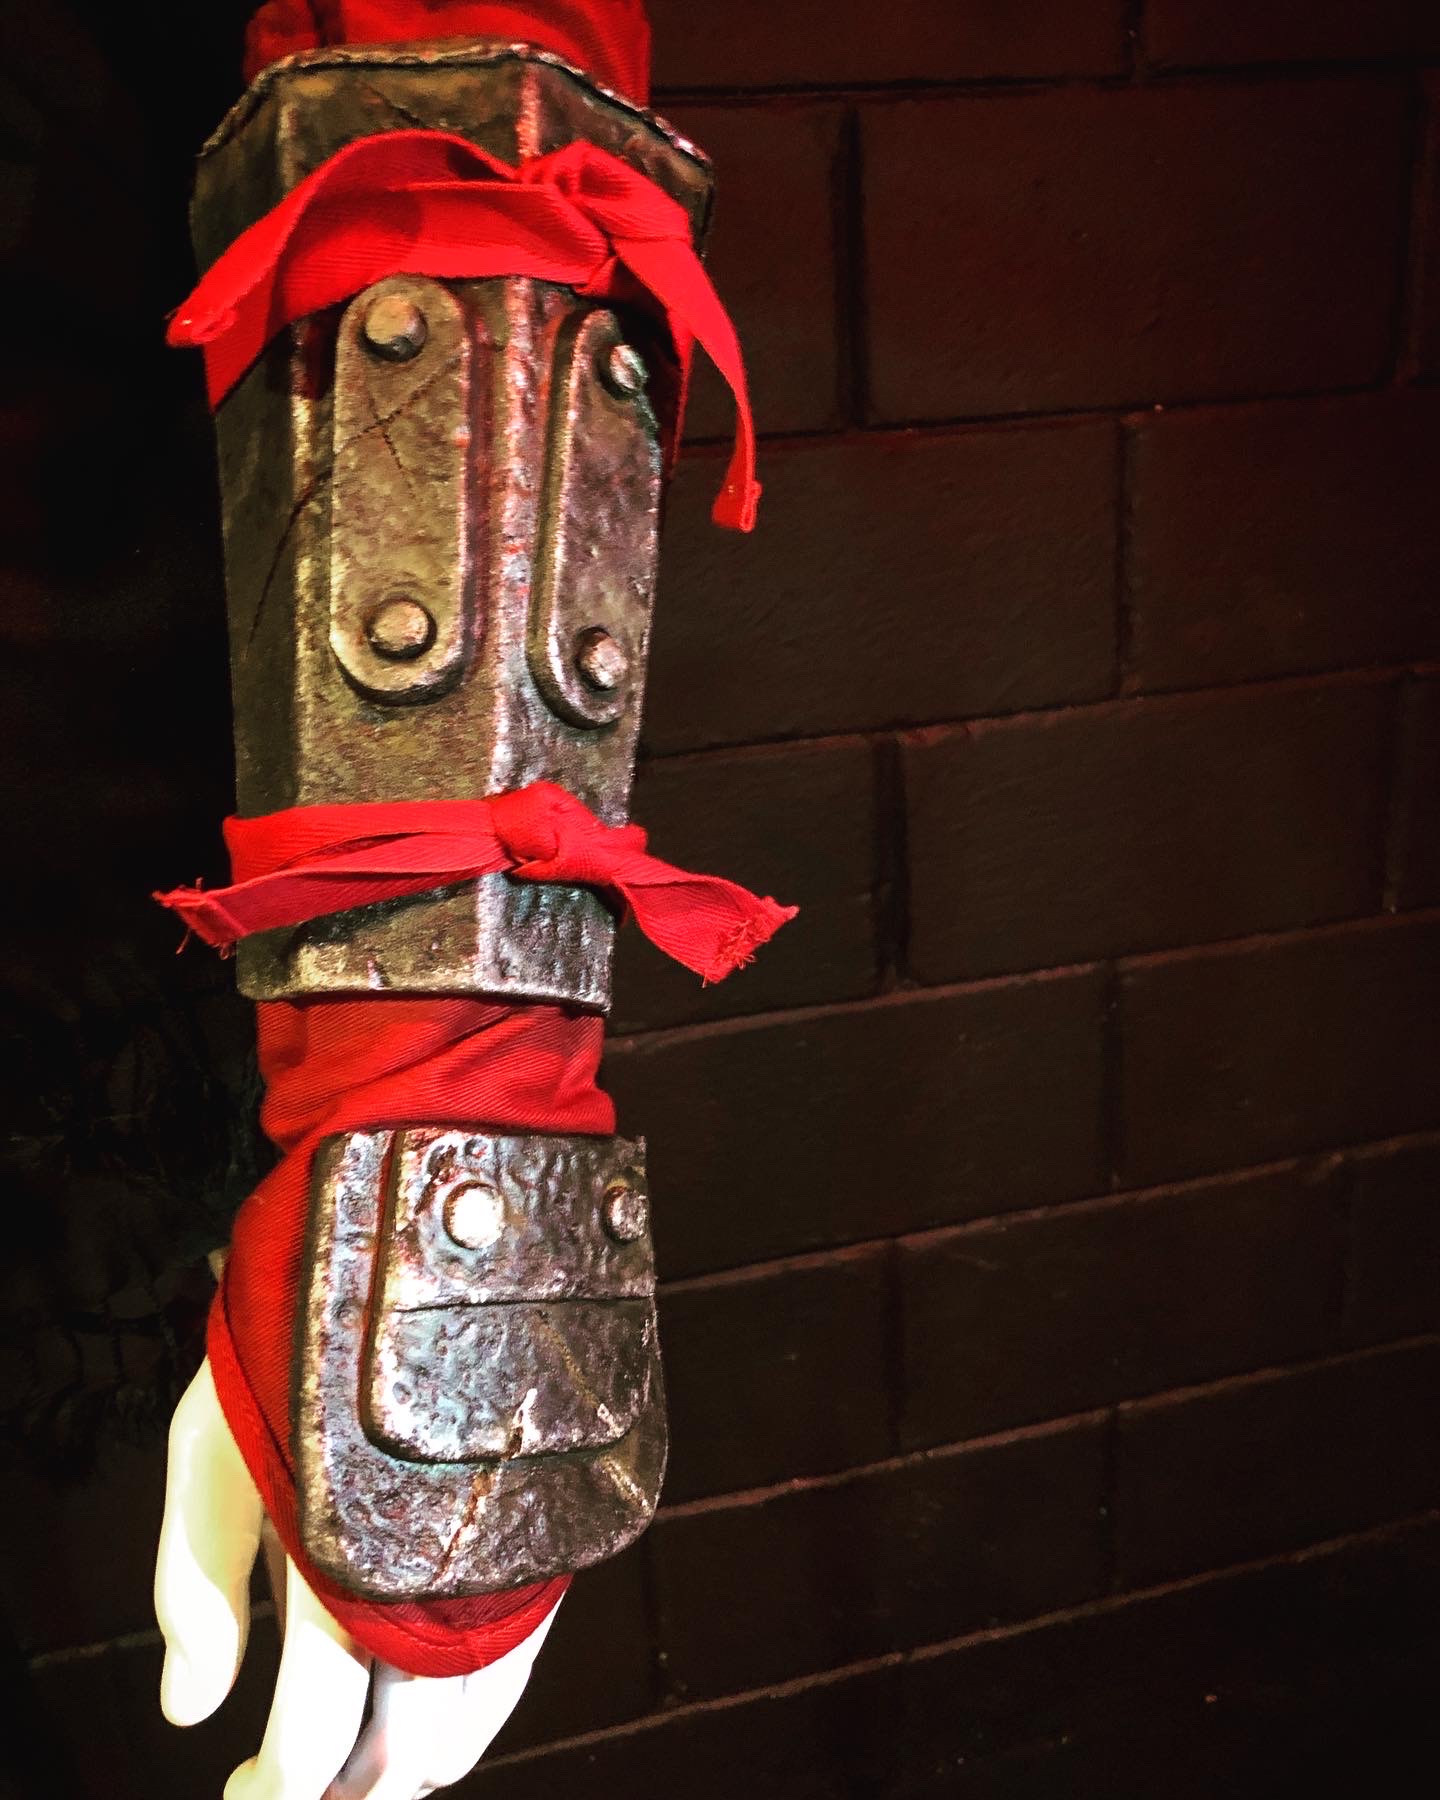
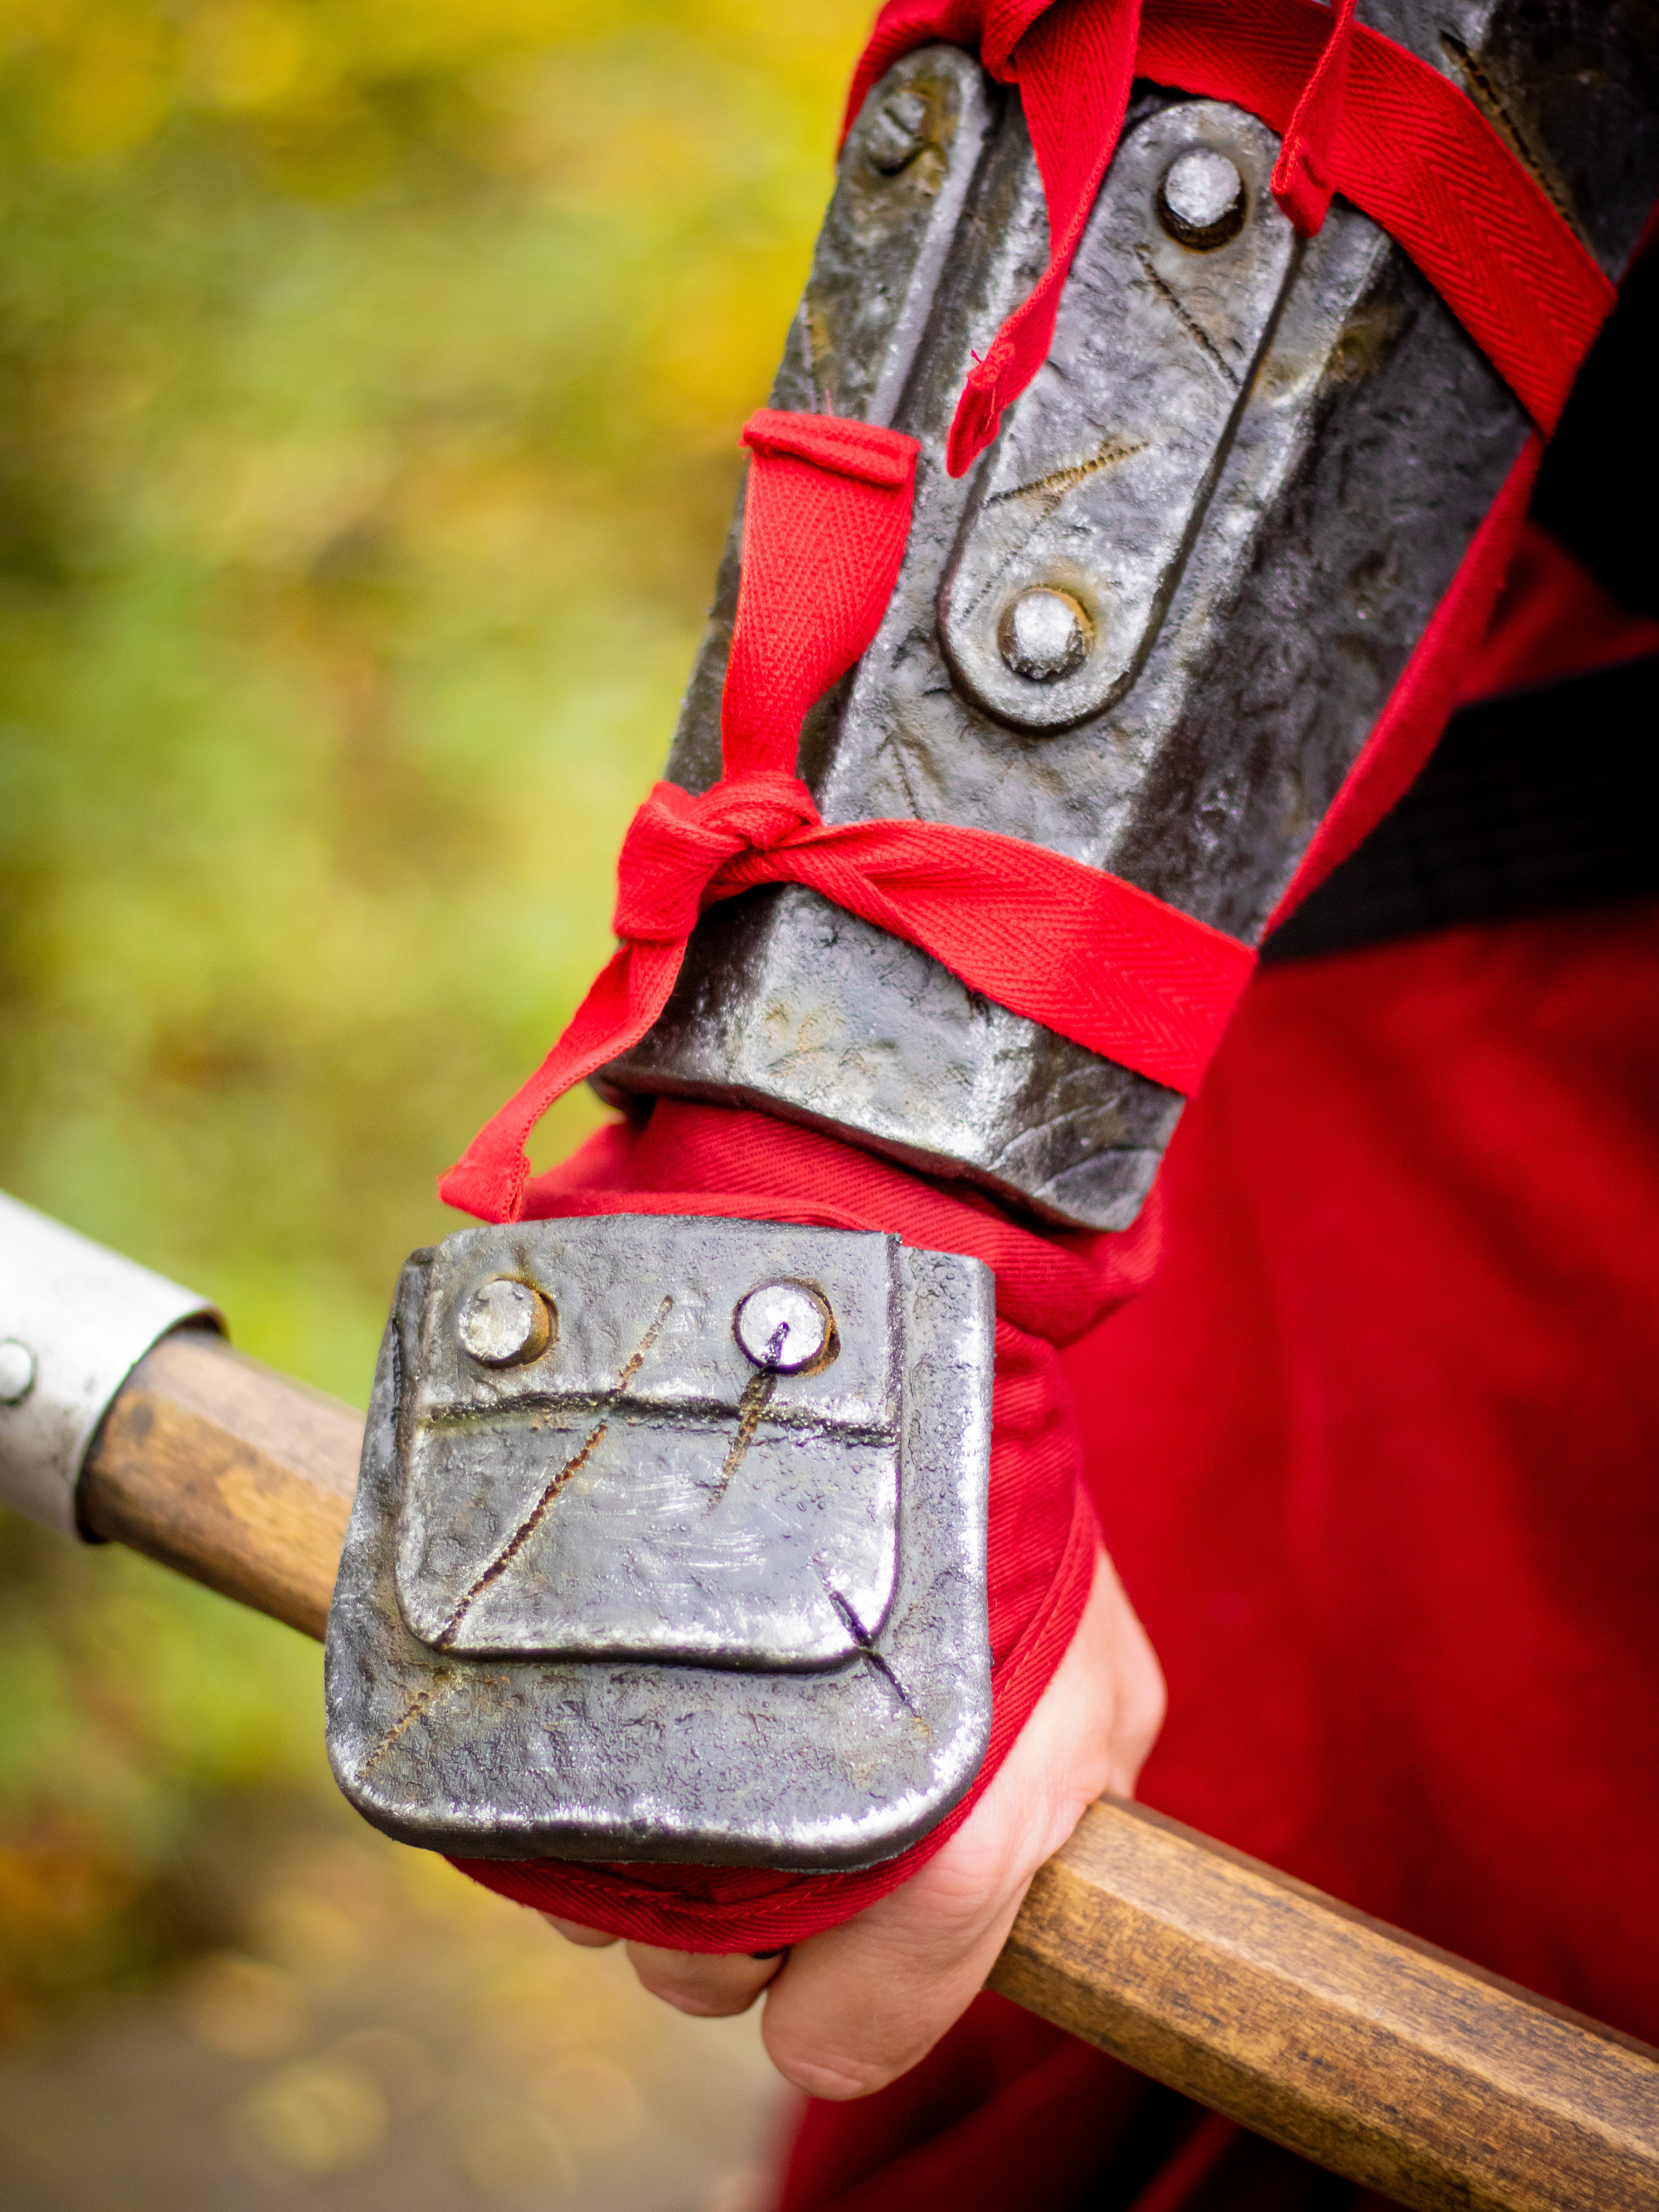
The hand armor was attached to the ninja gauntlet piece with velcro for ease of washing. I used the loop side on the arm pieces and the hook side on the EVA foam. The vambraces and the legs are attached with red cord/ribbon I picked up from the fabric store, so the majority of these pieces are just tied into place. The additional reinforcements on the arms and leg help them stay in place. You’ll need someone to help you tie them on the arms unless you have magical ambidextrous single handed powers!
This is a screen shot of my working file for reference only. Grab the Google Drive version below and Print at full scale for usable templates at your local Fed Ex - Kinkos -Staples or where ever else has a black and white plotter style printer. The finished size template is 2 foot wide by 3 feet tall. Prints should be fairly cheap overall in black and white.
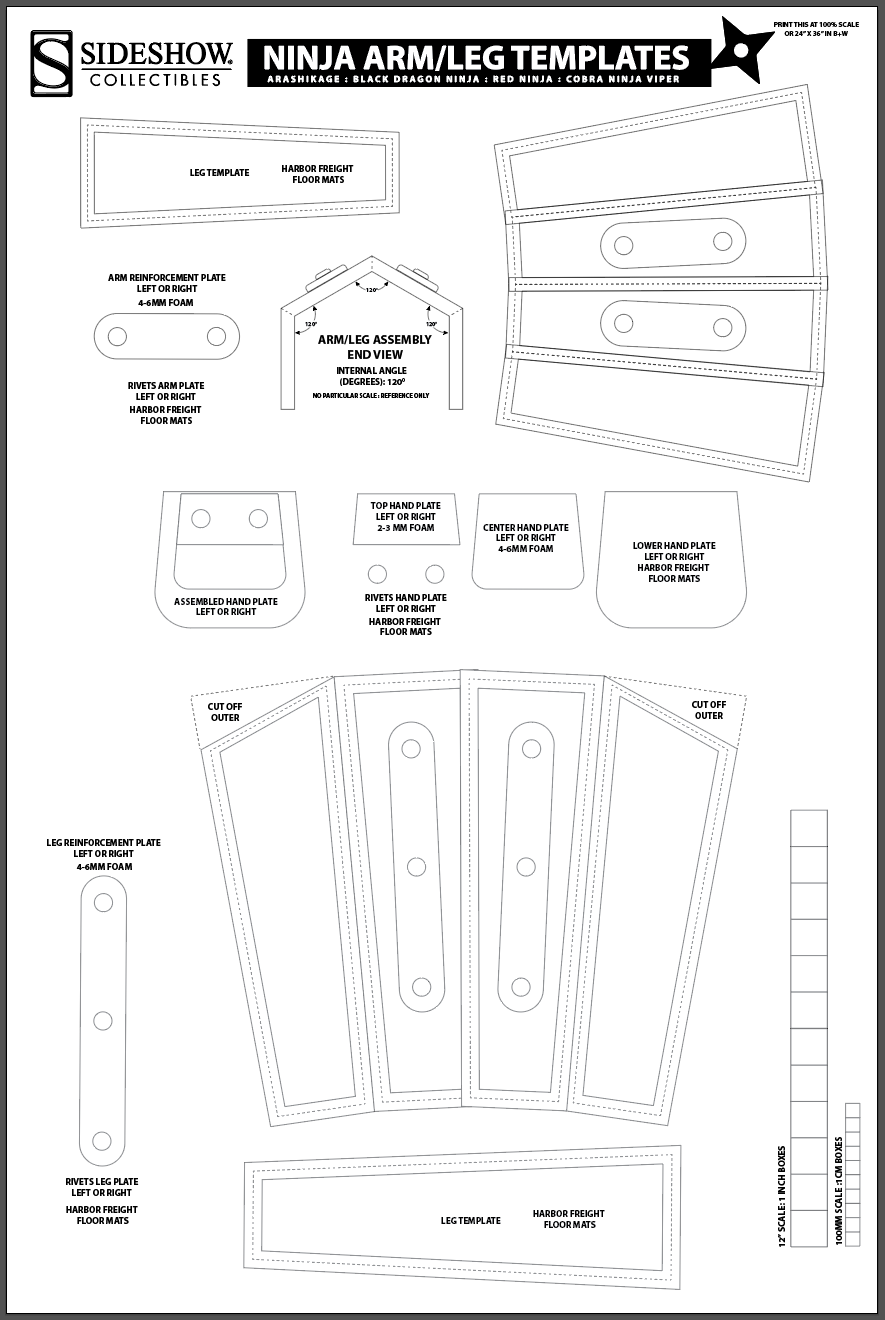
Google Drive Link to the Full Scale template: https://drive.google.com/file/d/1Lmf_INQBZJuB2yfq6LmMPUjx95jT4XTU/view?usp=sharing
Now, don’t go Ninja’in’ folks that don’t need Ninja’in’