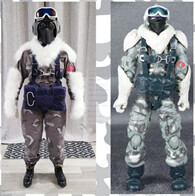
Snow Serpent (Rise of Cobra v10) Build
Here are some of my resources, pictures, and “what I dids” for this build. The entire build with a little more detail is on Pinterest here: https://www.pinterest.com/nixlyn/cosplay-completed-costumes/snow-serpent-gi-joe/
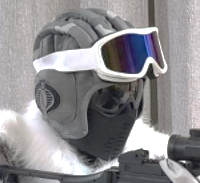
1.Helmet/Mask
I wear a black balaclava with this because there is a teeny bit of space between the black goggles and the lower mask.
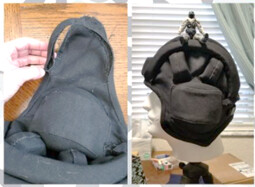
I built this with 4 pieces: face mask, black goggles, white goggles, and helmet.
1a. Mask: https://smile.amazon.com/dp/B07G13HSH7/ref=cm_sw_r_pi_dp_U_x_MtjIBbPVTER7B
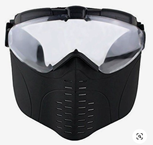
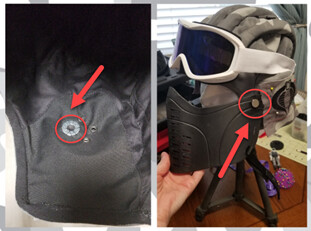
I dismantled it and am using just the lower part. I added magnets to the sides which snap to washers that I sewed onto the inside of the helmet.
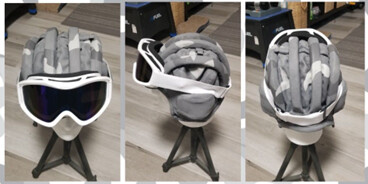
1b. Black goggles: https://smile.amazon.com/dp/B01MZYYHFP/ref=cm_sw_r_pi_dp_U_x_n8iIBb7PZVWH6
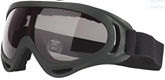
Nothing special here, just wear them. Over your eyes.
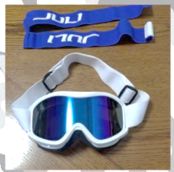
1c. White goggles: https://smile.amazon.com/dp/B075HD9HYT/ref=cm_sw_r_pi_dp_U_x_CCjIBb3CGKG2N
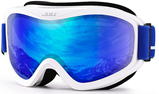
I swapped out the blue elastic with all white to match the reference.
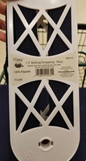
1d. Helmet: Russian Soviet tank helmet & Headset for World Of Tanks game size 56-62 | eBay
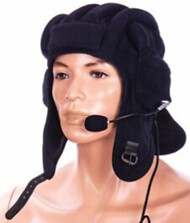
I originally started making the helmet out of foam. It was shaping up, but then I found this gaming headset made for World of Tanks! It was perfect and a whole lot less work. It needed a few modifications:
• Removed the flap that hangs down over the back of the neck.
• Removed the ear flappy things on the sides and recreated the finished hem.
• Removed the microphone and cut the headphone jack wires.
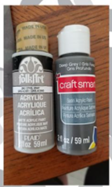
I hand painted the entire helmet using a 50/50 mix of the acrylic colors that I used to create the camo pattern on the pants and shirt: FolkArt Steel Gray and CraftSmart Satin Deep Grey.
Once the paint dried, I hand painted the Serpent camo pattern everywhere except the “ears” (the reference is just grey). The colors are the same as noted above.
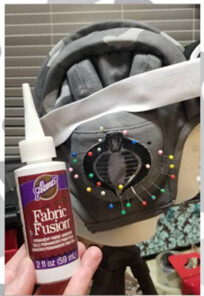
For the black cobras on the sides of the helmet, I commissioned Threadmage (IG: @thethreadmage). She embroidered them (and the red cobra for the sleeve) onto some spare shirt fabric. I cut them close to the edges and used fabric fusion to secure them.
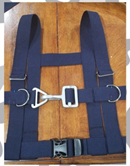
2.Harness: Homemade
• Strapping: Fabric/hobby store
• Front hook/buckle: eBay from a used military harness
• Other silver buckles and black plastic clips: Fabric/hobby store
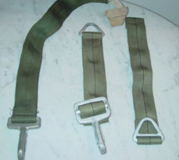
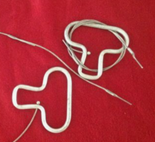
This was pieced together from different stuff. The color is not precisely matchy matchy to the reference, but in my opinion, it was easier to pick a more standard blue. This way, I could buy other stuff off the shelf and have them match. There wasn’t too much science to this. I made a mockup harness with rope to match the reference, then pieced the harness together. I have a super short torso, so it took a lot of reconfiguring and testing to make sure that everything was proportional and same as the reference. This is a huge pet peeve of mine in costuming. Many people ignore it or forget that it’s something to mind – and it can make or break the look.
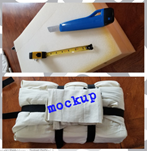
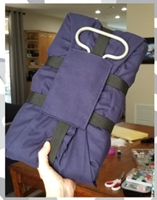
3.Parachute: Homemade
• Fabric: fabric store
• Strapping: same as for harness
• Pull cord: ebay
I made this mostly because I didn’t think I’d be able to match the color of a real chute to the harness. I used a block of foam wrapped in fabric mimicking the correct folds, added the strapping, added the pull handle, and voila. I used black strapping because I wanted it to stand out. The reference is kinda…monotone and boring. The waist harness strap passes through the black strapping on the parachute to hold it on.
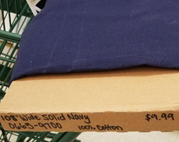
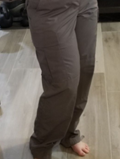
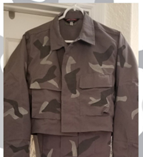
4.Suit (pants and shirt): Men's TRU-SPEC Poly / Cotton Ripstop BDU Coat | Tactical Gear Superstore | TacticalGear.com plus paint in FolkArt Steel Gray and CraftSmart Satin Deep Grey. PS: white paint is WAY too bright!
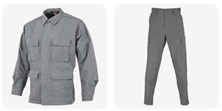

So the Suit of the process was a doozy.
• Not that many would have to do this, but I cut off the shirt right above the bottom pockets – again with the short torso. I didn’t want to have to stuff 8” of material into my pants.
• I also added some elastic straps to the inside of the sleeves to keep the shirt in place and from riding up my arm. I do this with a lot of my costumes – hands and feet! I hate falling apart or being disheveled when in costume.
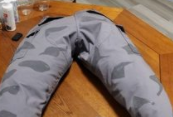
• I hand painted the entire set with the dark grey first, mimicking the pattern on the reference – two coats.
• Once everything dried, I added the light grey camo pattern to it – two coats.
• Tips: this is tedious! Okay that’s not a tip; just a complaint. Don’t use something to make a pattern for yourself. The reference is all over the place and so you should be too. Don’t waste time and paint on what’s going to be covered or not shown (like under the fur, the lower ankles, the forearms under the gloves, etc.). Put the outfit on a mannequin or stuff with towels (like I did) to simulate a body. If you paint it while it’s flat, the pattern won’t look natural once it’s on you.
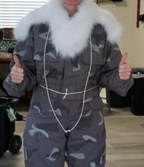
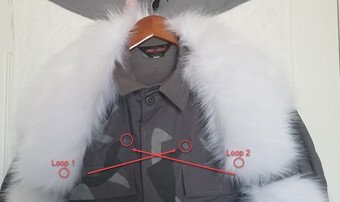
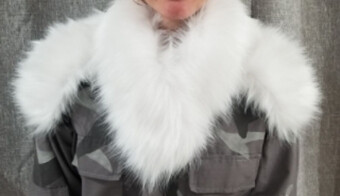
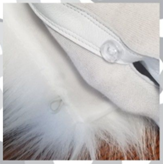
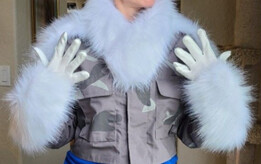
5.Fur bits: https://www.amazon.com/dp/B07655ZBB1/ How much of this you need will vary. Again, proportions, proportions, proportions! I bought a few of these because I wanted the finished edges. I’m not good at sewing at all, so I needed that pre-done for me. The great thing about this product was that it came ready to use for my purposes: loops along the edges and a baggie of buttons.
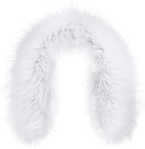
• Collar: this is all one piece. I sewed only one side of the buttons to the collar; the bottom of it somehow (magic?) lays nicely around my neck and shoulders. Buttons are sewn at the proper locations on the chest…then I overlap and secure the two ends which (also magically) makes a great V-shape.
• Shoulder bells: this is one piece, cut in half. I used the finished edges for the part that you see on the arm. The unfinished/cut edges are stuffed up under the collar, so you can’t see what a disaster they are. Held on again by the loops and buttons, sewn onto the shirt.
• Gloves: see below
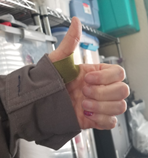
Gloves:
• Fur: see above
• Gloves: Nomex flight gloves in white – I got them from eBay, but I’m sure they’re everywhere.
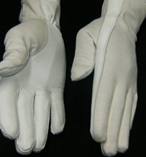
All I did here was sew more buttons on the gloves and the sleeves of the shirt and attached the fur. It was one piece of the fur, cut in half, again with the finished parts towards the hands where it will be seen more. The hardest part was punching through the leather on the gloves with the needle and not stabbing myself.
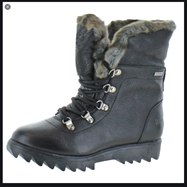
6.Boots: Black Leather Zag Leather Waterproof Fold-Over Winter Snow Boots. I got them from Rakuten; not sure if they’re available anywhere anymore. I searched so long for the right boot. I wanted blue, of course – but good luck finding a “military-looking” boot in a color other than black/tan/olive! These look amazing with the costume and they are super cozy.
I’m sure I missed some things, so please feel free to ask if you have questions!


